


Pay Expenses
Paying expenses in New Expensify is fast and easy—whether you’re reimbursing a teammate through a Workspace or sending money to a friend personally. You can pay using a connected business bank account or your Wallet.
How to Pay Expenses Submitted to a Workspace
To pay Workspace expenses, you’ll first need to:
- Connect a business bank account
- Ask the submitter to connect a personal bank account
Who Can Pay Workspace Expenses
Any admin who can manage the Payments section of Workflows can pay an approved report—this includes the Workspace admin and Payments admin roles. Payments must be enabled on the workspace.
- You do not have to be the workspace’s Payer to pay a report.
- The Payer is the only admin who is prompted to pay. They see a payment reminder in their Inbox and a Pay button next to the workspace chat. Other admins are not prompted, but they can still open the report and pay it.
- You pay from a bank account you have access to. If the workspace’s connected bank account has not been shared with you, choose one of your own business bank accounts, add one when prompted, or select Mark as paid.
- Paying from a different bank account does not change the workspace’s connected bank account.
Learn how to share a business bank account with other admins.
Where to Find Workspaces Expenses to Pay
- On web, go to the navigation tabs on the left and select Spend > Reports > To-do > Pay
- On mobile, go to the navigation tabs on the bottom and select Spend > Reports > To-do > Pay
- Or, tap the notification you received via email, push, or text
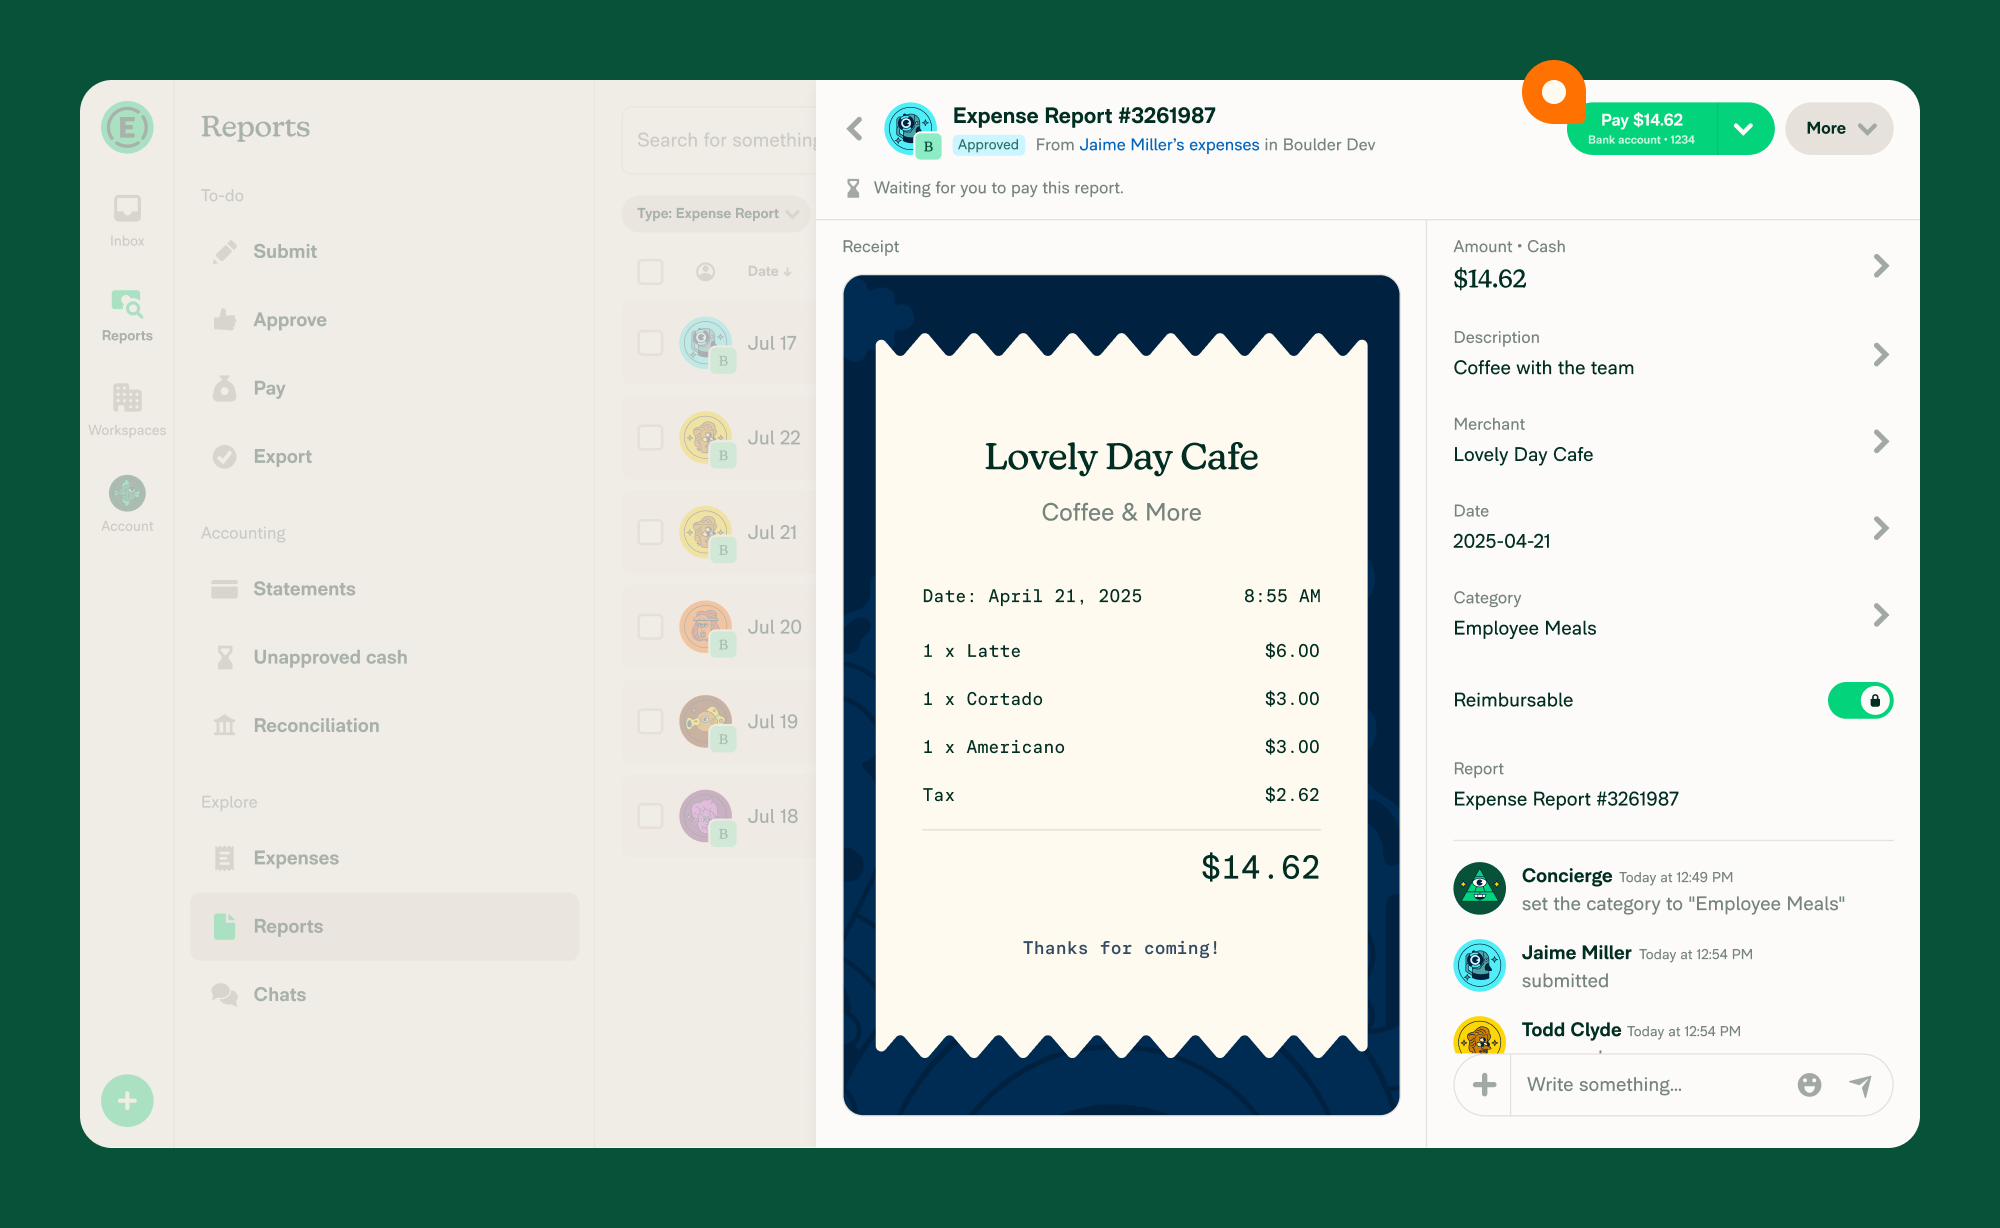
How to Pay Workspace Expenses
- Open the expense report from Spend > Reports or from the notification.
- Tap Pay to continue.
- Choose your payment method:
- Use your connected business bank account
- Or mark the report as paid manually
- If you’ve paid before, your most recent payment method will appear automatically. To switch, tap the right side of the button to see all available options.
- If this is your first time paying, you’ll be prompted to select your payment method after tapping Pay.
Note: Only bank accounts that match the report’s currency will appear as payment options. For example, if a report is in EUR, only EUR bank accounts are shown.
How to Pay Personal Expenses
To send a personal payment, you must first set up your Wallet.
Note: Personal payments are currently available only to U.S. customers.
Where to find Personal Expenses to Pay
- On web, go to the navigation tabs on the left and select Spend > Reports > To-do > Pay
- On mobile, go to the navigation tabs on the bottom and select Spend > Reports > To-do > Pay
- Or, click the notification you received
How to Pay a Personal Expense
- Open the personal expense from your notification or Spend > Reports.
- Tap Pay to proceed.
- Choose your payment method:
- Pay from your Wallet (personal bank account)
- Pay from a connected Workspace/business account
- Or mark the report as paid manually
- If you’ve made a payment before, the most recently used method will be selected by default. Tap the right side of the button to view other options.
- If this is your first time paying, you’ll be asked to select a payment method after tapping Pay.
How to cancel a personal payment before the recipient sets up their Wallet
When you pay a personal expense from your Wallet and the recipient has not set up their Wallet yet, the payment is held until they do. While it is held, you (the sender) can cancel it and have the funds returned.
- Open the payment report.
- Select More.
- Select Cancel payment.
- When asked Are you sure that you want to cancel this payment?, confirm to cancel.
The payment is cancelled and the held funds are returned to you. Once the recipient sets up their Wallet and the payment completes, Cancel payment is no longer available.
Note: Only the sender sees the Cancel payment option. The recipient cannot cancel the payment.
FAQ
How long does it take for the submitter to receive a payment?
For US-based ACH payments, if the payment is under $100 and your total withdrawals in the past 24 hours are under $10,000, the payment will process in one business day.
Otherwise, standard bank transfer times apply, and the recipient will receive their funds within 4–5 business days.
Can I pay someone in another currency?
You can reimburse Workspace expenses using business bank accounts in the following currencies:
- United States (USD)
- Canada (CAD)
- United Kingdom (GBP)
- European Union (EUR)
- Australia (AUD)
Note: Personal expenses paid with the Wallet can only be paid in USD.
Do I have to be the workspace Payer to pay a report?
No. Any admin who can manage the Payments section of Workflows—a Workspace admin or a Payments admin—can pay an approved report, even when a bank account is connected to the workspace. Only the Payer is prompted to pay, so other admins need to open the report and pay it themselves.
Why don’t I see my bank account when I click Pay?
Only bank accounts that match the report’s currency appear as payment options. If you have a USD bank account but the report is in EUR, the USD account will not be shown. To pay the report, connect a bank account in the matching currency, or select Mark as paid to record a payment made outside Expensify.
Why do I see a Pay report prompt asking me to enable global reimbursements?
The Pay report prompt appears when your workspace’s USD business bank account is not enabled for global reimbursements and the submitter’s deposit account is in a currency other than USD. Expensify cannot send the payment until one of those changes.
Select Enable Global Reimbursements to start setting up global reimbursements on the USD business bank account, or select Cancel to close the prompt and ask the submitter to add a USD deposit account instead. Selecting Cancel leaves the report in the Approved state.
Learn how to enable global reimbursements on a USD business bank account.
How do I pay a report with only non-reimbursable expenses?
Reports containing only non-reimbursable expenses (e.g., company card charges) cannot be paid via ACH through Expensify. Instead, select Mark as paid from the Pay button dropdown to close the report.
Why don’t I see Cancel payment on a report I paid with a business bank account?
Cancel payment only appears while Expensify can still stop the transfer. When you open the report, Expensify checks whether the reimbursement is still cancelable, and shows Cancel payment under More only if it is. Once the money is on its way to the recipient’s bank, the option no longer appears, and some payments send the money right away, so Cancel payment never appears for them.
If you need to stop a transfer that already left, contact your bank directly.
To cancel a payment you recorded with Mark as paid, open the report, select More, then select Cancel payment.


