


Set Up and Manage the Expensify Card
Workspace Admins can enable and issue Expensify Visa® Commercial Cards to manage company spending with real-time controls and flexibility across employees and subscriptions.
Card Admins can also issue and manage Expensify Cards — including setting limits, freezing or unfreezing cards, and adjusting card settings — once the Expensify Card is enabled on the workspace.
The Expensify Card offers powerful spend control tools, including:
- Unlimited virtual cards
- Individual Smart, Monthly, Fixed, or Single-use spend limits
- Optional expiration dates for time-bound spending
- Custom names for easier categorization
- Spend restrictions by employee and merchant
- Real-time visibility and cash back rewards
Prerequisites:
- Your primary login must be an email associated with your company’s domain. See this guide on updating your login.
- You must be a Workspace Admin and have a U.S. business bank account connected to Expensify. See this guide on connecting a business bank account.
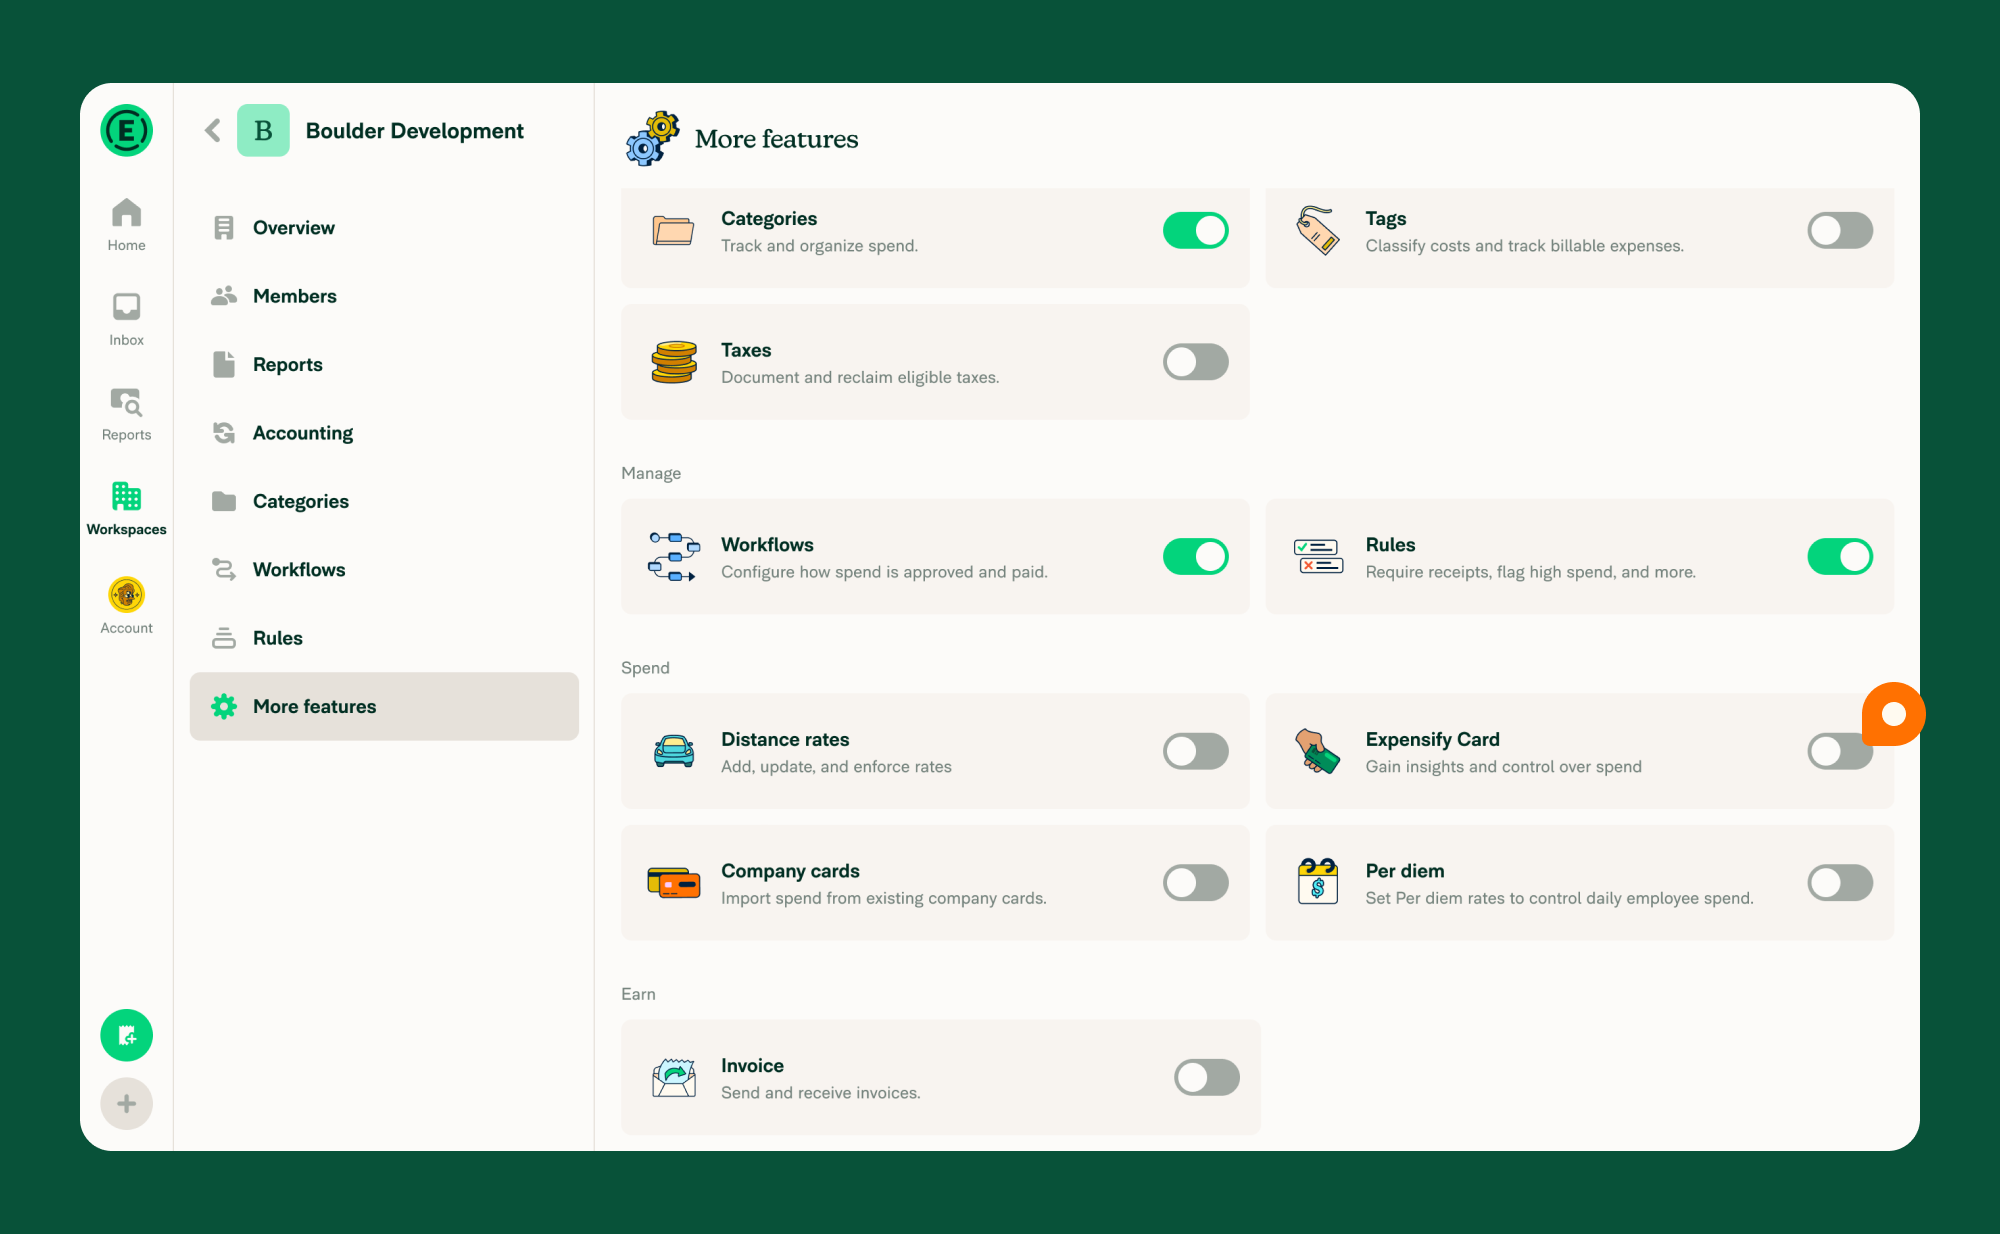
Step 1: Enable the Expensify Card
To turn on Expensify Cards for your workspace:
- From the left-hand menu, select Settings > Workspaces > [Workspace Name] > More features
- Under Spend, toggle on Expensify Card
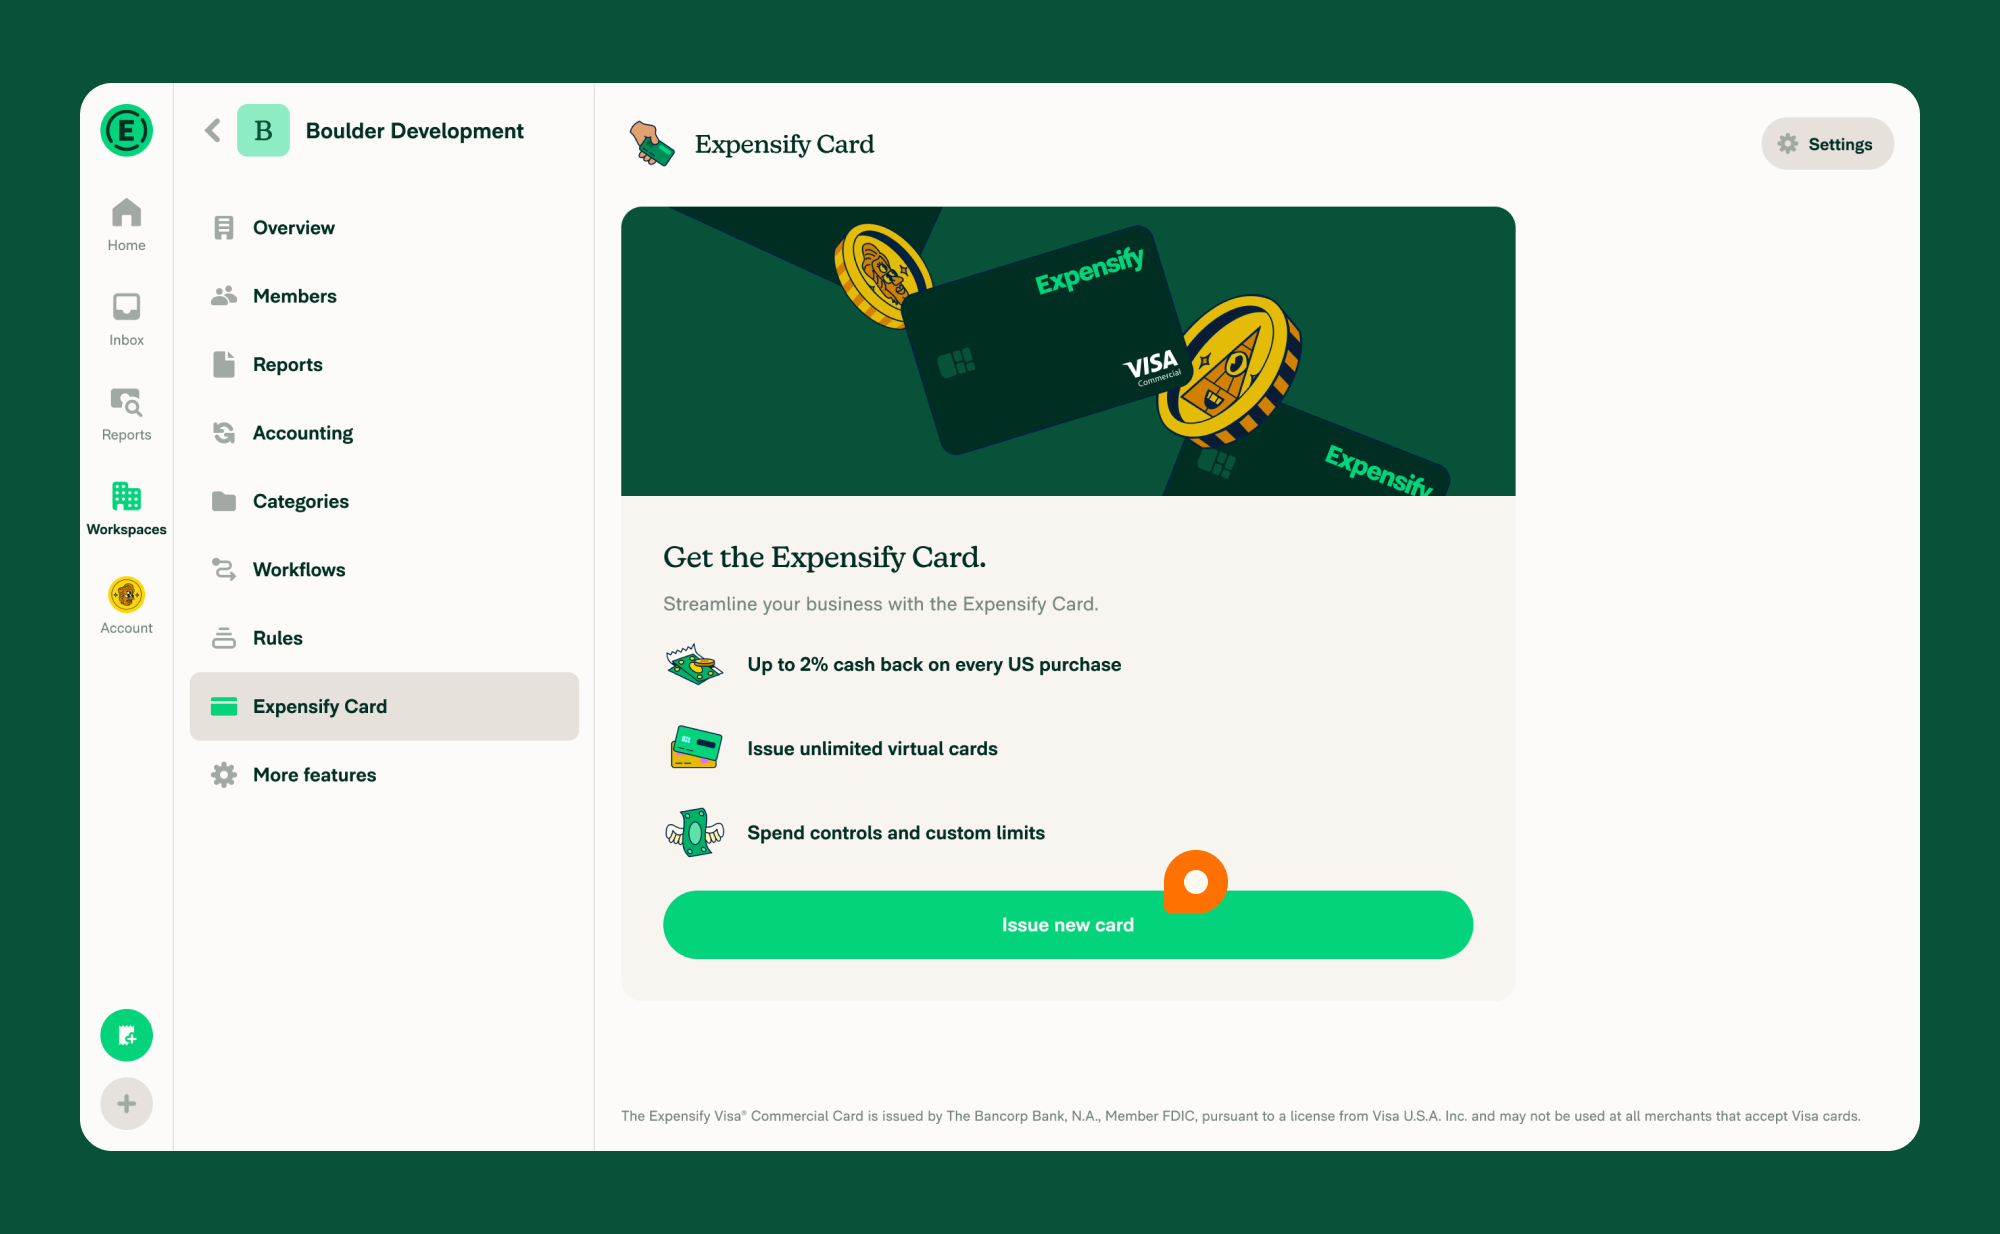
Step 2: Select a Bank Account
Link a U.S. business bank account to pay the card balance:
- From the navigation tabs (on the left on web, and at the bottom on mobile), select Workspaces > [Workspace Name] > Expensify Card
- Click Issue new card
- Choose an existing account or add a new bank account as the settlement account.
If you already have an Expensify Card feed on another workspace, you can select that existing feed instead of connecting a new bank account. This links the same card feed to the current workspace, so you can manage cards across multiple workspaces with a single settlement account.
Step 3: Issue Expensify Cards
You can issue virtual or physical cards to employees:
- From the navigation tabs (on the left on web, and at the bottom on mobile), head to Workspaces > [Workspace Name] > Expensify Cards
- Click Issue new card
- Select the employee
- Choose Virtual or Physical
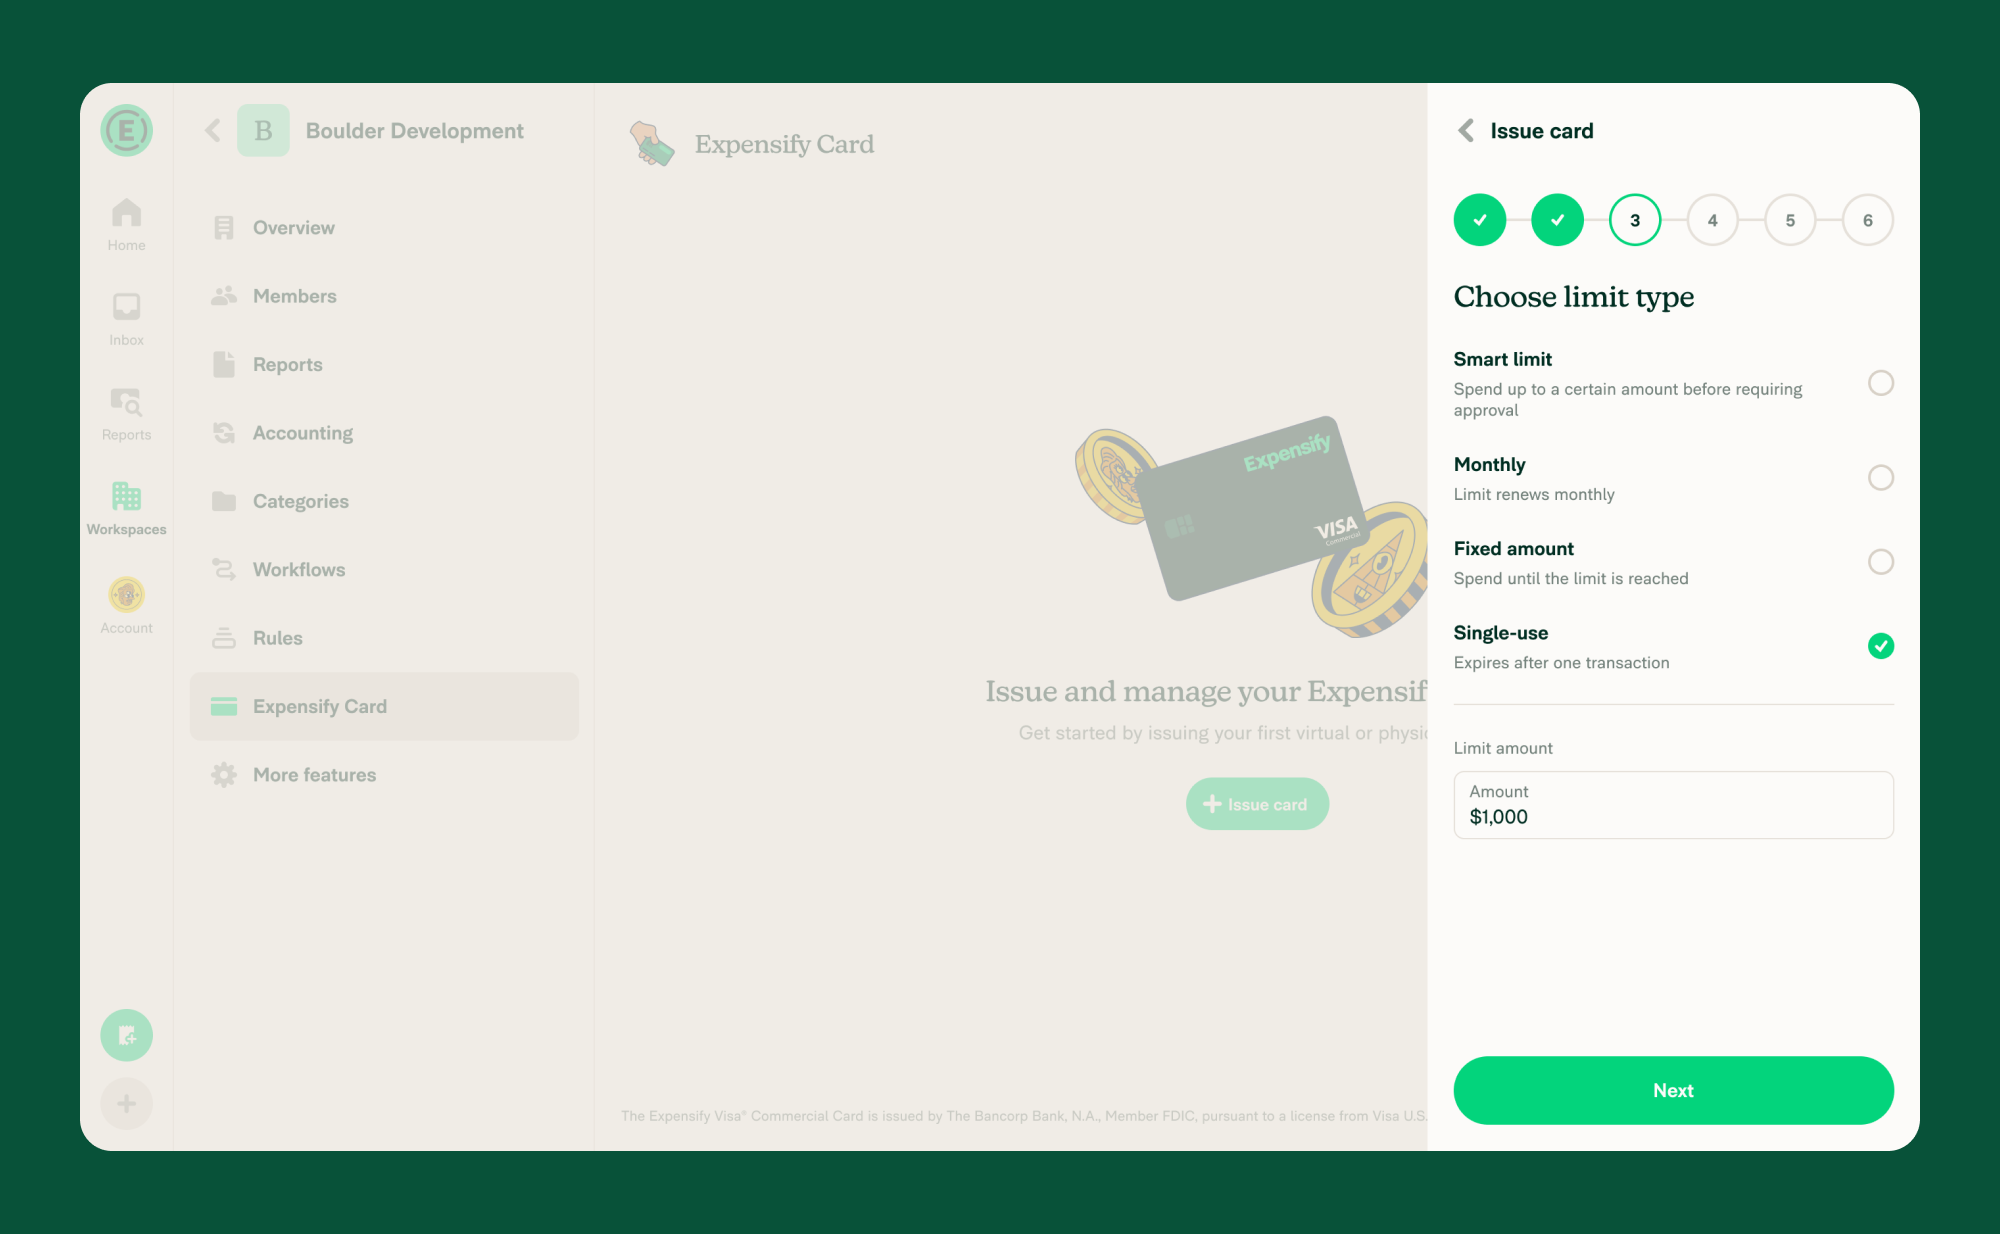
- Choose a limit type:
- Smart limit: Spend up to a threshold before needing approval
- Monthly limit: Limit renews monthly
- Fixed limit: Spend until the limit is reached
- Single-use (virtual only): Expires after one transaction
- Enter the spending limit
- (Optional for virtual cards) Toggle Set expiration date to define:
- Start date
- End date
- When enabled: Both dates are required. The card activates at 12:00 AM local time on the Start date and expires at 11:59 PM local time on the End date.
- When disabled: The card does not expire automatically.
- Name the card for easier tracking
- Click Issue card to confirm
When issuing a card, you can also apply an existing Spend Rule or create a new one so the card has real-time spending controls from its first use. To learn more, learn how to set up Expensify Card Spend Rules.

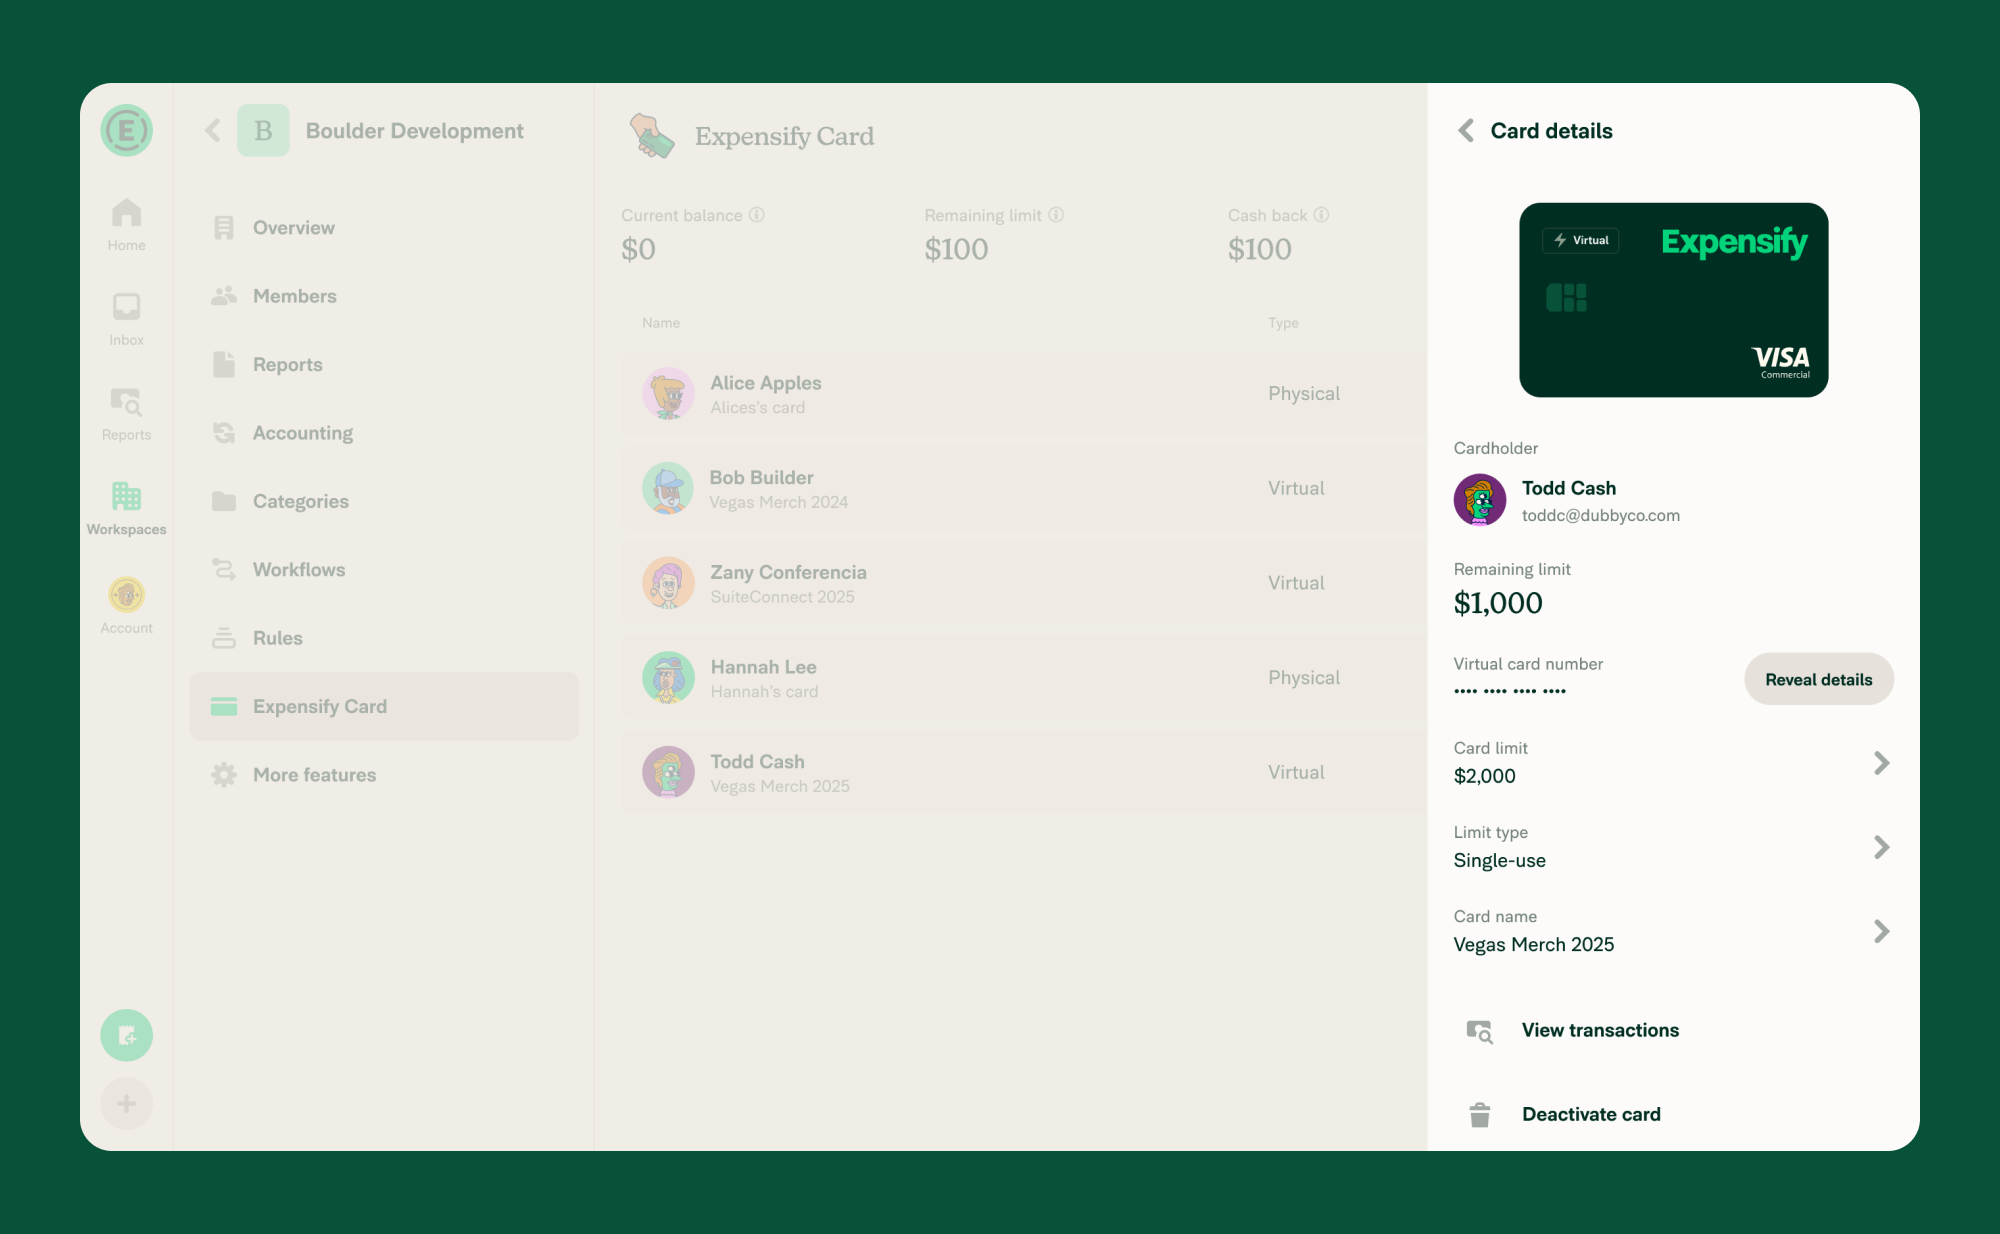
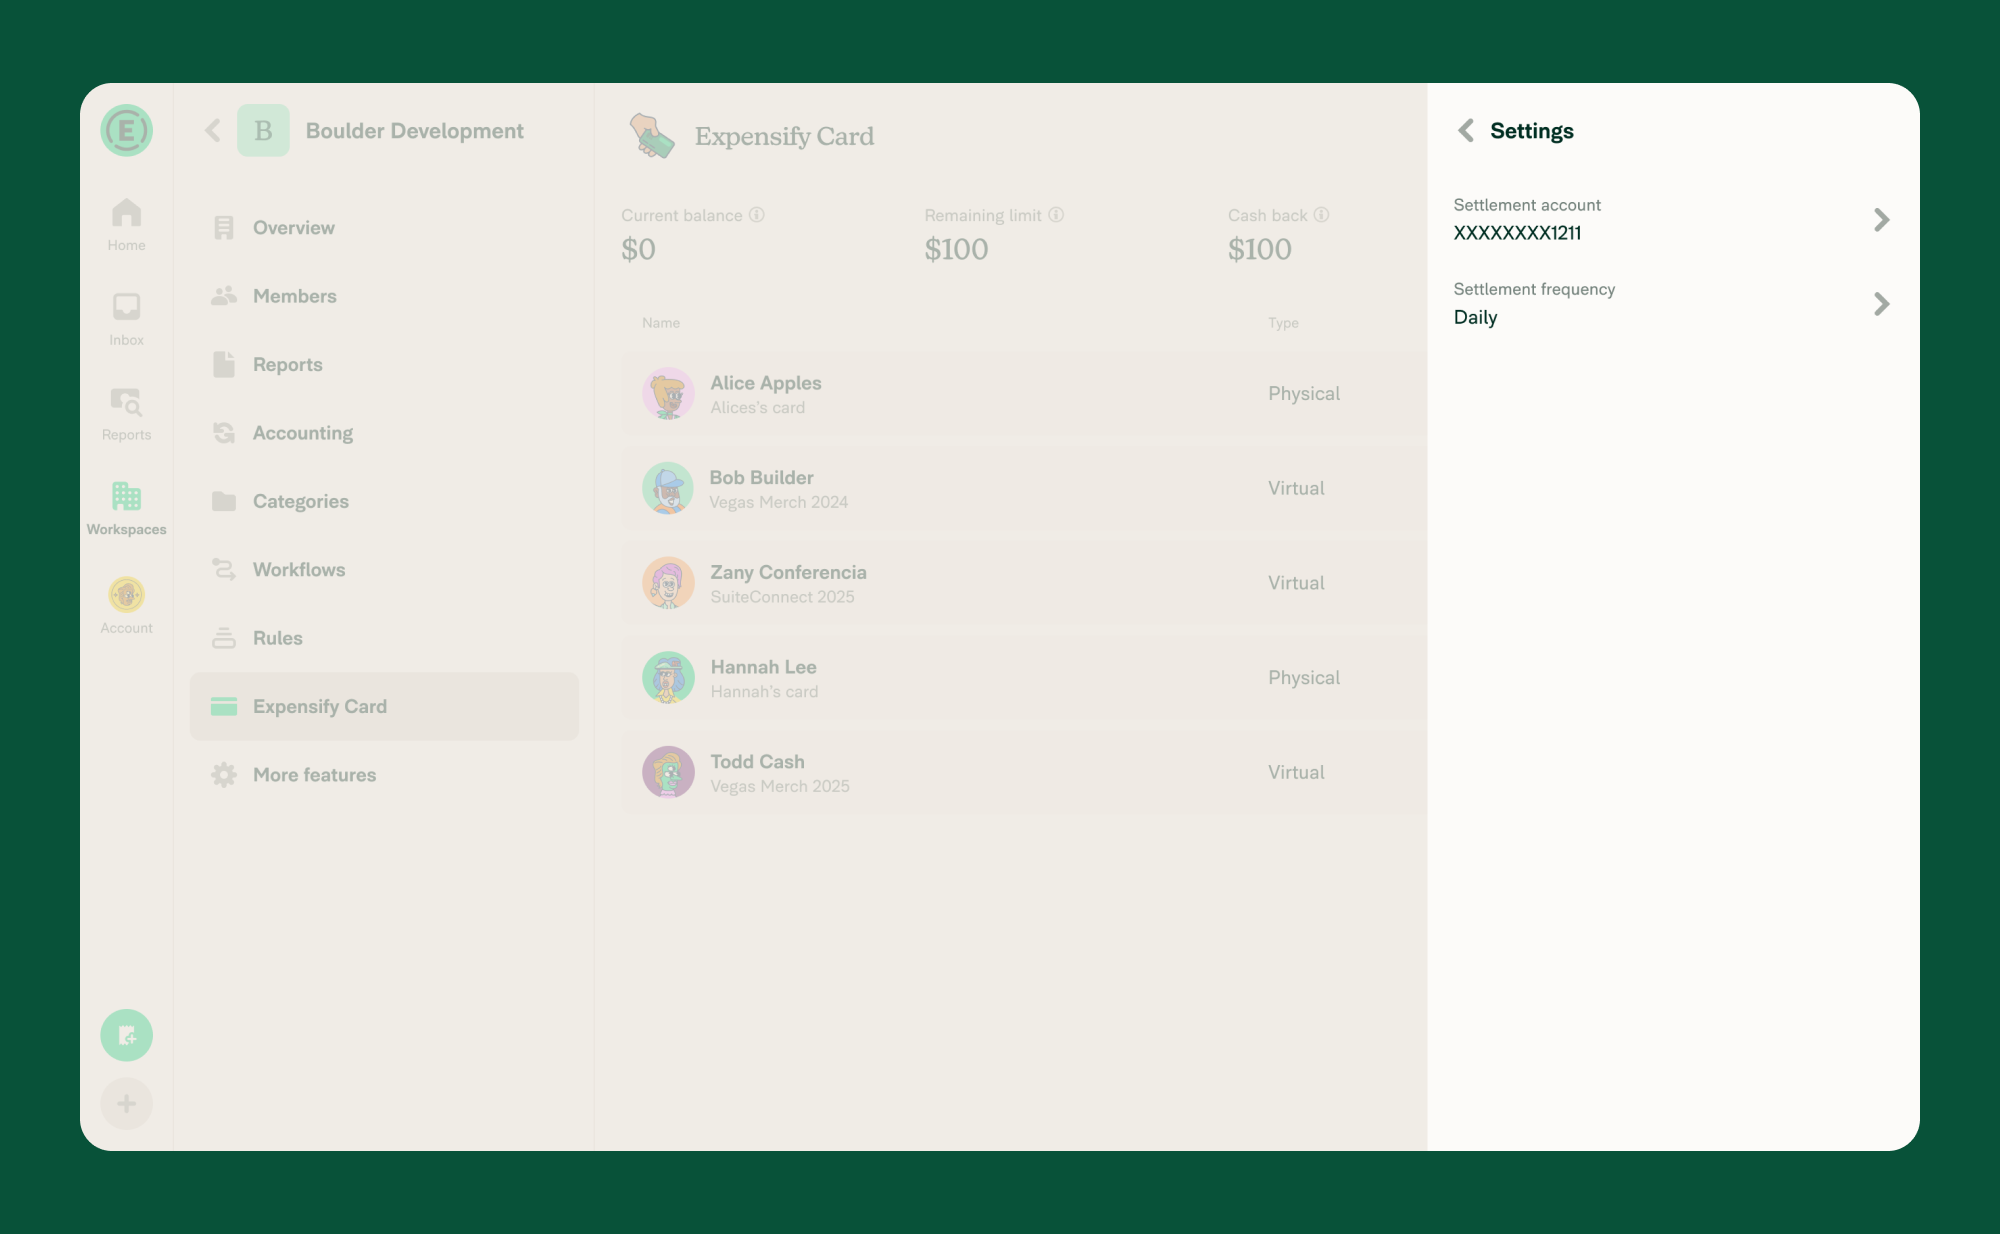
Monitor and Manage Cards
After issuing cards, you can view, adjust, or deactivate them:
- From the navigation tabs (on the left on web, and at the bottom on mobile), select Workspaces > [Workspace Name] > Expensify Card
- See a list of all issued cards
- Click a card to view details or adjust:
- Spending limit
- Limit type
- Card name
- Deactivation
- To change the linked bank account, update settlement frequency, or manage cash back settings, click Settings.
Your workspace also has built-in default protections that automatically block certain transaction categories on every Expensify Card, and you can set Spend Rules to approve or decline transactions in real time. To learn more, learn how to set up Expensify Card Spend Rules.

What the Status column shows in the Expensify Card list
The Expensify Card list includes a Status column so you can see each card’s lifecycle state at a glance without opening the card. Click the Status column header to sort the list by status.
Each card shows one of the following statuses:
- Pending order — A physical card has been issued but not yet ordered by the cardholder.
- Shipped — A physical card has shipped and is on its way to the cardholder.
- Active — The card is ready to use. Virtual cards are immediately Active once issued.
- Inactive — The card is frozen or otherwise not currently usable.
Note: The Status column is hidden on narrow and medium screens. Widen your browser window or view the list on a larger screen to see it.
How to apply Expensify Card cash back to your Expensify bill
Workspace Admins with a US Expensify Card program can choose whether their Expensify Card cash back is applied toward their Expensify bill or sent to their settlement account. This setting is enabled by default.
- From the navigation tabs (on the left on web, and at the bottom on mobile), go to Workspaces > [Workspace Name] > Expensify Card.
- Click Settings.
- Toggle Apply cash back to my Expensify bill on or off.
When enabled, cash back earned from the Expensify Card is automatically applied toward payment for your Expensify bill. When disabled, cash back is sent to your settlement account instead.
Note: This setting is only available for US card programs and is not shown for workspaces on an invoiced subscription.
If a Single-use card completes its first successful transaction, it automatically deactivates. If a card reaches its expiration date, it automatically deactivates and declines new transactions.
How to export Expensify Card data as CSV
You can bulk-select cards and export their details to a CSV file for reporting or reconciliation.
- From the navigation tabs (on the left on web, and at the bottom on mobile), select Workspaces > [Workspace Name] > Expensify Card.
- Select the checkboxes next to the cards you want to export. Use the checkbox in the header row to select all cards at once.
- Click the selected dropdown that appears.
- Select Export as CSV.
The downloaded CSV file includes the following columns for each selected card: email, name, last four digits, type (virtual or physical), limit type, and limit amount.
How to freeze or unfreeze an Expensify Card
As a Workspace Admin or Card Admin, you can freeze or unfreeze any card in your workspace without needing to cancel or reissue it.
Freezing a card is helpful if:
- You suspect misuse or a policy violation
- You want to temporarily pause employee spending
- You’re enforcing a department-wide budget freeze
To freeze or unfreeze a card:
- Go to Settings > Workspaces > [Workspace Name] > Expensify Card.
- Click a card from the list to open its details pane.
- Click Freeze card or Unfreeze card.
- Confirm the action in the popup modal.
Once frozen:
- The card immediately stops working for purchases
- You’ll see a note below the card indicating who froze the card and when
- The employee sees the same message and cannot unfreeze the card themselves
All freeze/unfreeze actions are automatically posted to the workspace chat.
FAQ
What kind of bank account is required?
You’ll need a U.S. business bank account registered to a U.S.-incorporated business.
Can I use Expensify Cards across multiple workspaces?
Yes. You can link a single Expensify Card feed to multiple workspaces using the same settlement account. When issuing cards on a new workspace, select an existing feed that is already connected to another workspace. Each workspace shows only its own members in the card list, but all workspaces share the same card feed and settlement account.
Can an employee have multiple cards?
- Yes: Employees can have unlimited virtual cards (e.g. for trips or subscriptions).
- Yes: Employees can be issued multiple physical cards with different limit types.
How is the Expensify Card limit determined?
The limit is the maximum combined spending limit for all Expensify Cards in your domain. It’s calculated using:
- Available balance in the verified bank account set as your settlement account
- Pending expenses and unsettled transactions
- Funds availability tracked via Plaid
- Settlement cycle timing, which usually takes three business days
What affects the Expensify Card limit?
- Available funds: A sudden drop in your linked bank account can reduce your Domain Limit.
- Pending expenses: Large, unprocessed purchases temporarily reduce your spending capacity.
- Processing settlements: Until the previous cycle settles, your limit adjusts dynamically.
What is a Single-use Expensify Card?
A Single-use virtual card automatically deactivates after its first successful authorization. It’s ideal for one-time purchases like flights, vendor payments, or event registration.
What happens when a card reaches its expiration date?
The card automatically deactivates at 11:59 PM local time on the selected End date and declines new transactions.