Add Invoices in Bulk
Expensify offers importing multiple invoices (bulk import) via CSV to save you from manually creating individual invoices.
Uploading Invoices into Expensify
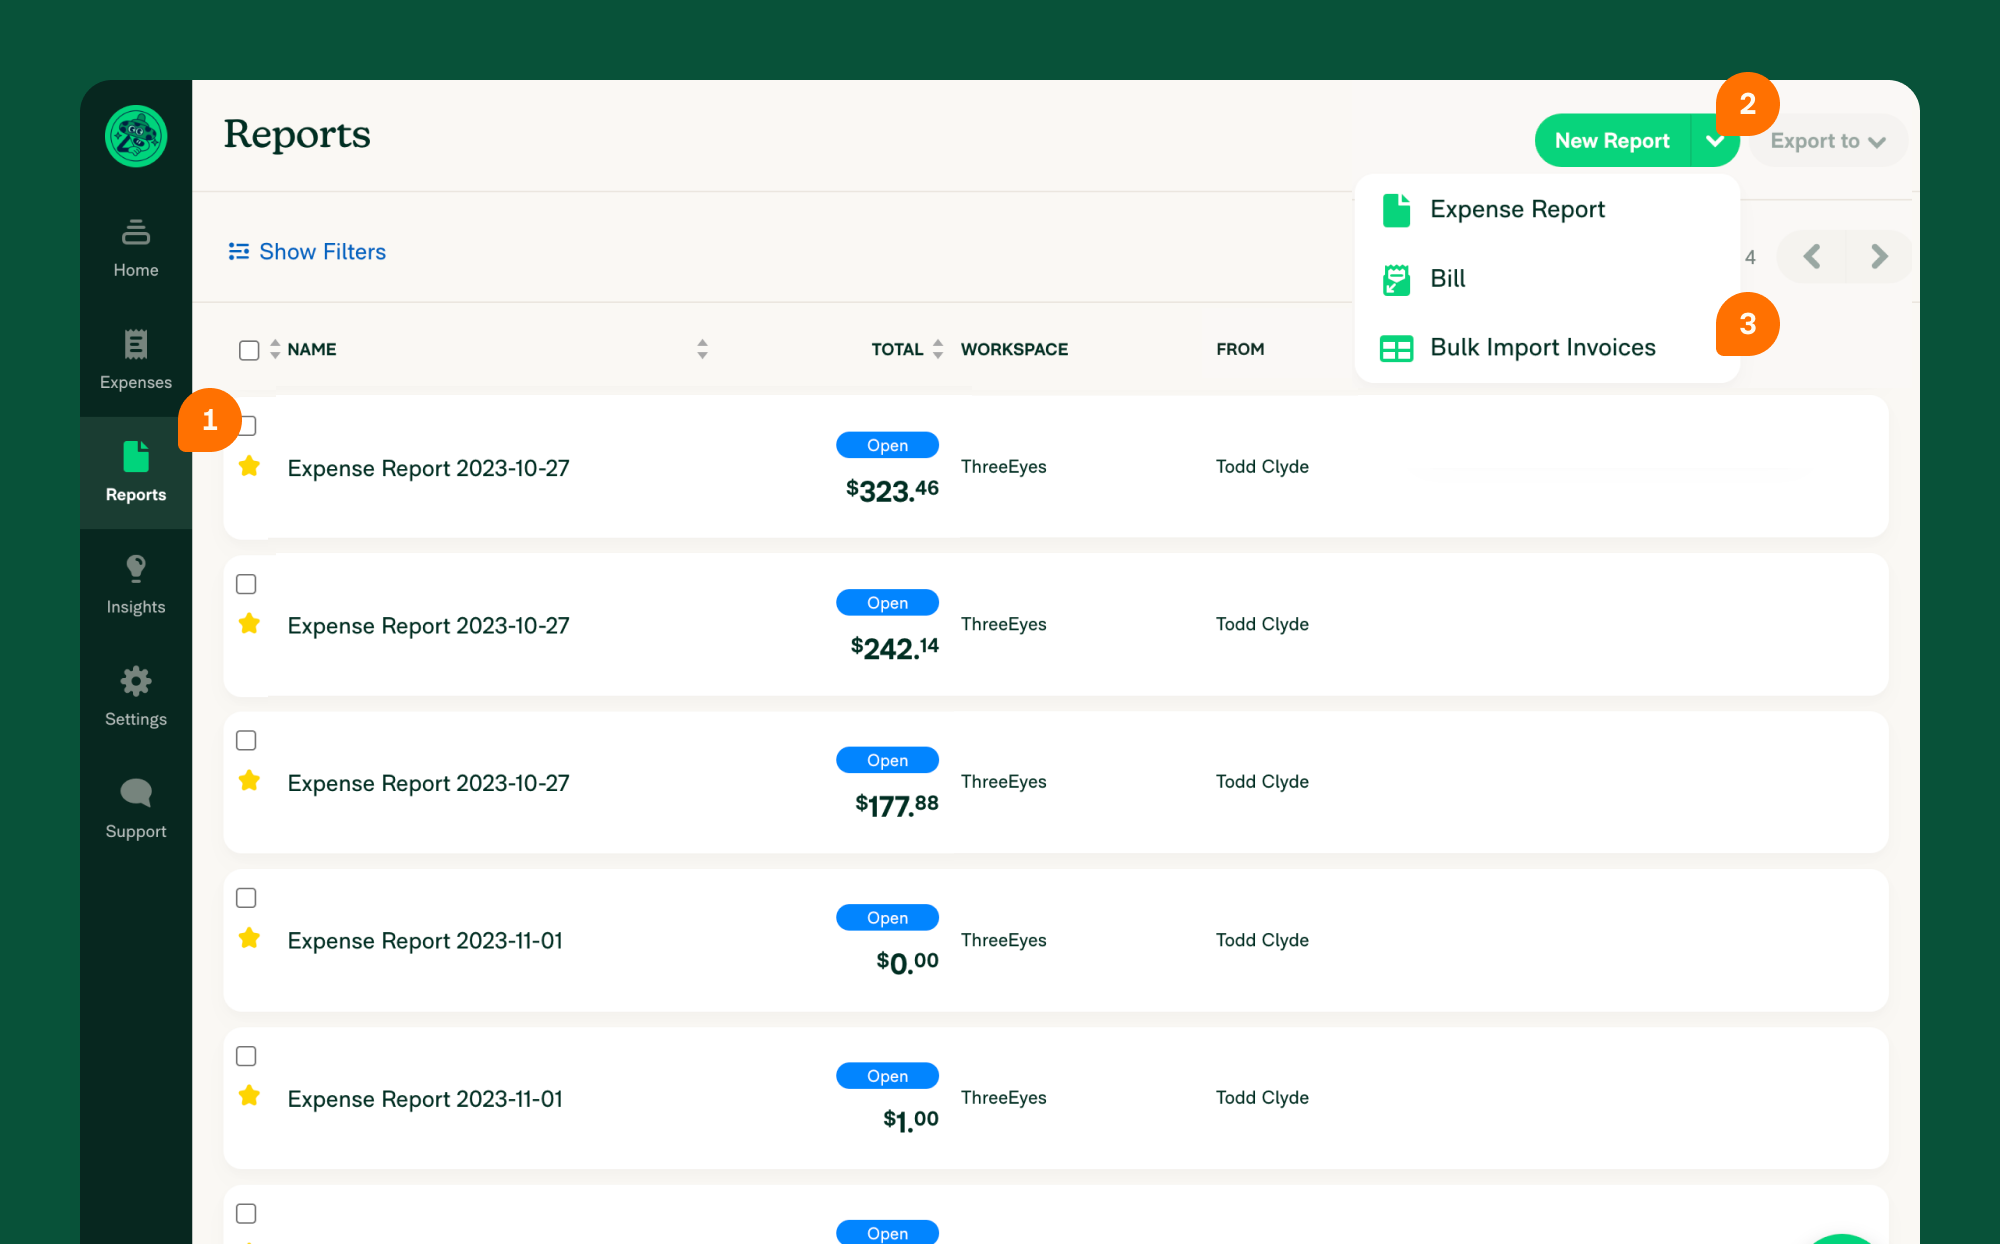
- Click the Reports tab.
- Click the New Report drop-down.
- Select Bulk Import Invoices.
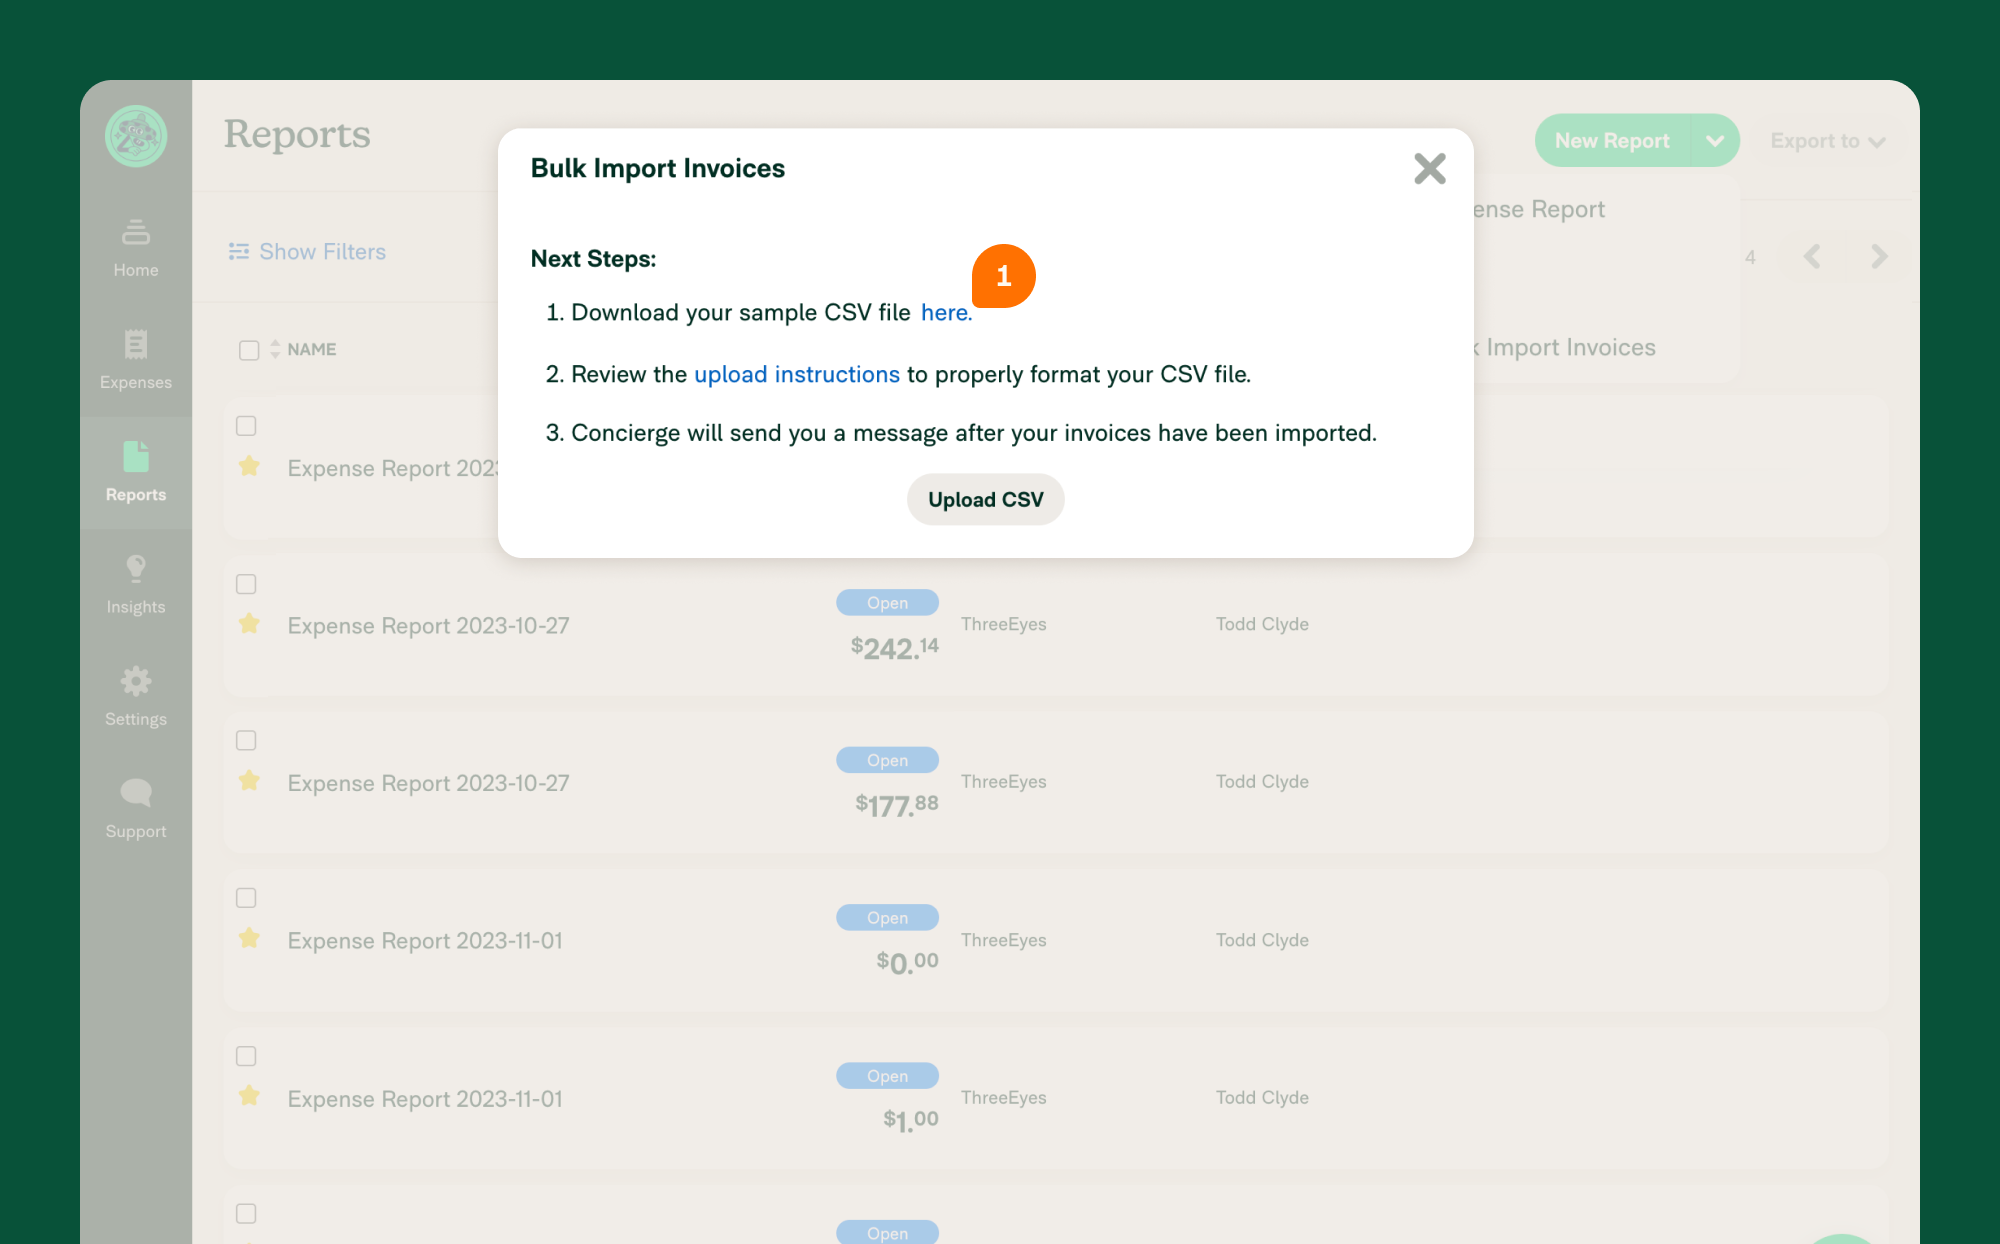
- Click the sample CSV link to download your custom CSV template to your browser or computer.
- Add the invoice details following the formatting rules (see below CSV formatting guide section)
- Click Upload CSV


CSV formatting guide
- Send to: recipient’s email address (ex: john.smith@companydomain.com)
- Share: email address (ex: julie.clarke@companydomain.com)
- Report Name: this will be the name of the Invoice report
- Merchant: business name of invoice sender
- Amount: use the number format in this column. Negative amounts cannot be invoiced.
- Date: YYYY-MM-DD formatting
- Due Date: YYYY-MM-DD formatting
After the Invoices are uploaded
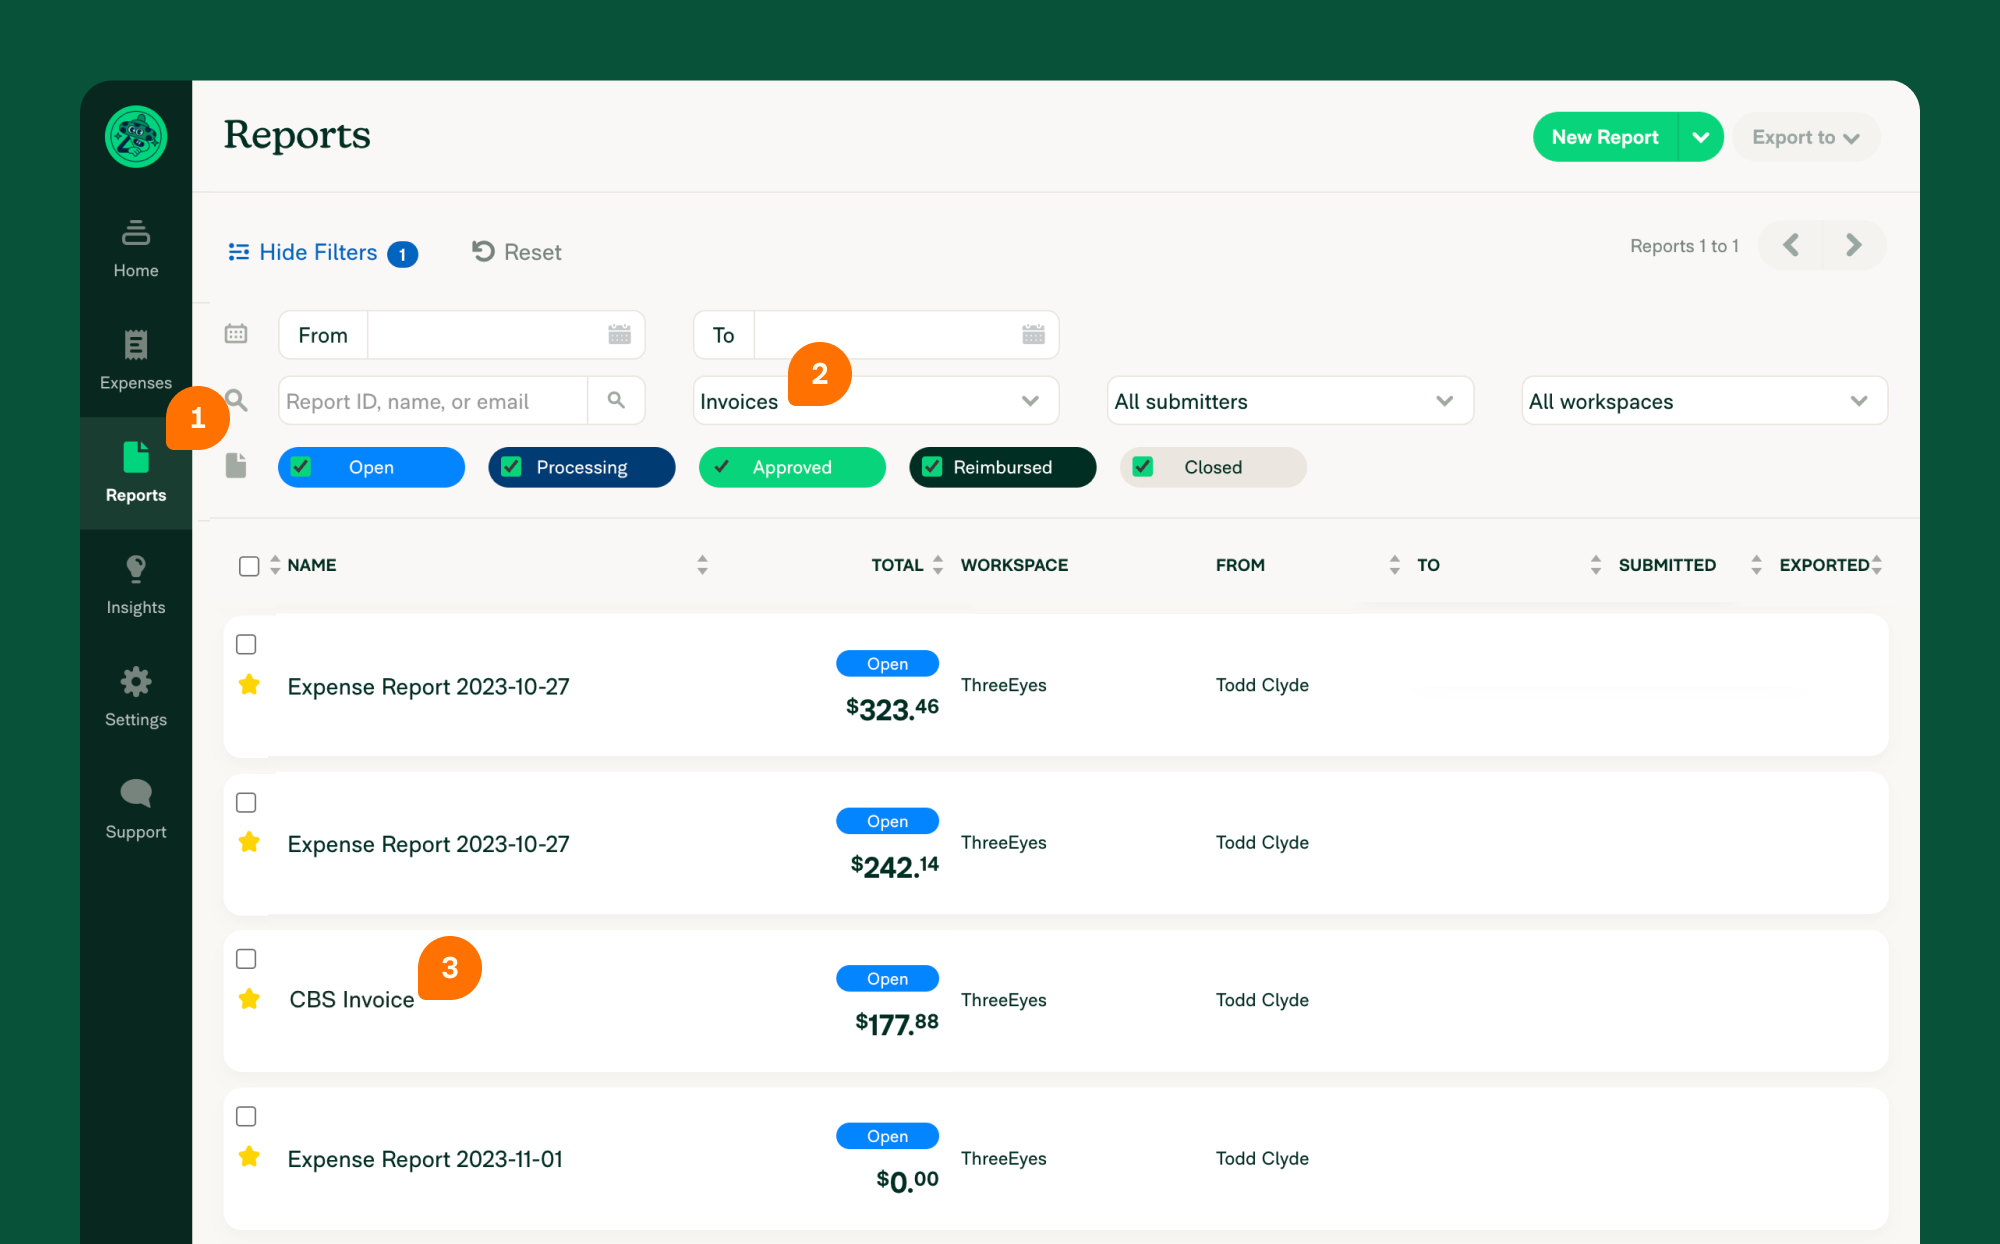
- After you click Upload, the invoices will automatically be created and viewable on the Reports page.
- Set the Reports page filter to Invoices to narrow down your search.
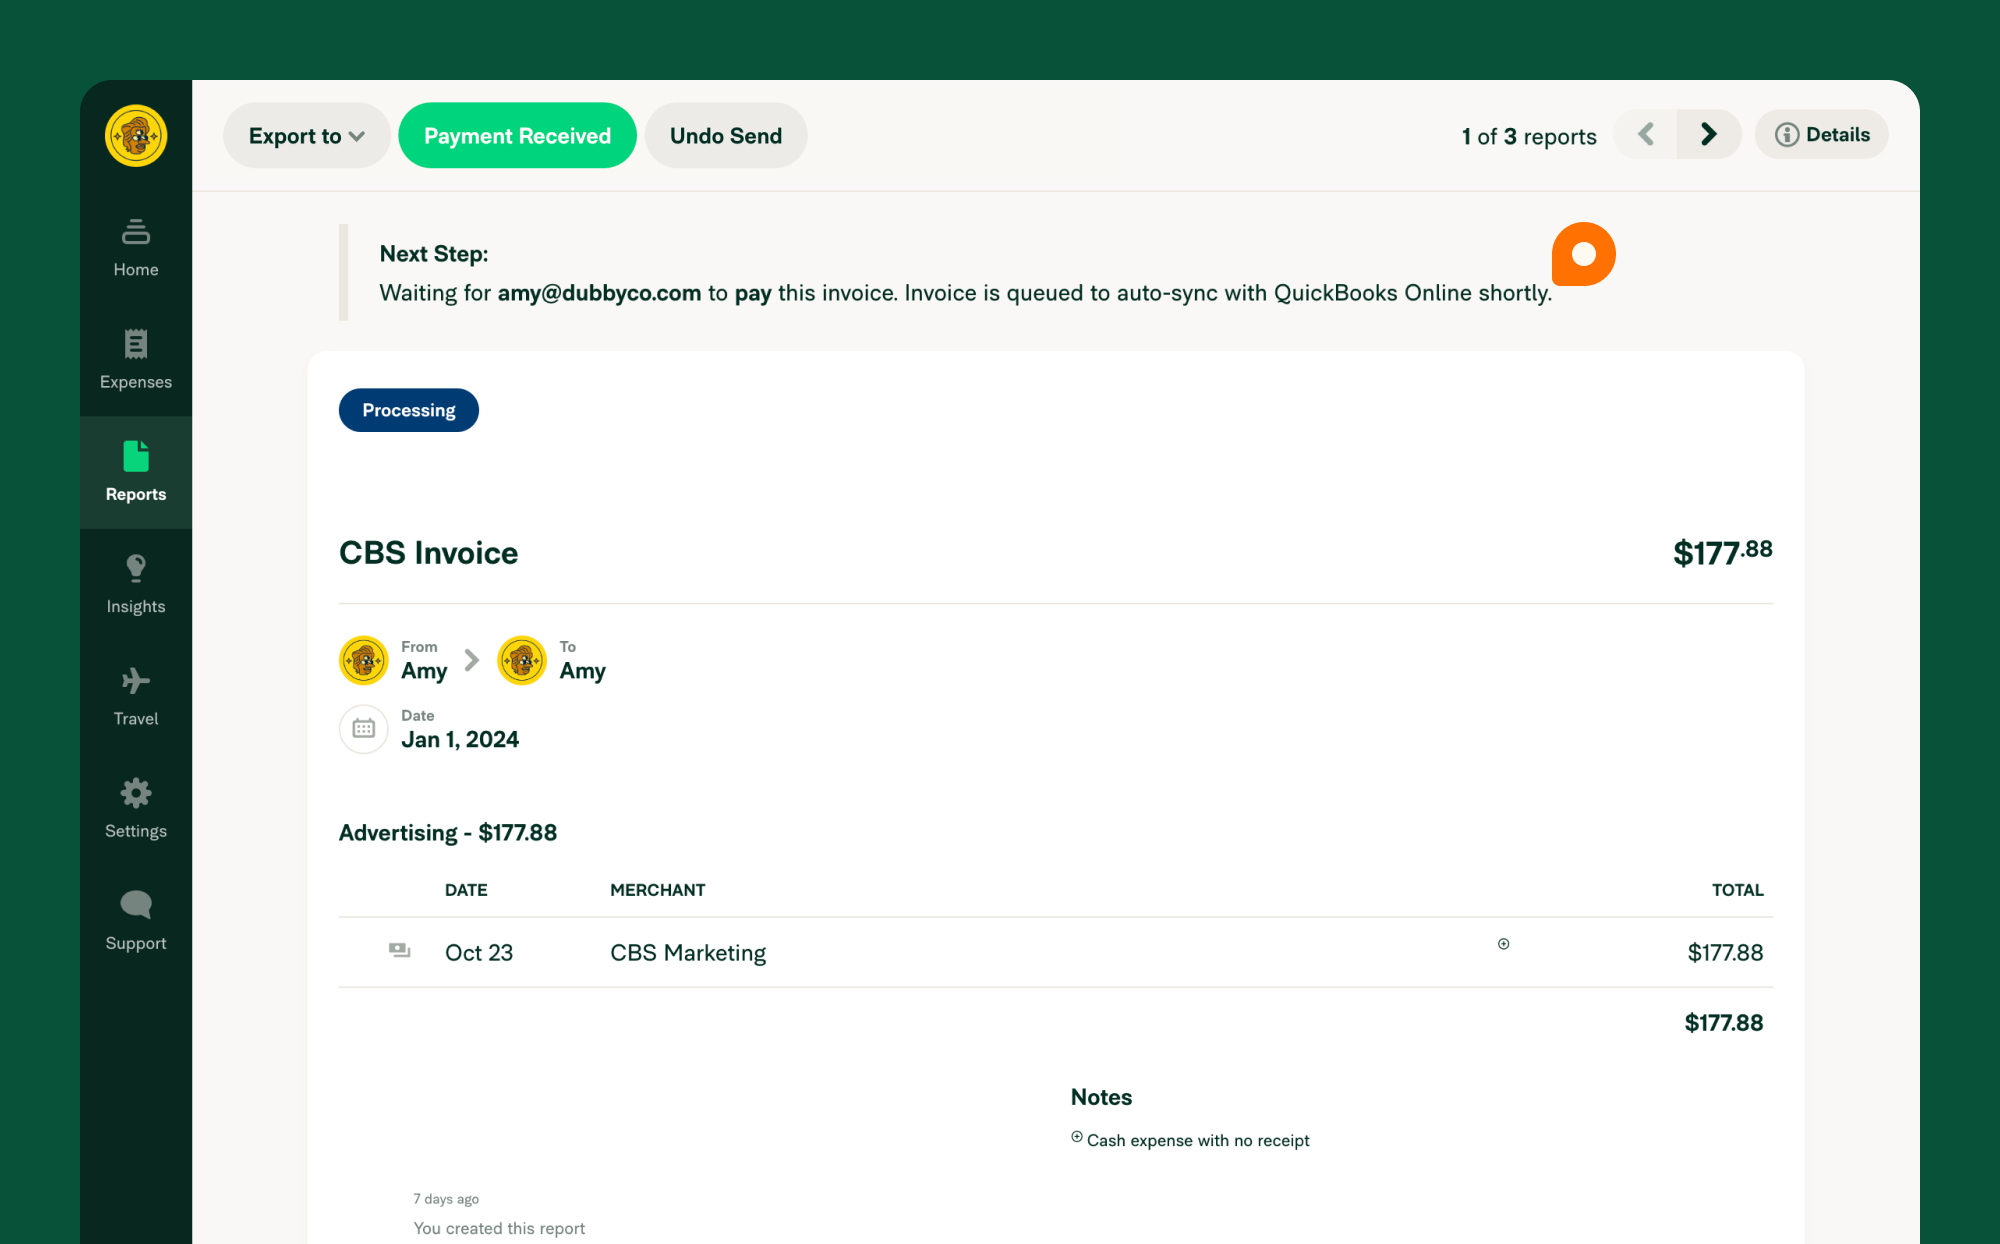
- The Send To contact will get an email notifying them of the invoice you sent.
- You can manually edit the invoice details.
- You can manually upload a PDF of the invoice to the report.


FAQ
Are there any fees associated with Invoices in Expensify?
No, Invoices are part of the Control Plan.
Can Invoices be revised once they are sent?
If you sent an invoice by mistake, you can click Undo Send on the invoice to revoke it. If you’d like to add more details to a sent invoice, you can add those as a Report comment for everyone to view.
How do I communicate with the payor
You can communicate with the payor through Report comments.
What’s the difference between an Invoice and an Expense Report in Expensify?
An invoice is an expense submitted to a client or contractor for payment. An expense report is an expense or group of expenses submitted to an employer for reimbursement.


