


Managing Workspace Members
Managing members in a workspace helps ensure that the right people can submit, approve, and review expenses. This guide walks through how to invite, remove, and update roles for members in New Expensify.
A Workspace member is anyone added to a workspace with one of the following roles:
- Member – Can submit and/or approve expenses.
- Workspace admin – Can manage members, roles, workflows, and settings.
- Card admin – Can manage the Expensify Card and Company cards, including issuing cards, setting limits, and assigning company cards. Has read-only access to Overview and Members, and all other workspace settings pages are hidden. (Control workspaces only)
- People admin – Can manage workspace membership and configure approval workflows. People admins can add and remove Members and Auditors only, and cannot add or remove admins or other scoped admin roles. They have read-only access to the workspace overview and edit access to Members and the Approvals section of Workflows. All other workspace editor pages are hidden. (Control workspaces only)
- Payments admin – Can manage workspace payment settings in the Payments section of Workflows, including business bank accounts, the authorized expense payer, and payment methods. Payment permissions are otherwise unchanged, so paying a report still depends on the relevant bank account being shared with the payer. Has read-only access to the workspace overview and Members, and all other workspace editor pages are hidden. (Control workspaces only)
- Auditor – Can view and comment on reports and has read-only access to all workspace editor pages (such as Categories, Tags, Rules, Workflows, and Accounting). Auditors cannot change any workspace settings or take workflow actions such as approving, paying, or taking control. (Control workspaces only)
- Editor – Can edit workspace settings, but cannot see all expenses associated with the workspace. They cannot add admins to the workspace or change other users’ roles. (Submit workspaces only)
Invite Members to a Workspace
To invite someone to your workspace:
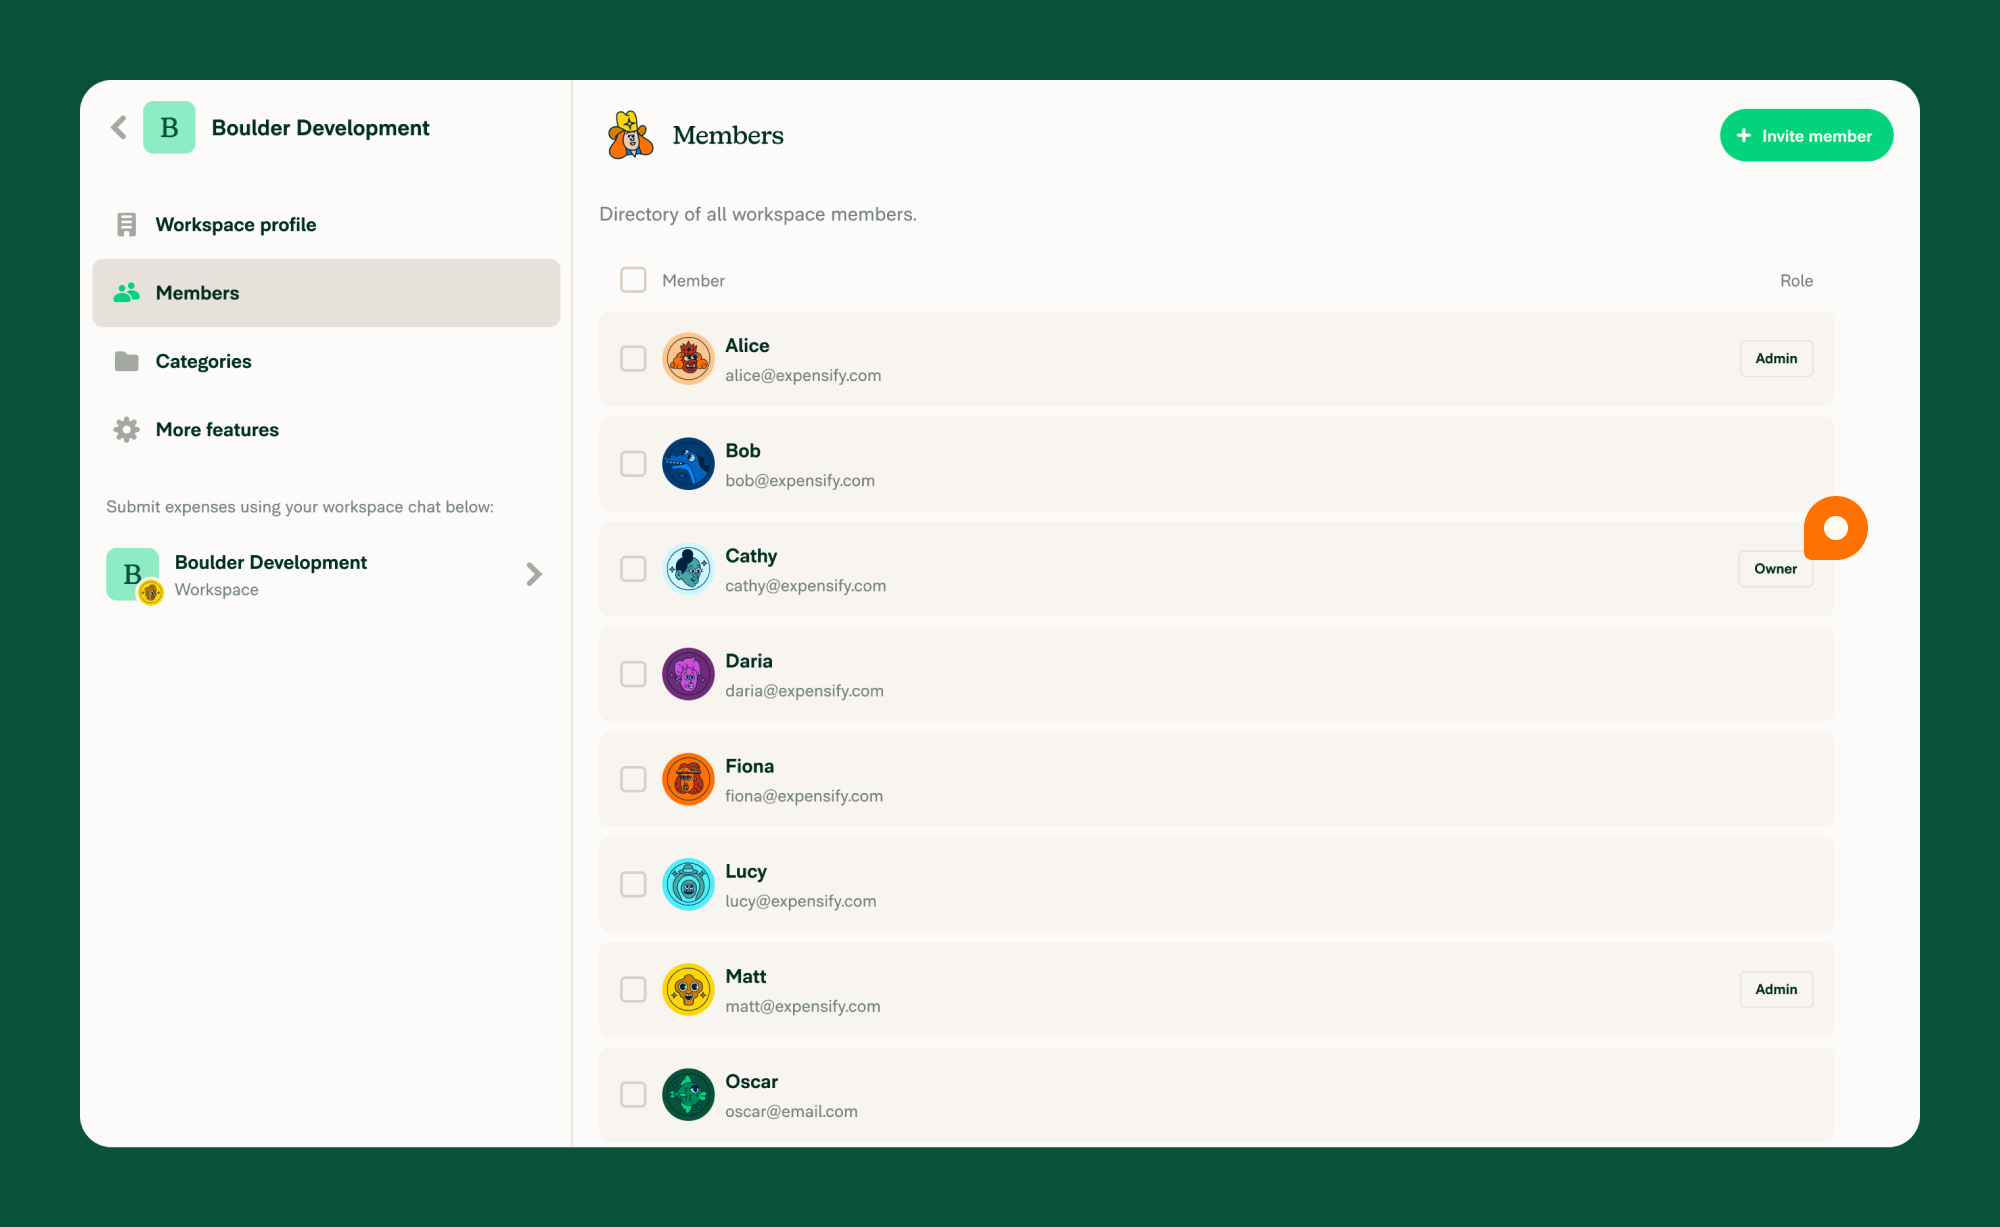
- Go to Workspaces > [Workspace Name] > Members.
- Click Invite Member.
- Search for the user by name, email, or phone number.
- (Optional) Click Role to change the default role (Member).
- (Optional) Add a message to the invitation.
- Click Invite.
Tip: You can also invite members under Settings > Profile by clicking Share to send the workspace’s URL or QR code.
Note: Workspace admins and People admins can invite members. People admins can only invite users as Members or Auditors — they cannot invite admins or other scoped admin roles.
Filter Workspace Members by Role
You can filter the member list by role to quickly find specific groups of members.
- Go to Workspaces > [Workspace Name] > Members.
- Click the role filter dropdown at the top of the member list.
- Select one of the available roles:
- All members – Shows all workspace members (default).
- Approvers – Shows only members who are designated approvers.
- Workspace admins – Shows only members with the Workspace admin role (not available on Submit workspaces).
- Card admins – Shows only members with the Card admin role (Control workspaces only).
- Payments admins – Shows only members with the Payments admin role (Control workspaces only).
- Auditors – Shows only members with the Auditor role (Control workspaces only).
- Editors – Shows only members with the Editor role (Submit workspaces only).
The member list updates immediately to show only members matching the selected role. You can also combine the role filter with the search bar to narrow results further.
The roles available in the filter depend on your workspace type, so the options change if you switch your workspace plan. If you’ve filtered by a role that is no longer available after a plan change, the filter automatically resets to All members.
If no members match the selected filter, an empty state is displayed with the message: “No members match this filter.”
Remove Workspace Members
If someone no longer needs access to your workspace, you can remove them individually or in bulk to keep your member list up to date.
Note: Workspace admins and People admins can remove members. People admins can only remove Members and Auditors — they cannot remove admins or other scoped admin roles.
Remove a Single Member
- Go to Workspaces > [Workspace Name] > Members.
- Click the member’s name.
- In the right-hand panel, click Remove from Workspace.
- Confirm by clicking Remove.
Remove Multiple Members
- Go to Workspaces > Members.
- Select the checkboxes next to the members you want to remove.
- Click the green dropdown arrow in the top-right.
- Choose Remove Member(s).
- Confirm by clicking Remove.
Change a User’s Role
- Go to Workspaces > Members.
- Click the member’s name.
- In the right-hand panel, click Roles.
- Select the new role and confirm.
Note: People admins can change a member’s role between Member and Auditor only. Granting or removing the admin role or any scoped admin role (such as Card admin, People admin, or Payments admin) requires a Workspace admin.
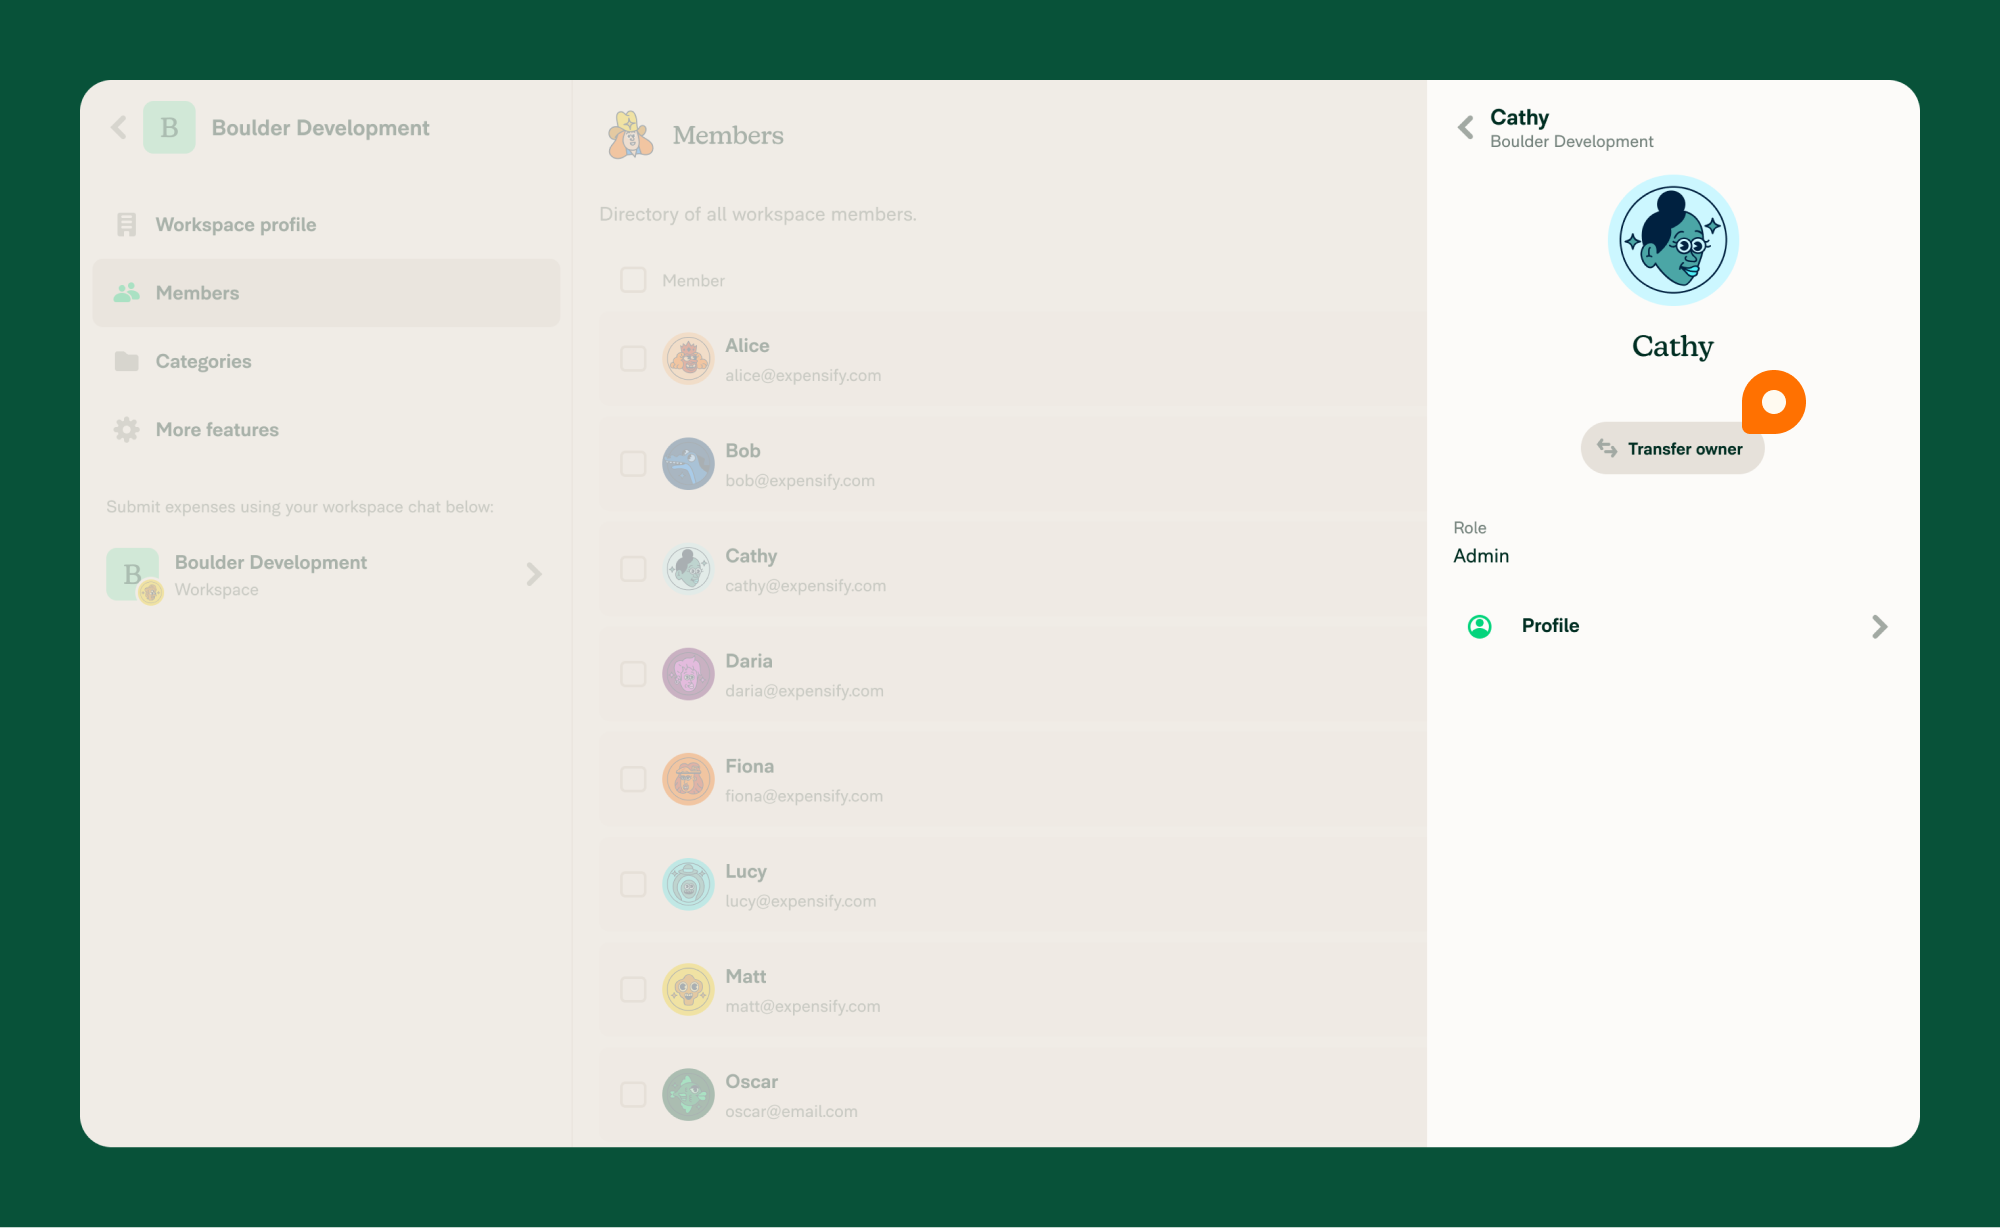
Transfer Workspace Ownership
To transfer ownership to another admin:
- Go to Workspaces > Members.
- Click the current Owner (identified with a tag).
- Click Transfer Owner in the right-hand panel.
- Click Continue to confirm.
After the transfer, the initiating user becomes the new Owner.
Invite Multiple Members via Spreadsheet
- Go to Workspaces > Members.
- Click the three-dot menu in the top-right.
- Select Import via Spreadsheet.
- Drag and drop your file or click Upload File to browse.
- Map each column in your file to a member field, then complete the import.
When mapping columns, you can assign each one to any of the following member fields:
- Email (required)
- Role
- Submit to
- Forward to
- Over limit forward to
- Approval limit
- Custom field 1
- Custom field 2
Mapping the Submit to, Forward to, Over limit forward to, and Approval limit fields sets up each member’s approval workflow, which you can review under Workflows after the import completes.
Note: Use this spreadsheet import template to ensure proper formatting.
Control plan required: The Submit to, Forward to, Over limit forward to, Approval limit, Custom field 1, and Custom field 2 fields — along with specialized roles like Auditor and Card admin — are only available on the Control plan. If your workspace isn’t on the Control plan, you’ll be prompted to upgrade before the import can finish.
FAQ
Why can’t I add someone to a workspace?
You must be a Workspace admin, and the email or phone number of the individual you’re inviting must be valid and correctly formatted.
Can I invite multiple members to a workspace at the same time?
Yes. Use the search tool during invite or import members using a spreadsheet (see the Invite Multiple Members via Spreadsheet section above.
Why am I prompted to upgrade when importing members from a spreadsheet?
Your file maps an advanced field (Submit to, Forward to, Over limit forward to, Approval limit, Custom field 1, or Custom field 2) or assigns a specialized role like Auditor or Card admin. These are only available on the Control plan, so you’ll need to upgrade your workspace to the Control plan before the import can finish.