


Create expense categories
In Expensify, categories represent your chart of accounts, GL accounts, expense accounts, or other financial coding used for reporting and accounting.
Workspace Admins can create categories manually, or import them automatically when connecting an accounting system such as QuickBooks, Xero, NetSuite, or Sage Intacct. Once categories are available, they can be enabled or disabled as needed. Over time, Expensify also learns how categories are applied to specific merchants and suggests them automatically.
The Categories table displays the category Name, GL Code (if assigned), the assigned Approver (on the Control plan), and whether it’s Enabled for workspace members to use.

How to add or delete categories manually
- In the navigation tabs (on the left on web, and at the bottom on mobile), click Workspaces.
- Click your workspace name.
- Click Categories.
- Click Add Category in the top-right corner.
- Enter a category name and click Save.
To delete a category:
- Click the category from the list.
- Click the three-dot menu in the top-right corner.
- Select Delete category.
How to add a category while creating or editing an expense
Workspace Admins can also create a new category directly from the category picker when creating or editing an expense, without navigating to workspace settings first. This option is available when no accounting integration is connected to the workspace.
- While creating or editing an expense, tap the Category field.
- Tap the + icon in the top-right corner.
- Enter a category name.
- Tap Save.
The new category is immediately applied to the expense and added to the workspace’s category list.
How to upload categories using a CSV file
- In the navigation tabs (on the left on web, and at the bottom on mobile), click Workspaces.
- Click your workspace name.
- Click Categories.
- Click the three-dot menu, then select Import Spreadsheet.
- Format your spreadsheet using the supported columns listed below.
- Download the template using Download CSV if needed.
- Upload your completed file and follow the prompts to map each column.
The following columns are supported:
| Column | Required | Plan |
|---|---|---|
| Name | Yes | All |
| Enabled | No | All |
| GL Code | No | Control |
| Require receipts over | No | Control |
| Require itemized receipts over | No | Control |
For the Require receipts over and Require itemized receipts over columns, use one of the following values:
default— Keep the existing workspace or category setting (no change).required— Always require a receipt (or itemized receipt), regardless of amount.not_required— Never require a receipt (or itemized receipt).- A number (e.g.,
2500) — Require a receipt (or itemized receipt) for expenses over that amount in cents.
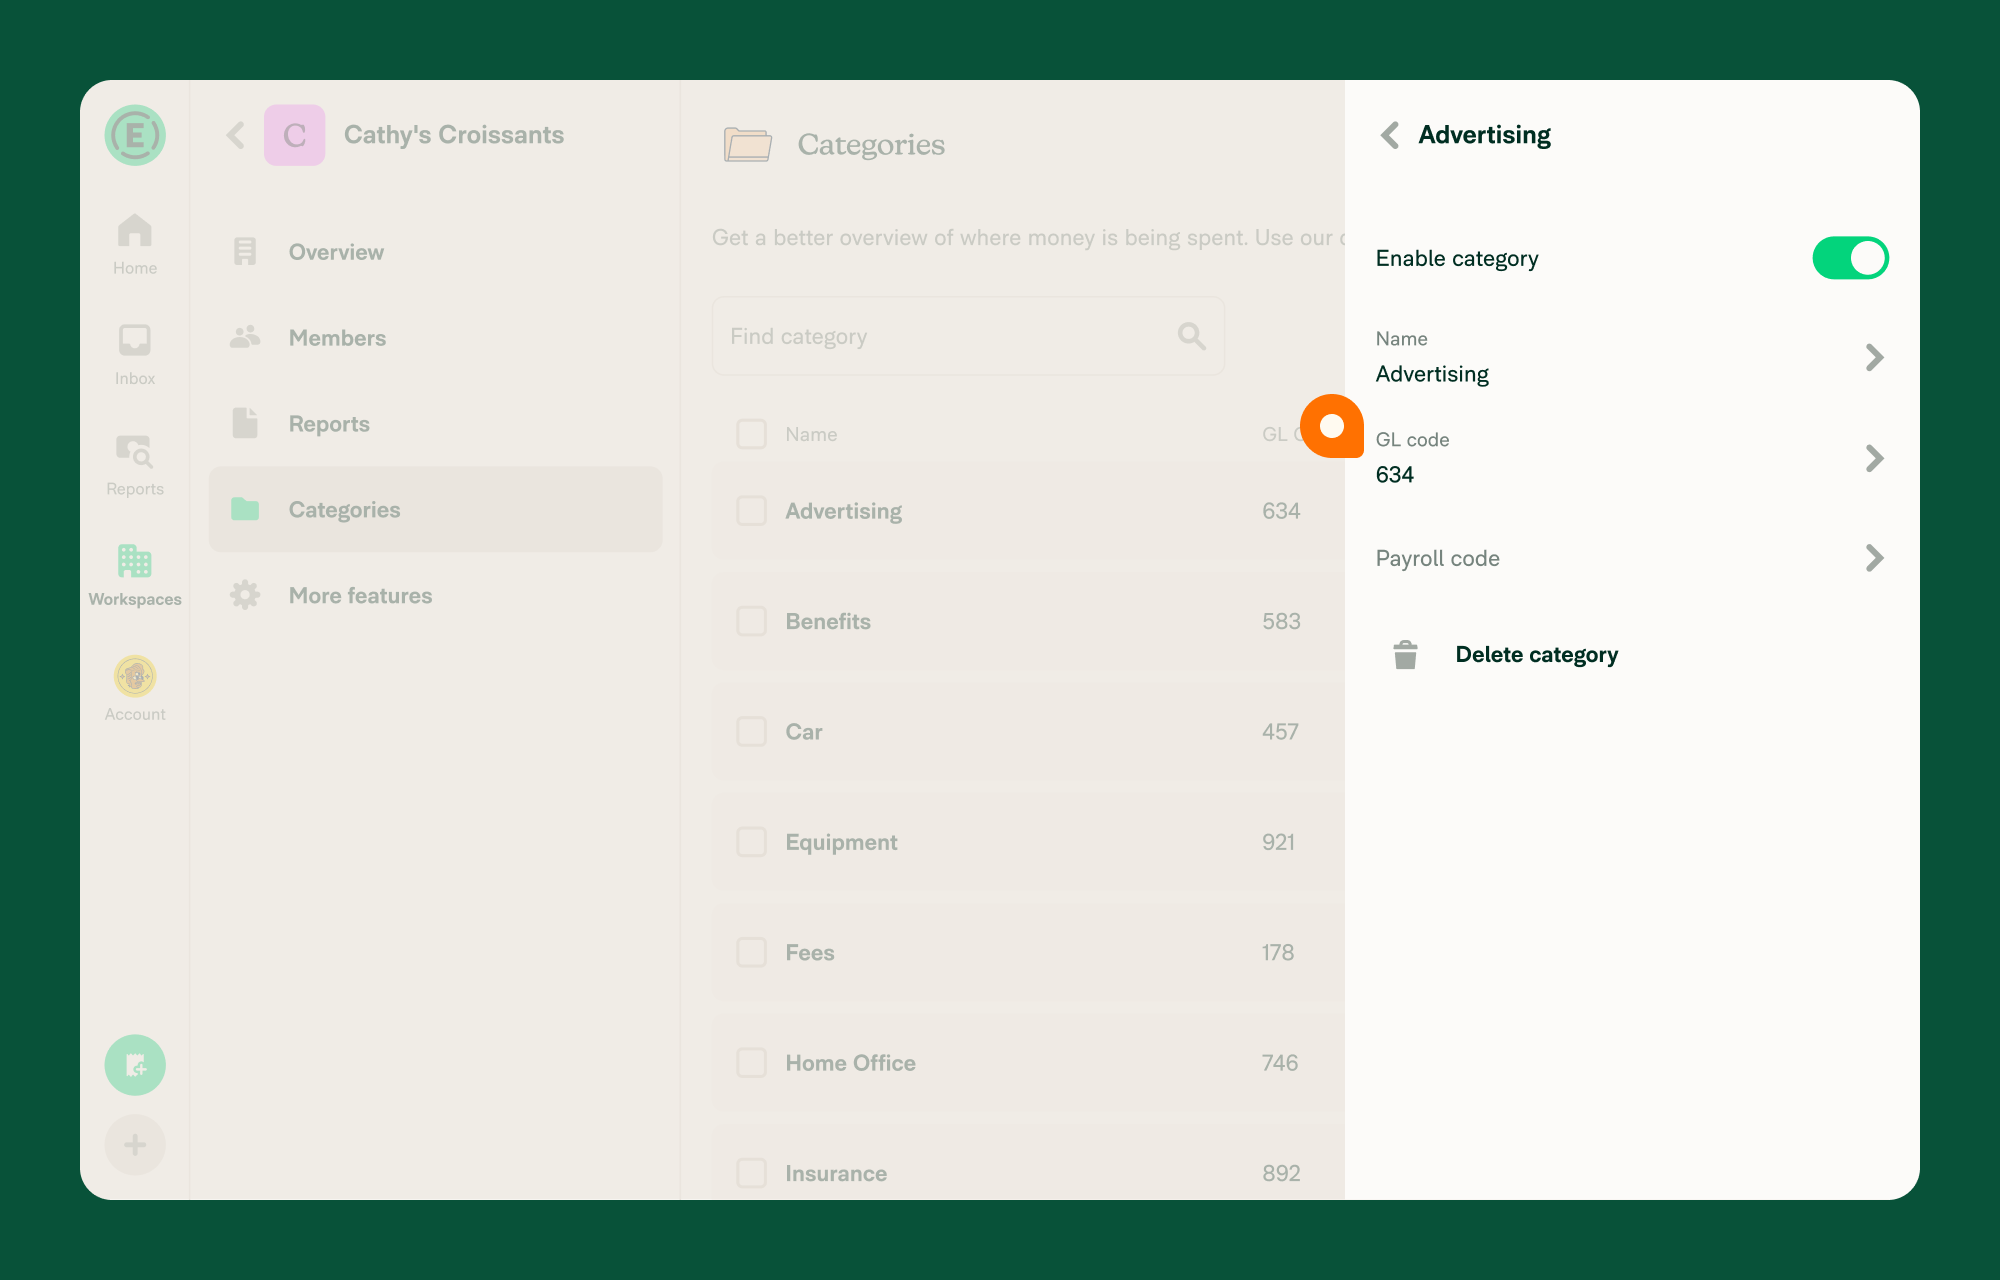
How to enable or disable categories
Once categories are added (manually or via import), they can be toggled on or off.
- In the navigation tabs (on the left on web, and at the bottom on mobile), click Workspaces.
- Click your workspace name.
- Click Categories.
- Click a category.
- Use the toggle to enable or disable it.
Bulk actions are available using the checkboxes and Selected menu.
Note: GL and payroll code import is available on the Control plan only.
How to add or edit GL codes or payroll codes
Workspaces on the Control plan can assign optional GL codes and payroll codes to each category. These codes are not visible to members but can be exported for accounting purposes.
To edit these fields:
- In the navigation tabs (on the left on web, and at the bottom on mobile), click Workspaces.
- Click your workspace name.
- Click Categories.
- Click a category to open the detail panel.
- Edit the GL Code or Payroll Code field.
- Click Save.
How to configure Category Rules
Category Rules let you control how specific categories behave. You can require additional information, assign approvers, or set spending thresholds for individual categories.
To manage Category Rules:
- In the navigation tabs (on the left on web, and at the bottom on mobile), click Workspaces.
- Click your workspace name.
- Click Categories.
- Select a category to open its settings panel.
Available Category Rule options include:
- Approver – Assign a specific approver for expenses in this category.
- Default tax rate – Set a default tax percentage (Taxes must be enabled on the workspace).
- Flag amounts over - Set a spending cap for this category.
- Require receipts over – Set a threshold for when receipts are required.
- Require itemized receipts over – Require itemized receipts for expenses over a specific amount.
- Require fields - Require specific fields be completed for this category. The options are:
- Require description - Force members to enter a reason when using the category.
- Require attendees - Force members to add additional attendees when using the category.
Category Rules apply to all members who use that category. If both a Category Rule and a Workspace Rule apply to the same expense, the Category Rule takes priority.
How to apply categories automatically
Expensify offers two ways to automatically apply categories based on merchant:
Learned Categorization
Expensify learns your category preferences over time and suggests them automatically based on the merchant.
- If you manually change a category, Expensify remembers the update.
- Existing expenses are not updated retroactively.
- These suggestions are based on patterns and may vary by user.
How to set default categories by MCC code
Expensify can automatically assign a default category based on the merchant’s MCC (Merchant Category Code). For example, you can set all airline expenses to default to a “Flights” category.
To manage MCC default categories:
- In the navigation tabs (on the left on web, and at the bottom on mobile), click Workspaces.
- Click your workspace name.
- Click Categories.
- Click More
- Click Settings.
- Update the default category for any MCC group (e.g., Airlines, Gas, Groceries).
Workspace Merchant Rules
Workspace Admins can configure Workspace Merchant Rules to apply consistent categories based on merchant name across all workspace members.
- Rules apply across all expenses on the workspace.
- Rules take precedence over learned suggestions.
- If a category is already set manually, Expensify won’t override it.
FAQ
Can I edit categories on a submitted expense report?
Yes, until an expense is approved or reimbursed. Approvers can also edit categories—even post-approval—by taking control of the report.
Can I see an audit trail of category changes?
Yes. When a category is manually edited, the change is logged in the related expense chat.
What happens if a category is disabled in my accounting system?
It will be removed from the workspace’s category list. However, it will remain visible on previously submitted or drafted reports where it was already applied.
What happens to an expense if its category is disabled on the workspace?
If categories are disabled on the workspace while an expense still has a category applied, the Category field stays on the expense with a Category no longer valid violation.
To resolve the violation, select the Category field on the expense. A Category disabled alert appears with options for managing the disabled category.
Alternatively, you can enable tags on the workspace to edit the category directly.
How can members see GL codes?
GL codes are not visible to members by default. If visibility is required, consider including the GL code in the category name itself.