


Configure Per Diem in a workspace
Per Diem allows workspace admins to assign fixed daily rates for travel or other recurring allowances. Once enabled, it appears as its own menu item in the workspace settings, giving you full control over importing, editing, and categorizing daily allowances.
Enable Per Diem in a Workspace
To enable the Per Diem feature:
- In the navigation tabs (on the left on web, and at the bottom on mobile), click Workspaces.
- Click your workspace name to open settings.
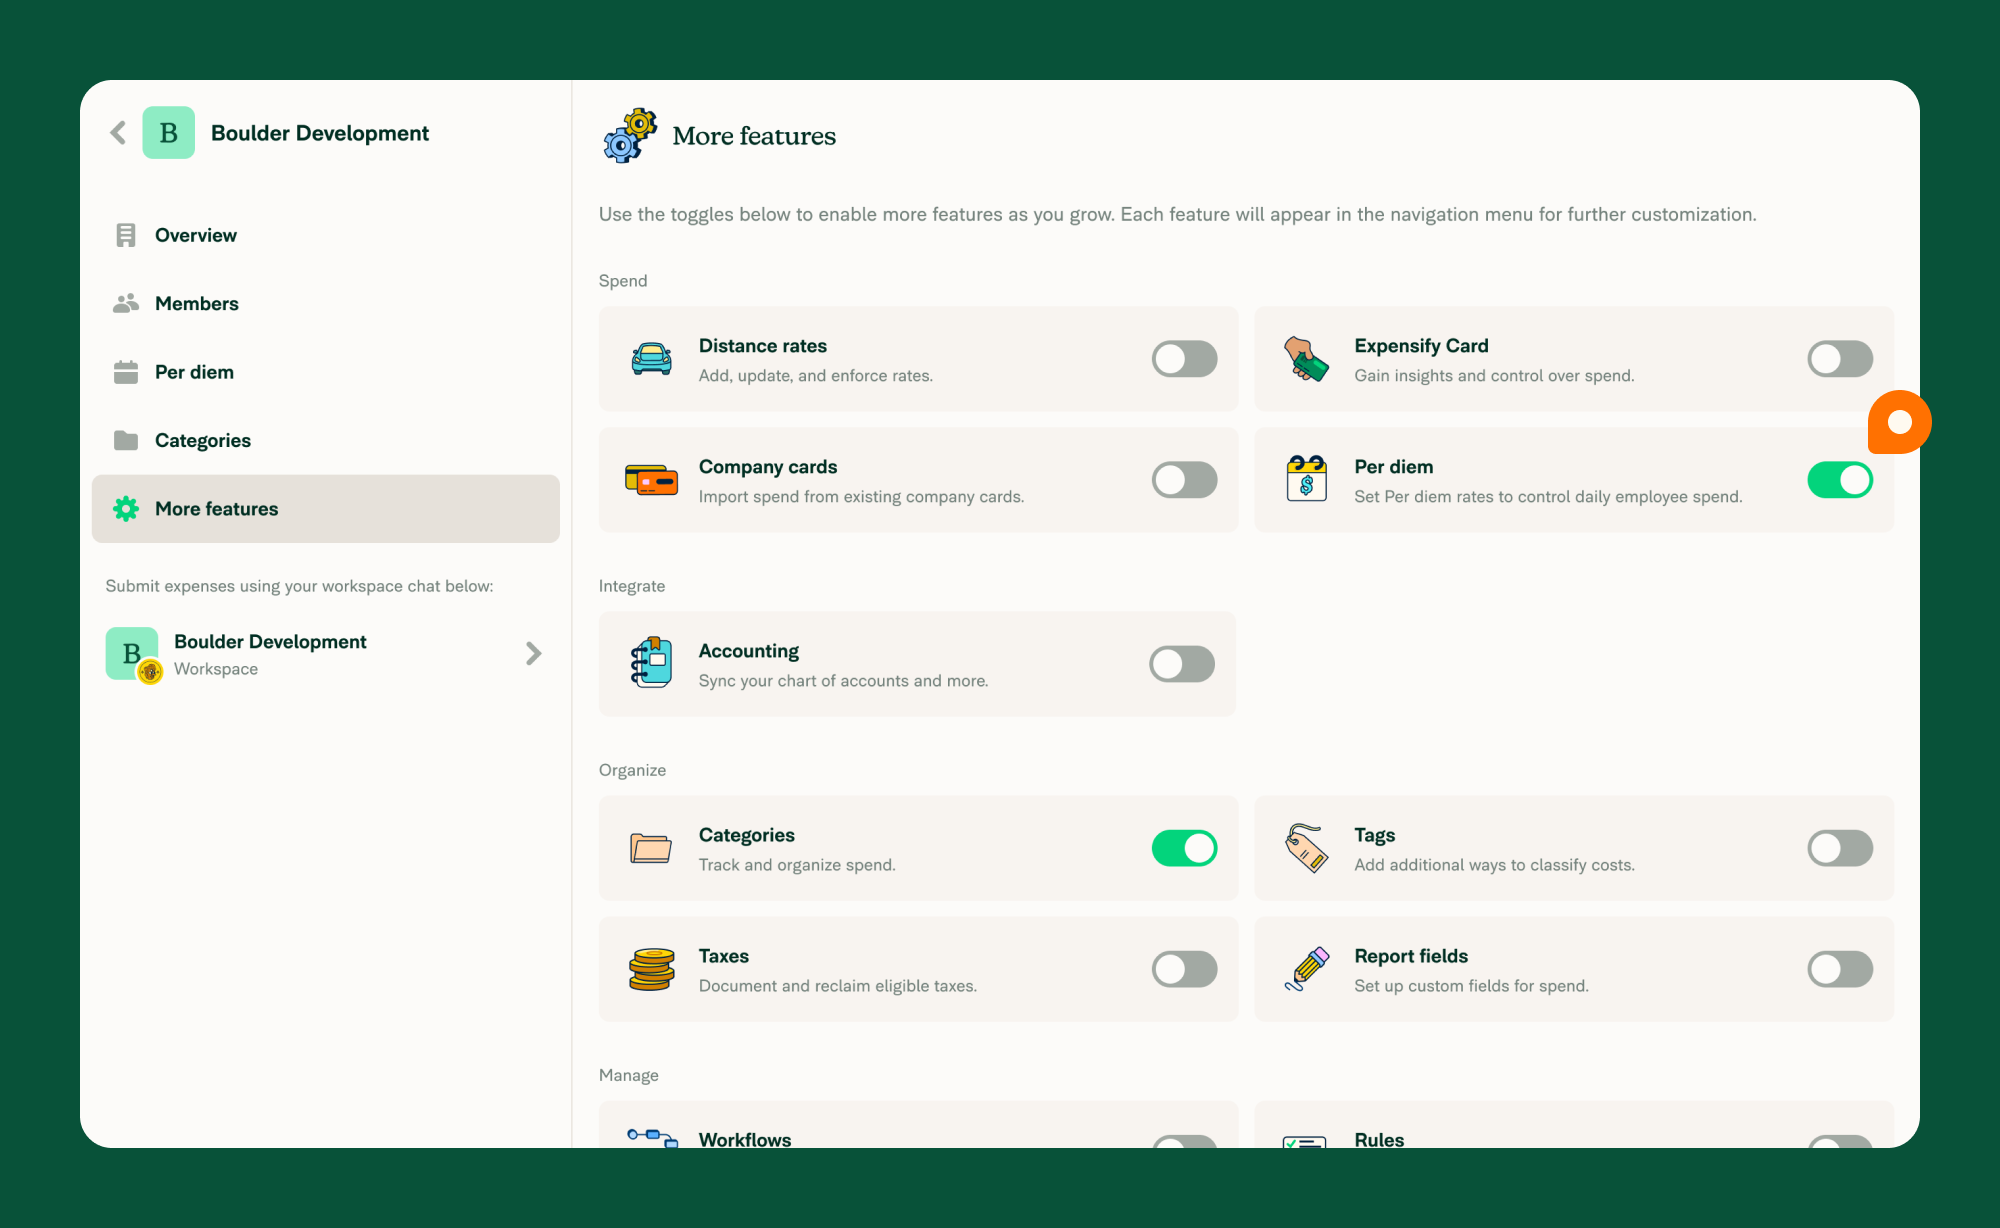
- Click More Features in the left menu.
- Under the Spend section, toggle on Per Diem.
Once enabled, Per Diem will appear as a dedicated item in the left-hand menu under the workspace settings.
Upload or Export Per Diem Rates
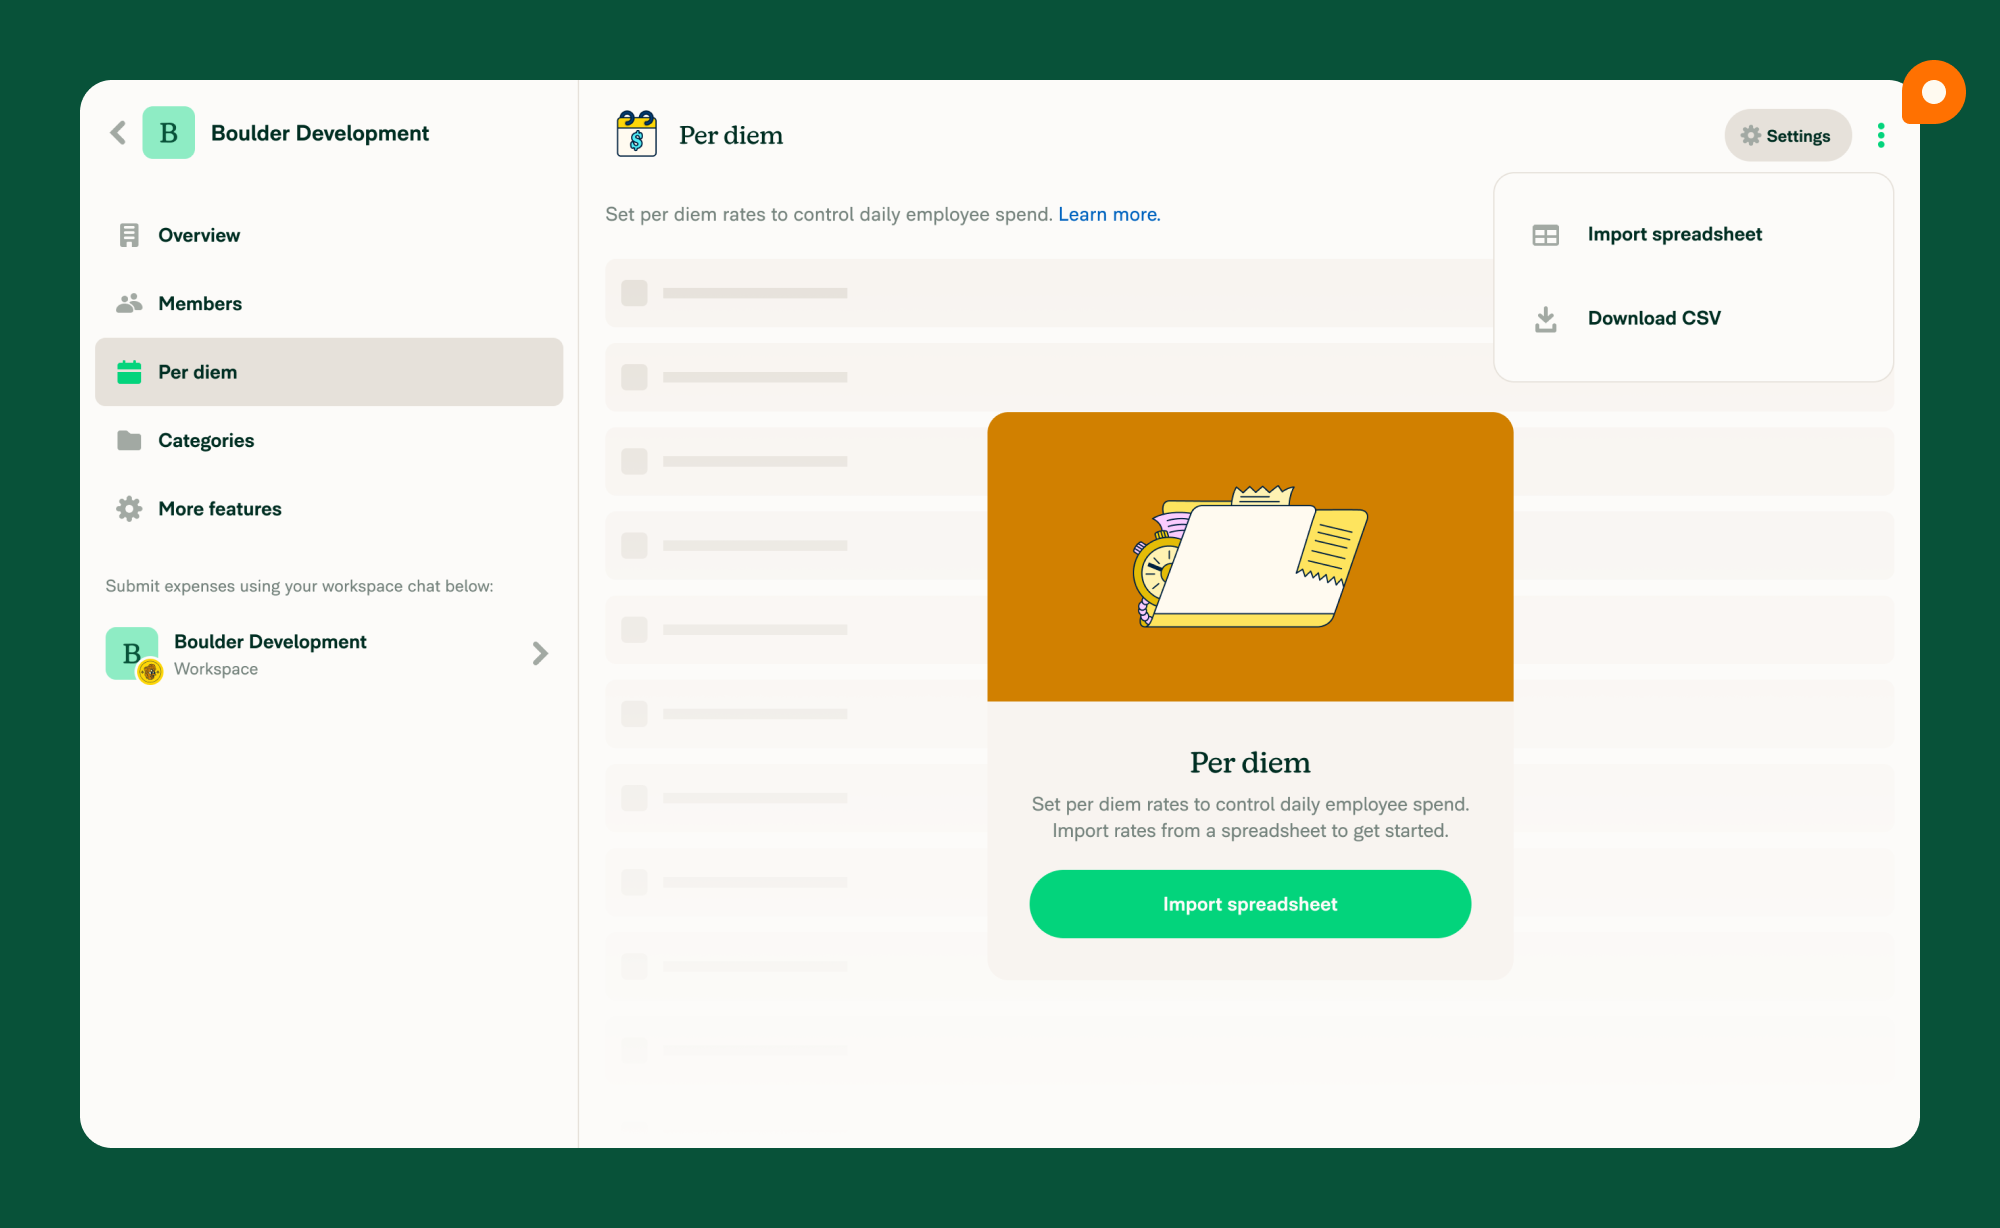
Admins can manage rates by uploading a spreadsheet or exporting existing ones.
- Import spreadsheet – Upload a CSV to add or update rates.
- Download CSV – Export your current Per Diem rate list.
Both options are found in the three-dot menu at the top-right corner of the Per Diem page.
Per Diem Rate Templates
Below are some example templates to reference:
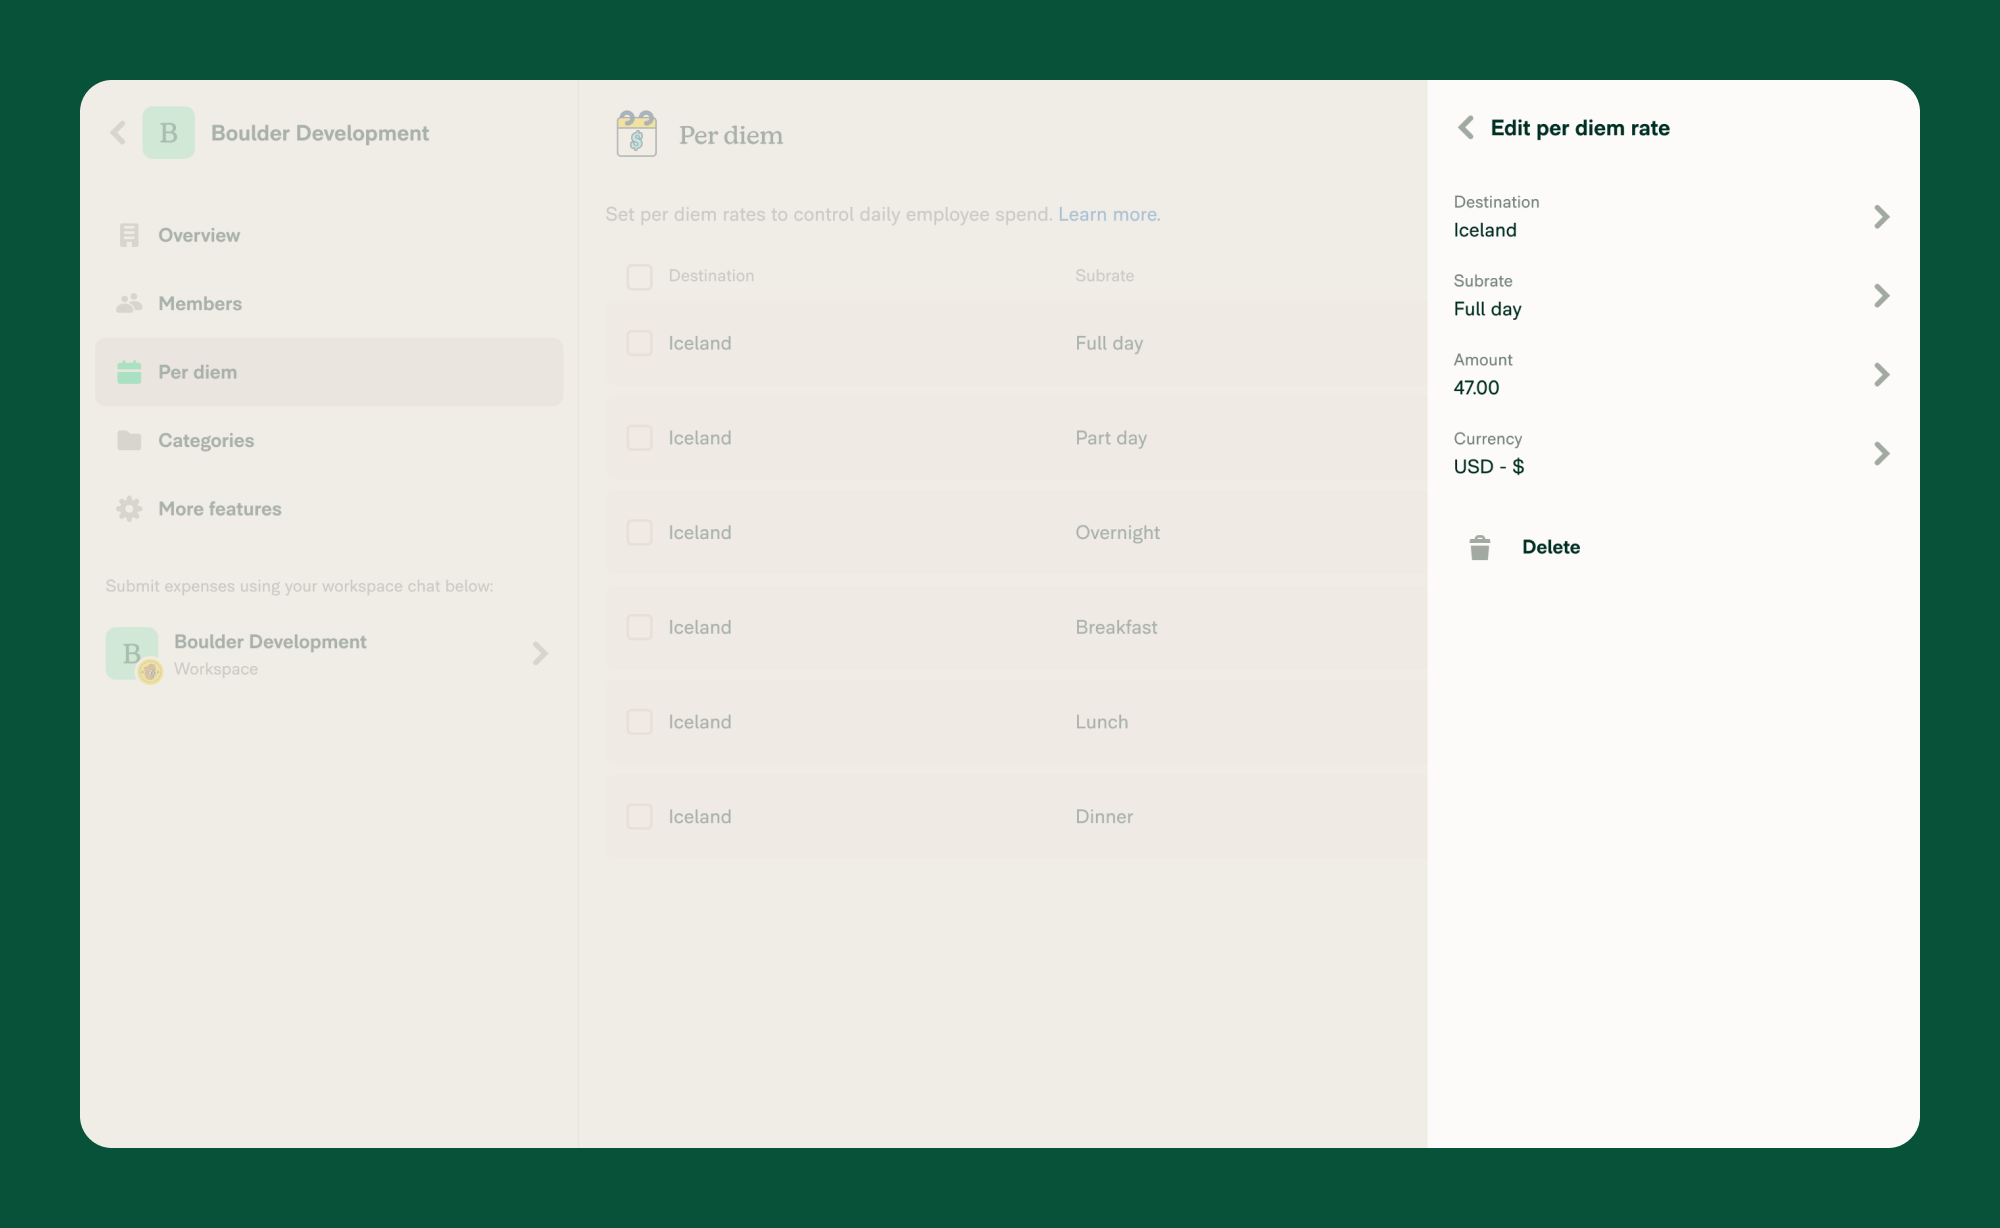
Edit or Delete Per Diem Rates
Each rate is listed as a line item. You can:
- Select one or more rates to edit or delete.
- Click a rate to adjust its details.
- Use the X selected dropdown to apply bulk actions like delete.
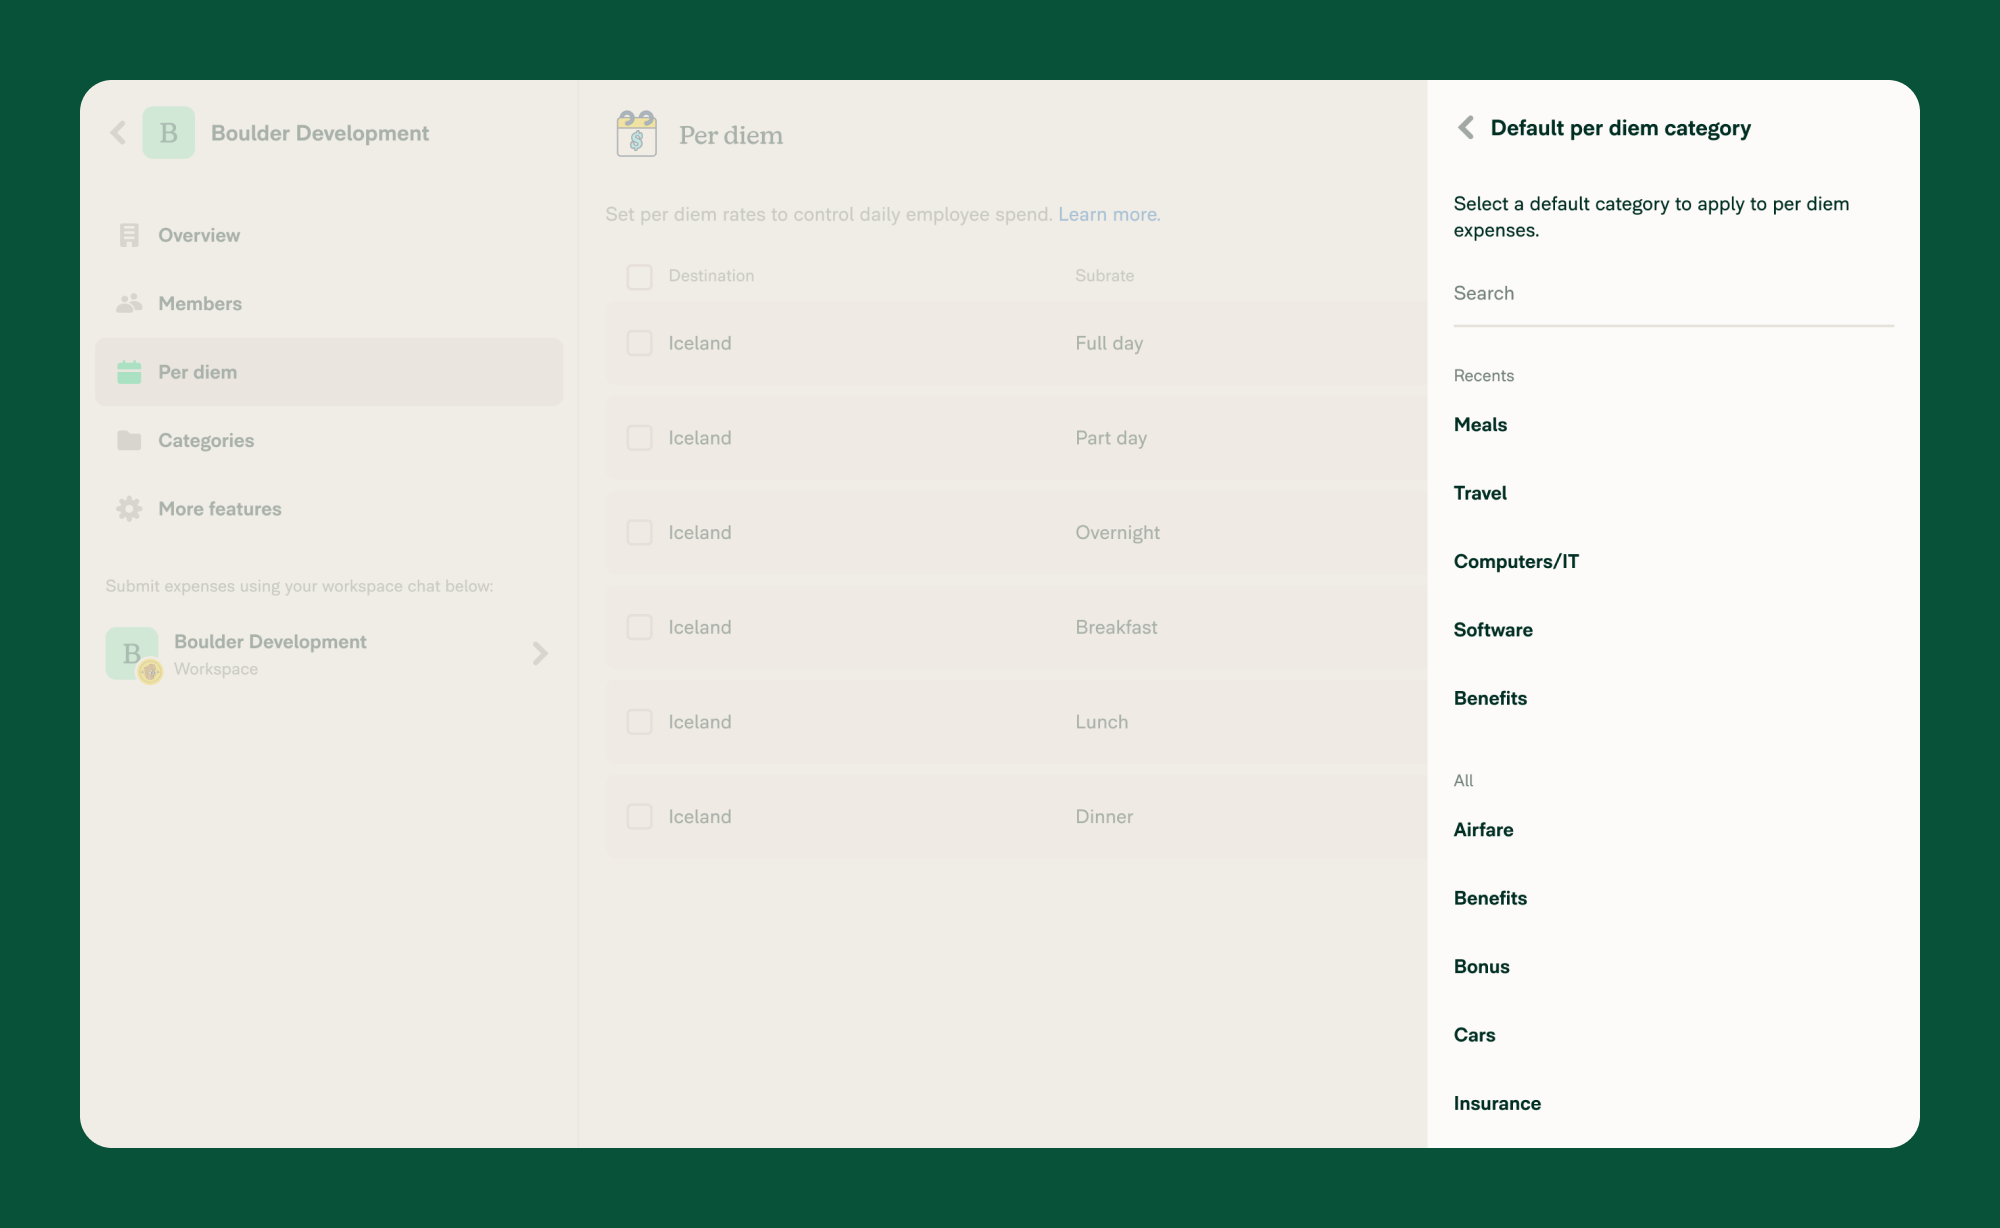
Set a Default Category for Per Diem
You can assign a default expense category to all Per Diem entries:
- Click the Settings button in the upper-right corner of the Per Diem page.
- In the right-hand panel, click Default category.
- Choose a category from the list.
FAQ
Why Don’t I See the Per Diem Option When Submitting an Expense?
Per Diem is only available when submitting expenses within a workspace where the feature is enabled. It will not appear in DMs, group chats, or expenses submitted outside a workspace.
Can I Bulk-Edit or Delete Per Diem Rates?
Yes. You can select multiple rates at once and apply bulk actions, such as editing or deleting them from the list view.