


Approve and pay expenses
As a workspace admin, you can set an approval workflow for the expenses submitted to you. Expenses can be,
- Instantly submitted without needing approval. - Submitted at a desired frequency (daily, weekly, monthly) and follow an approval workflow.
Setting approval workflow and submission frequencies
Approval workflow settings and submission frequencies can be set in the Workflow settings of your workspace.
Manually approve expense
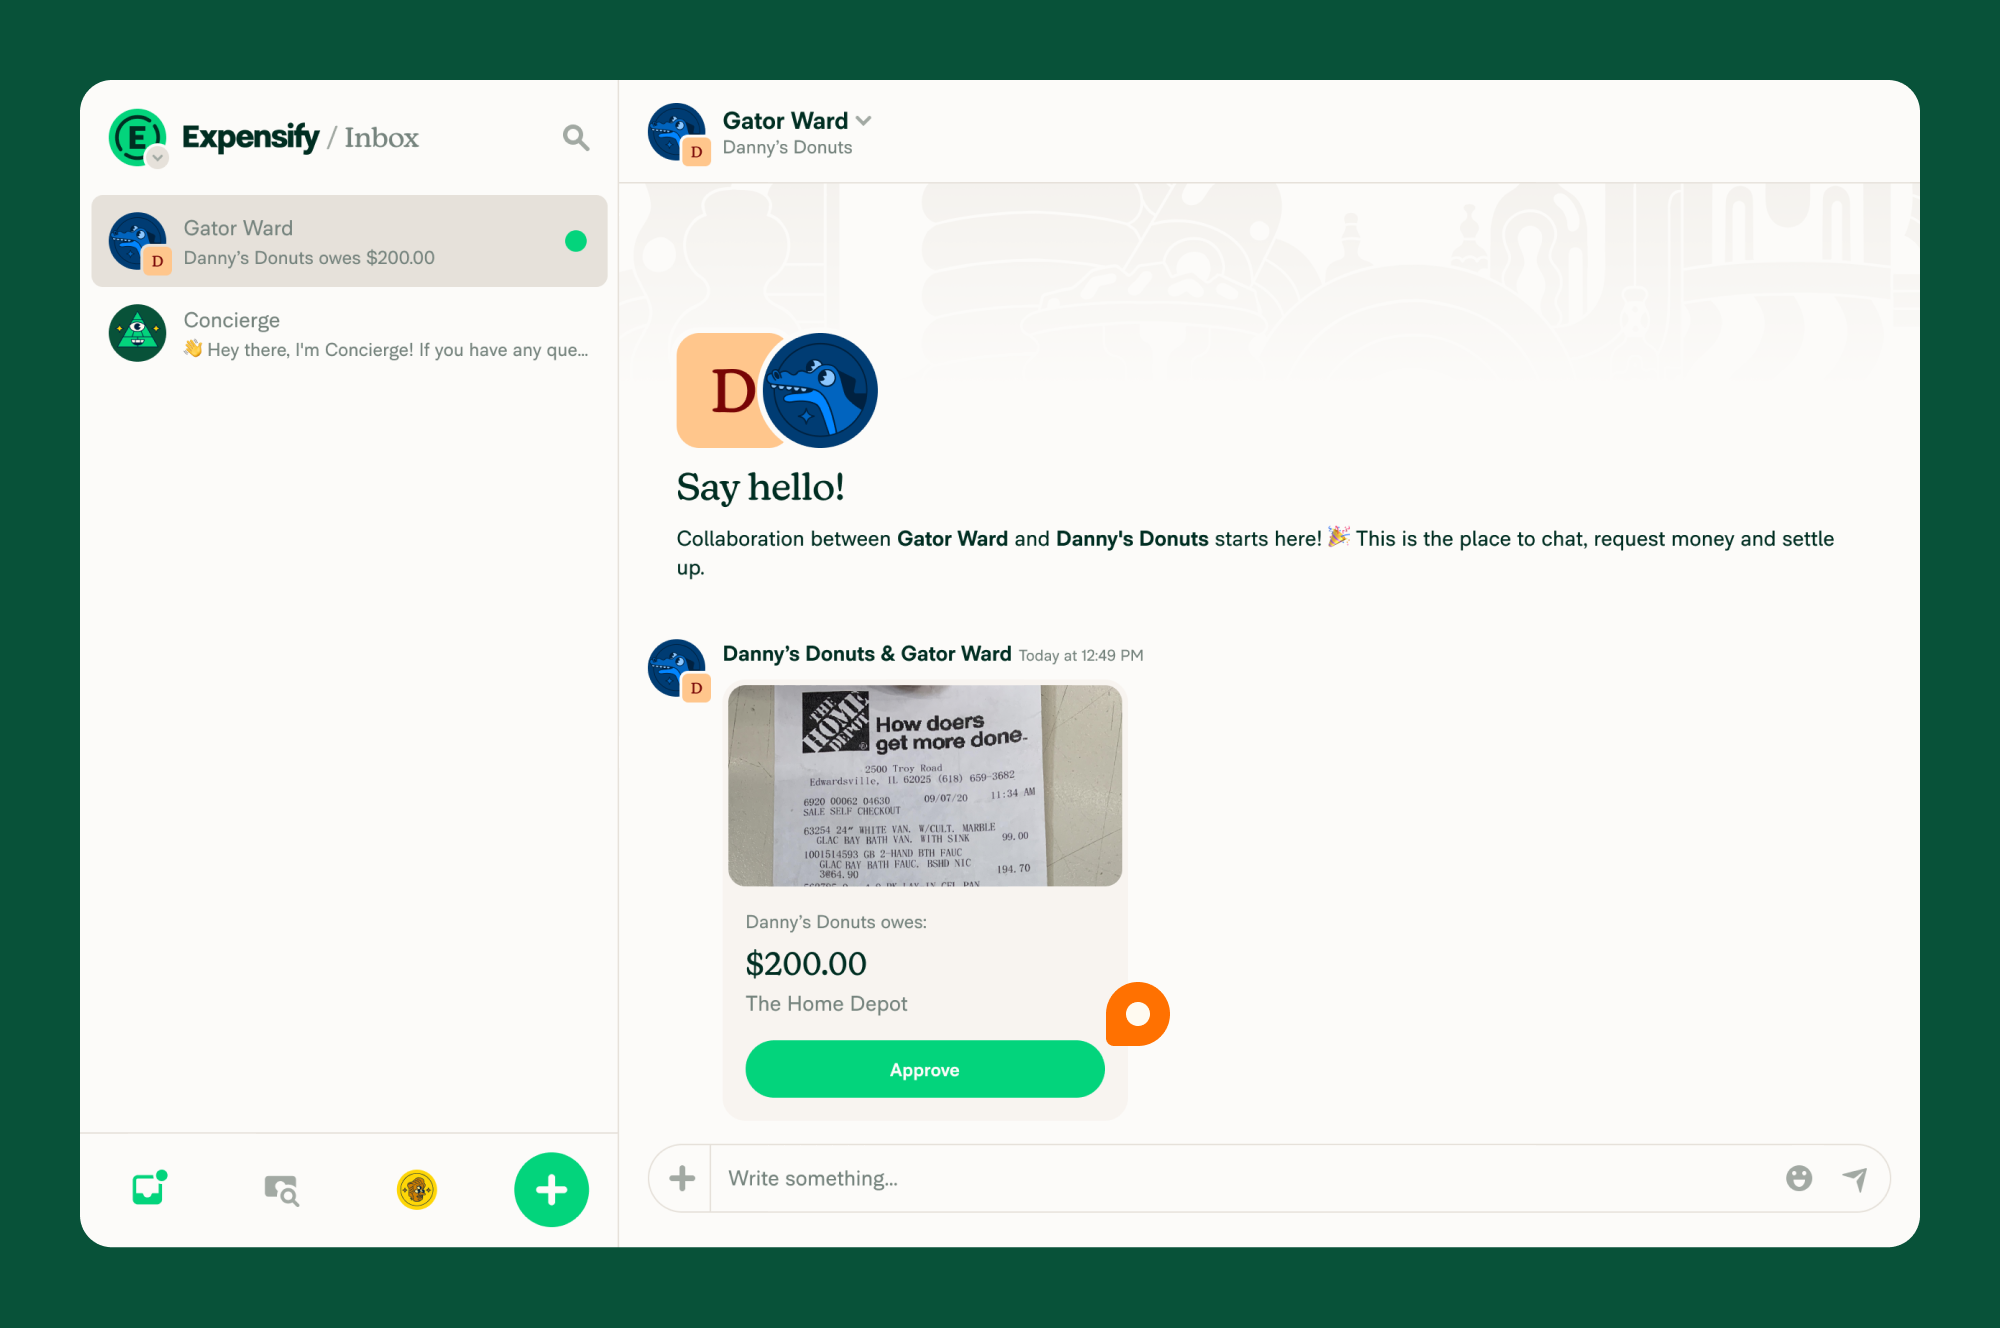
When someone sends an expense or a group of expenses to you for approval, you’ll receive the expense in Expensify Chat for the related workspace. Chats with new updates appear with a green dot to the right of the chat message. Concierge also sends you an email notification for the new expense.
If an expense is sent to you by a friend, you will not need to approve the expense. Instead, you can immediately pay the expense when you are ready.
Approve expenses
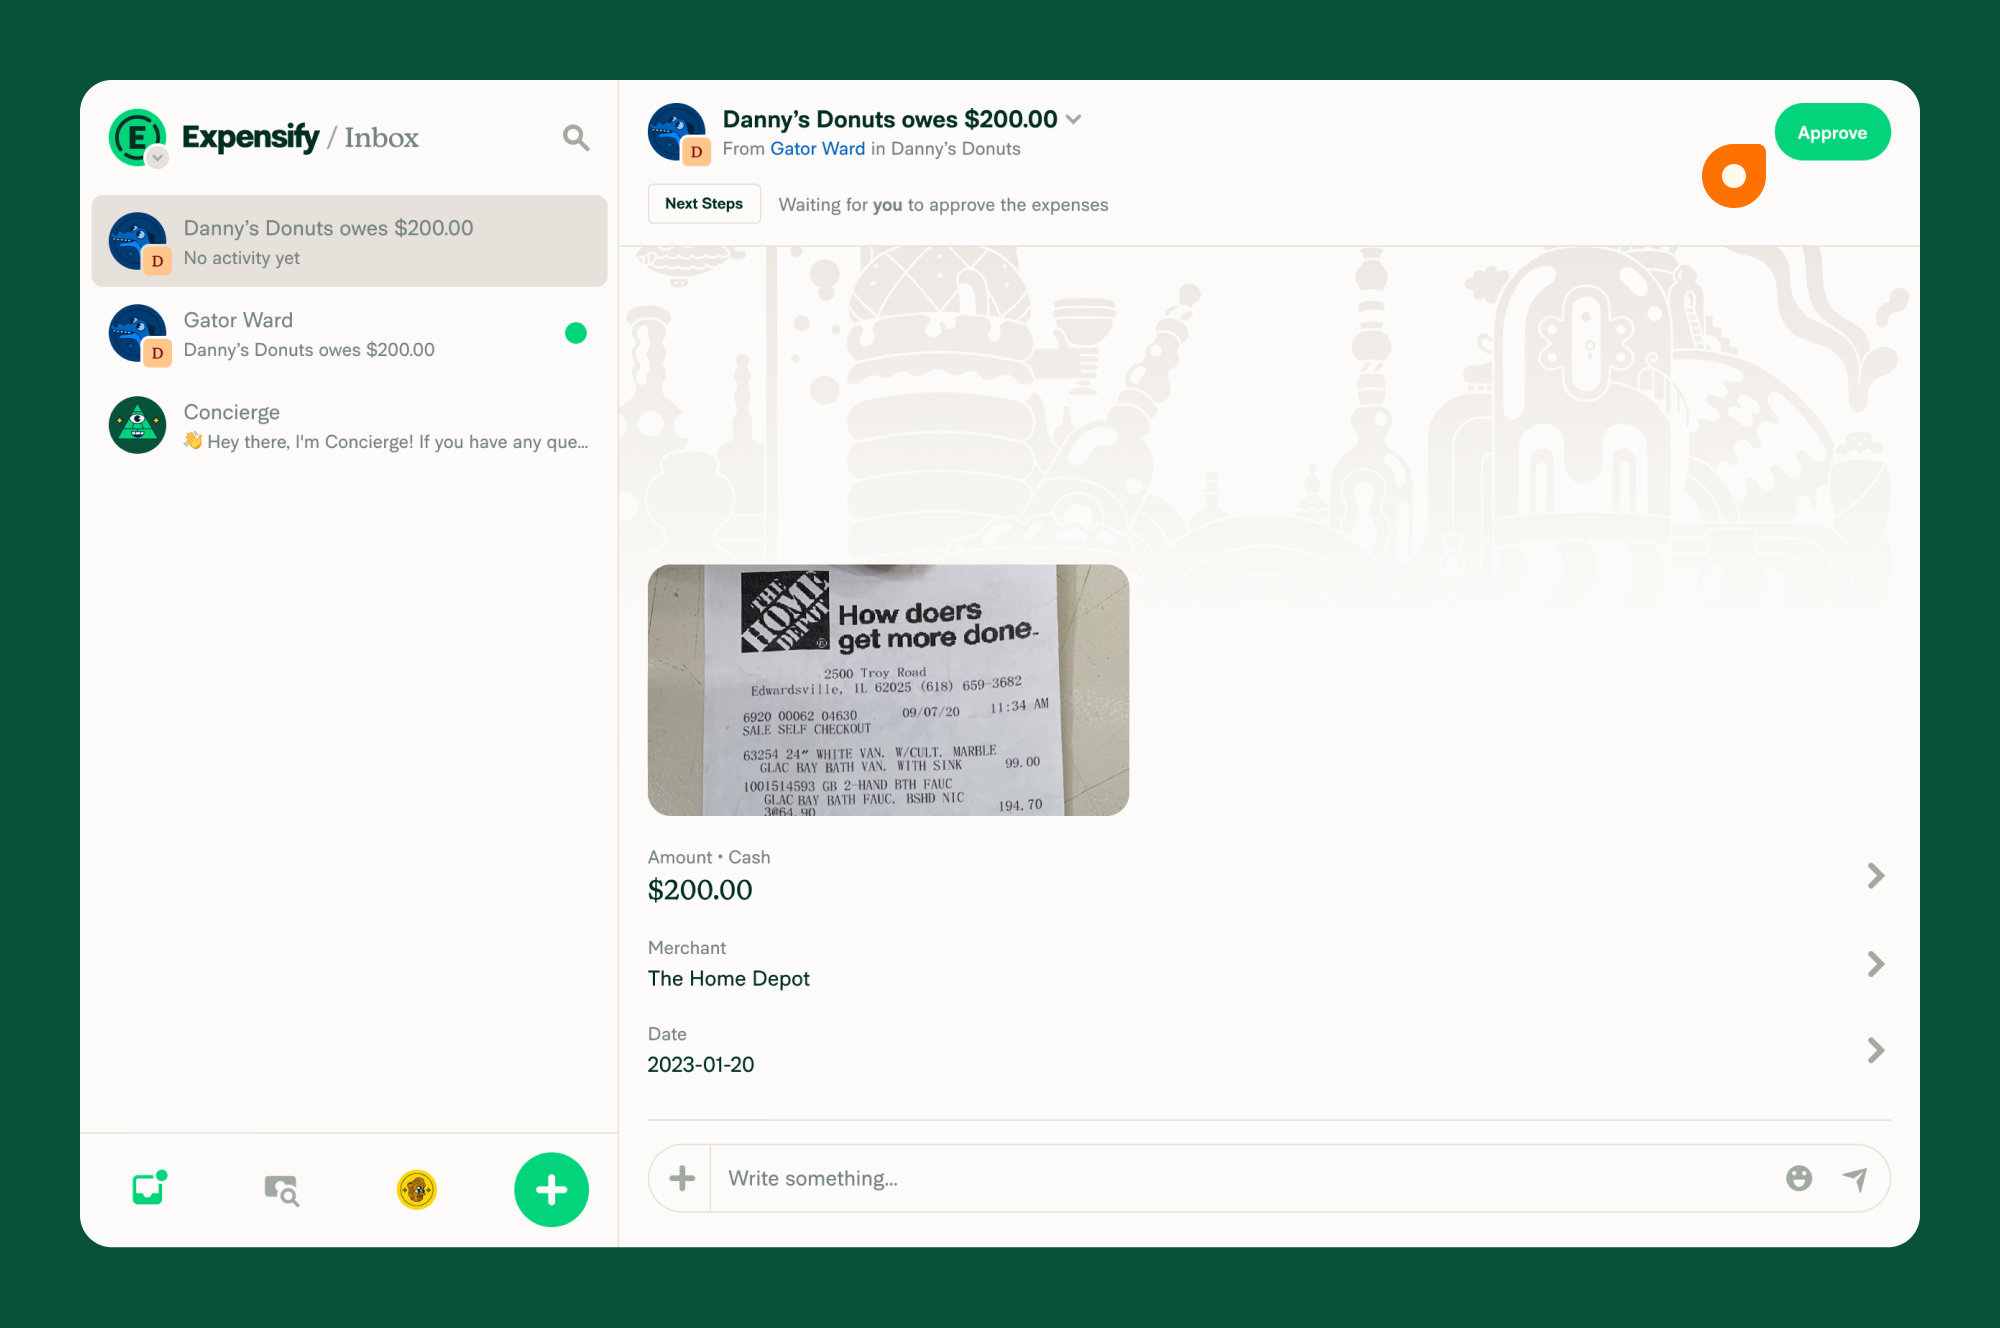
To approve an expense,
- Open the Expensify Chat thread for the expense.
- Click the expense or group of expenses.
- Review the expense details to ensure they are correct. Look at each receipt, the amount, the description, and any additional details.
- Determine the next steps.
- Approve: When you’re satisfied with the expense, click Approve.
- Handle holds: If any of the expenses are on hold, you can choose to either approve only the expenses that are not on hold or approve the full amount, including any held expenses.
- Request changes: You can add a comment to the expense’s chat thread in your Expensify Chat inbox to request changes to the expense details.
If the transaction is pending (a common occurrence with recent company card expenses or SmartScan expenses), you’ll need to wait until the transaction posts before approving it.
You’re now ready to pay the expense.
Hold an expense
If you need to delay a payment or if you need more information on the expense before it can be approved, you can hold the expense.
To hold an expense,
- Open the Expensify Chat thread for the expense.
- Click the expense or group of expenses.
- Click the three dot menu at the top right of the expense and select Hold.
- Enter a reason for the delay.
- Review the Hold Overview page and click Got It.
When you’re ready, you can choose to:
- Remove the hold: Complete the steps above and select Unhold.
- Approve the expense: Complete the steps above for “Approve expenses.” Once the expense has been approved, you can now pay the expense.
Held expenses will not be available for payment until they have been approved.
Unapprove an expense
Some details of approved expenses and reports cannot be edited. If you need to edit an expense that has been approved, admins and the last approver have the option to unapprove reports.
- Click the workspace logo in the top left corner.
- Select the workspace associated with the expense report.
- Find the approved report by searching for the submitter.
- Click the dropdown arrow at the top of the report to view the report actions.
- Click Unapprove.
The unapproved report will return to an editable state, and the submitter will receive an email and chat notification that the expense has been unapproved.
Reports that have been paid cannot be unapproved. If the approved expense has already been exported to an accounting package, you’ll see a warning that unapproving an expense can cause data discrepancies and Expensify Card reconciliation issues. Ideally, you’ll want to delete the data that has already been exported to the accounting package before approving the expense again.
Pay expenses
Once you’ve approved an expense—or if the expense does not require approval—you’ll be able to pay it.
To pay expenses within Expensify, you’ll need to set up your Expensify Wallet.
To pay an expense,
- Open the Expensify Chat thread for the expense.
- Click the expense or group of expenses.
- Select a payment option.
- Click Pay to pay the full expense within Expensify. If the expenses contain one that has been held, the pay amount will only include the expenses that have not been held. Then you’ll select your payment method.
- Click Pay Elsewhere to indicate that a payment has been sent using a method outside of Expensify, such as cash or a check. This will label the expense as Paid.
FAQ
Why was an expense automatically approved?
We refer to this as Instant Submit. If a workspace doesn’t have Delayed Submission enabled, an expense report will automatically be submitted.
Why is an employee expense showing as ‘pending?’
An Expensify Card expense will show as pending if the merchant hasn’t posted it. This is usually the case with hotel holds, or card rental holds. A hold will normally last no more than 7-10 business days unless it’s a hotel hold, which can last 31 days.