


Configure travel policy and preferences
As a Workspace Admin, you can set travel policies for all travel booked under a workspace, including approval methods, flight booking class, and hotel star preferences. You can also create multiple policies with specific conditions for particular groups of employees and/or non-employees.
Create or update a travel policy
Workspace admins can create different travel policies that provide travel rules for different groups of travelers. When using Expensify Travel for the first time, you will need to create a new Travel Policy.
To create or update a travel policy,
- Click the Travel tab.
- Click Book or manage travel.
- Click the Program tab at the top and select Policies.
- Under Employee or Non-employee in the left menu, click Add new to create a new policy.
- Use the Edit members section to select the group of employees that belong to this policy.
- To select an existing policy: Select the policy in the left menu.
- To add a new policy: Click Add new under Employee or Non-employee in the left menu. Then under the Edit members section, select the group of employees that belong to this policy.
A Legal Entity in Expensify Travel is the equivalent of an Expensify Workspace.
- Select which travel preferences you want to modify: General, flight, hotel, car, or rail.
- Click the paperclip icon next to each setting to de-couple it from your default policy.
- Update the desired settings.
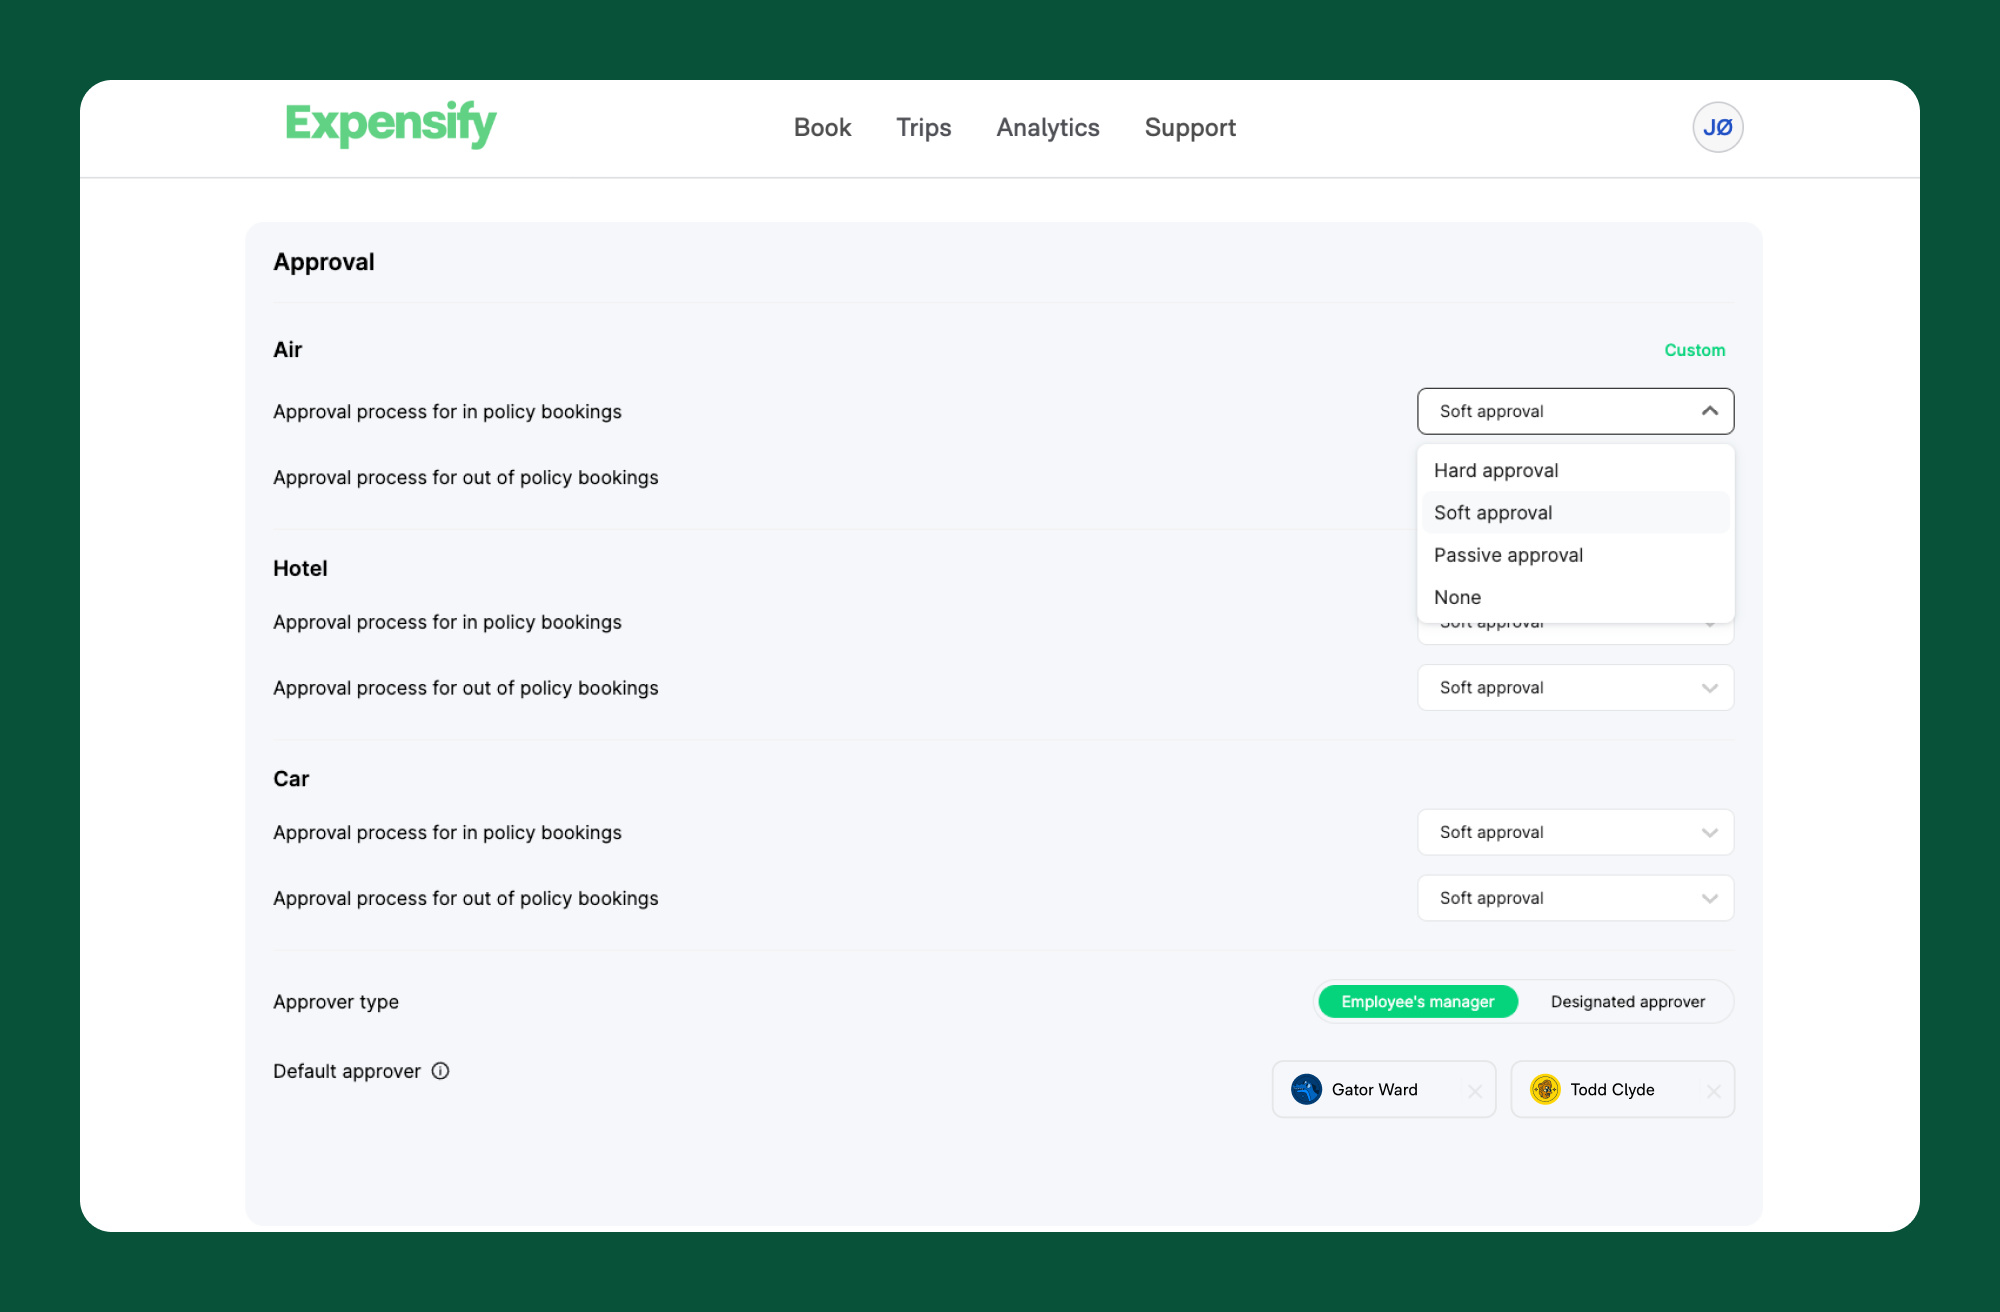
General
Determine the currency and approval type for different types of travel bookings. You can also upload a PDF of your company travel policy for employees to access when booking travel.
Flight
Flight preferences include multiple sections with different settings:
- Flights not allowed to be booked: Restrict specific flight classes from being booked by employees.
- Cabin class settings: Set the highest cabin class allowed for booking and whether employees can accept cabin upgrades.
- Budget: Set a percentage or fare cap for the median or cheapest fares on flights, and a maximum capped price. Flight fares above this cap will be considered out of policy. You can also add customization to allow for different caps for different flight durations.
- Lowest logical fare settings: Set a preference for layovers, number of stops, flight time window, and airport connection changes. Expensify automatically takes these preferences into account when showing the lowest logical travel fare.
- Add Ons and Preferences: Select what types of add-ons your employees can book, including:
- Additional baggage
- Early check-in
- Seat preference
- No add-ons allowed
- Booking windows: Add a time limit to prevent employees from booking less than a certain number of days in advance to prohibit bookings too close to the flight time.
- Refundable/changeable tickets: Allow employees to book fully or partially refundable fares. To allow all options, you can leave this as the default option.
- Maximum CO2 per kilometer: If the CO2 per passenger km exceeds this threshold, the flight will be marked as out of policy. You can leave the entry blank if you do not wish to use this policy.
- Out of policy reason codes: If enabled, travelers will be asked to enter a reason code for an out-of-policy flight booking. This gives them a way to provide context for why the booking is still being placed. You can also modify the reason codes by clicking Manage reason codes below the toggle.
Hotel
- Restrict booking by keyword: Keywords entered here will be compared to the hotel rate description. If any of the keywords are found, the hotel rate will be restricted. You also have the option to provide a reason why each keyword is restricted.
- Hotel rates not allowed to be booked: Restrict specific hotel rates (such as non-refundable, prepaid, and requires deposit) from being booked by employees. This overrides all other hotel policy rules. You also have the option to add a reason why these options aren’t available.
- Maximum price: Set a maximum price per night for bookings. You can also select the Customizations by location option to set a maximum price for each location.
- Booking window: Add a time limit to prevent employees from booking less than a certain number of days in advance to prohibit bookings too close to the flight time.
- Cancellation policy: Allow your employees to book fully or partially refundable rooms. To allow all options, you can leave this as the default option.
- Experience: Set hotel ratings that are in and out of policy.
- Nightly median rate: Determine which hotels to consider when calculating the median price. You can set a radius around the search location and include/exclude hotels above or below a certain rating.
- Out of policy reason codes: If enabled, travelers will be asked to enter a reason code for an out-of-policy hotel booking. This gives them a way to provide context for why the booking is still being placed. You can also modify the reason codes by clicking Manage reason codes below the toggle.
Car
- Car categories not allowed: Restrict specific car types from being booked by employees. This overrides any other car policy.
- Car categories in policy: Define the types of cars that are in policy. If you do not list a specific car category, it will still be booked as long as it isn’t included in the Car categories not allowed setting. However, the booking will be classed as out of policy.
- Car engine types not allowed: Restrict specific engine types from being booked by employees regardless of other policy settings.
- Maximum price: Set a daily price cap per car (not including taxes and fees).
- Out of policy reason codes: If enabled, travelers will be asked to enter a reason code for an out-of-policy car booking. This gives them a way to provide context for why the booking is still being placed. You can also modify the reason codes by clicking Manage reason codes below the toggle.
Rail
- Maximum price: Set a maximum price per booking or customise by rail trip duration.
- Highest travel class: Set a maximum travel class per booking or customise by rail trip duration.
- Booking window: Add a time limit to prevent employees from booking less than a certain number of days in advance to prohibit bookings too close to the journey time.
- Out-of-policy reason code for rail: If enabled, travelers will be asked to enter a reason code for an out-of-policy rail booking. This gives them a way to provide context for why the booking is still being placed. You can also modify the reason codes by clicking Manage reason codes below the toggle.
FAQ
How do travel policy rules interact with Expensify’s approval flows?
Travel policy rules define what can and can’t be booked by your employees while they’re making the booking. Once a booking is placed and the travel itself is approved, the expense will appear in Expensify. It will then be coded, submitted, pushed through the existing expense approval process as defined by your workspace, and exported to your preferred accounting platform (if applicable).