


Edit expenses
You can edit expenses in Expensify to update details like category, description, tags, attendees, or report assignment. You can also split, merge, or delete expenses when the report is editable.
Edit expenses
Who can edit expenses
Editing permissions depend on the report status and your role.
- The expense submitter can edit expenses on Draft reports.
- Approvers and Workspace Admins can edit expenses on Outstanding reports.
- Approved expenses must be Unapproved before they can be edited.
- Expenses on Done reports cannot be edited.
What fields can be edited on an expense
For expenses in a Draft or Outstanding report, you can edit:
- Category
- Tag
- Description
- Attendees
- Receipt image
- Amount (if not a company card expense)
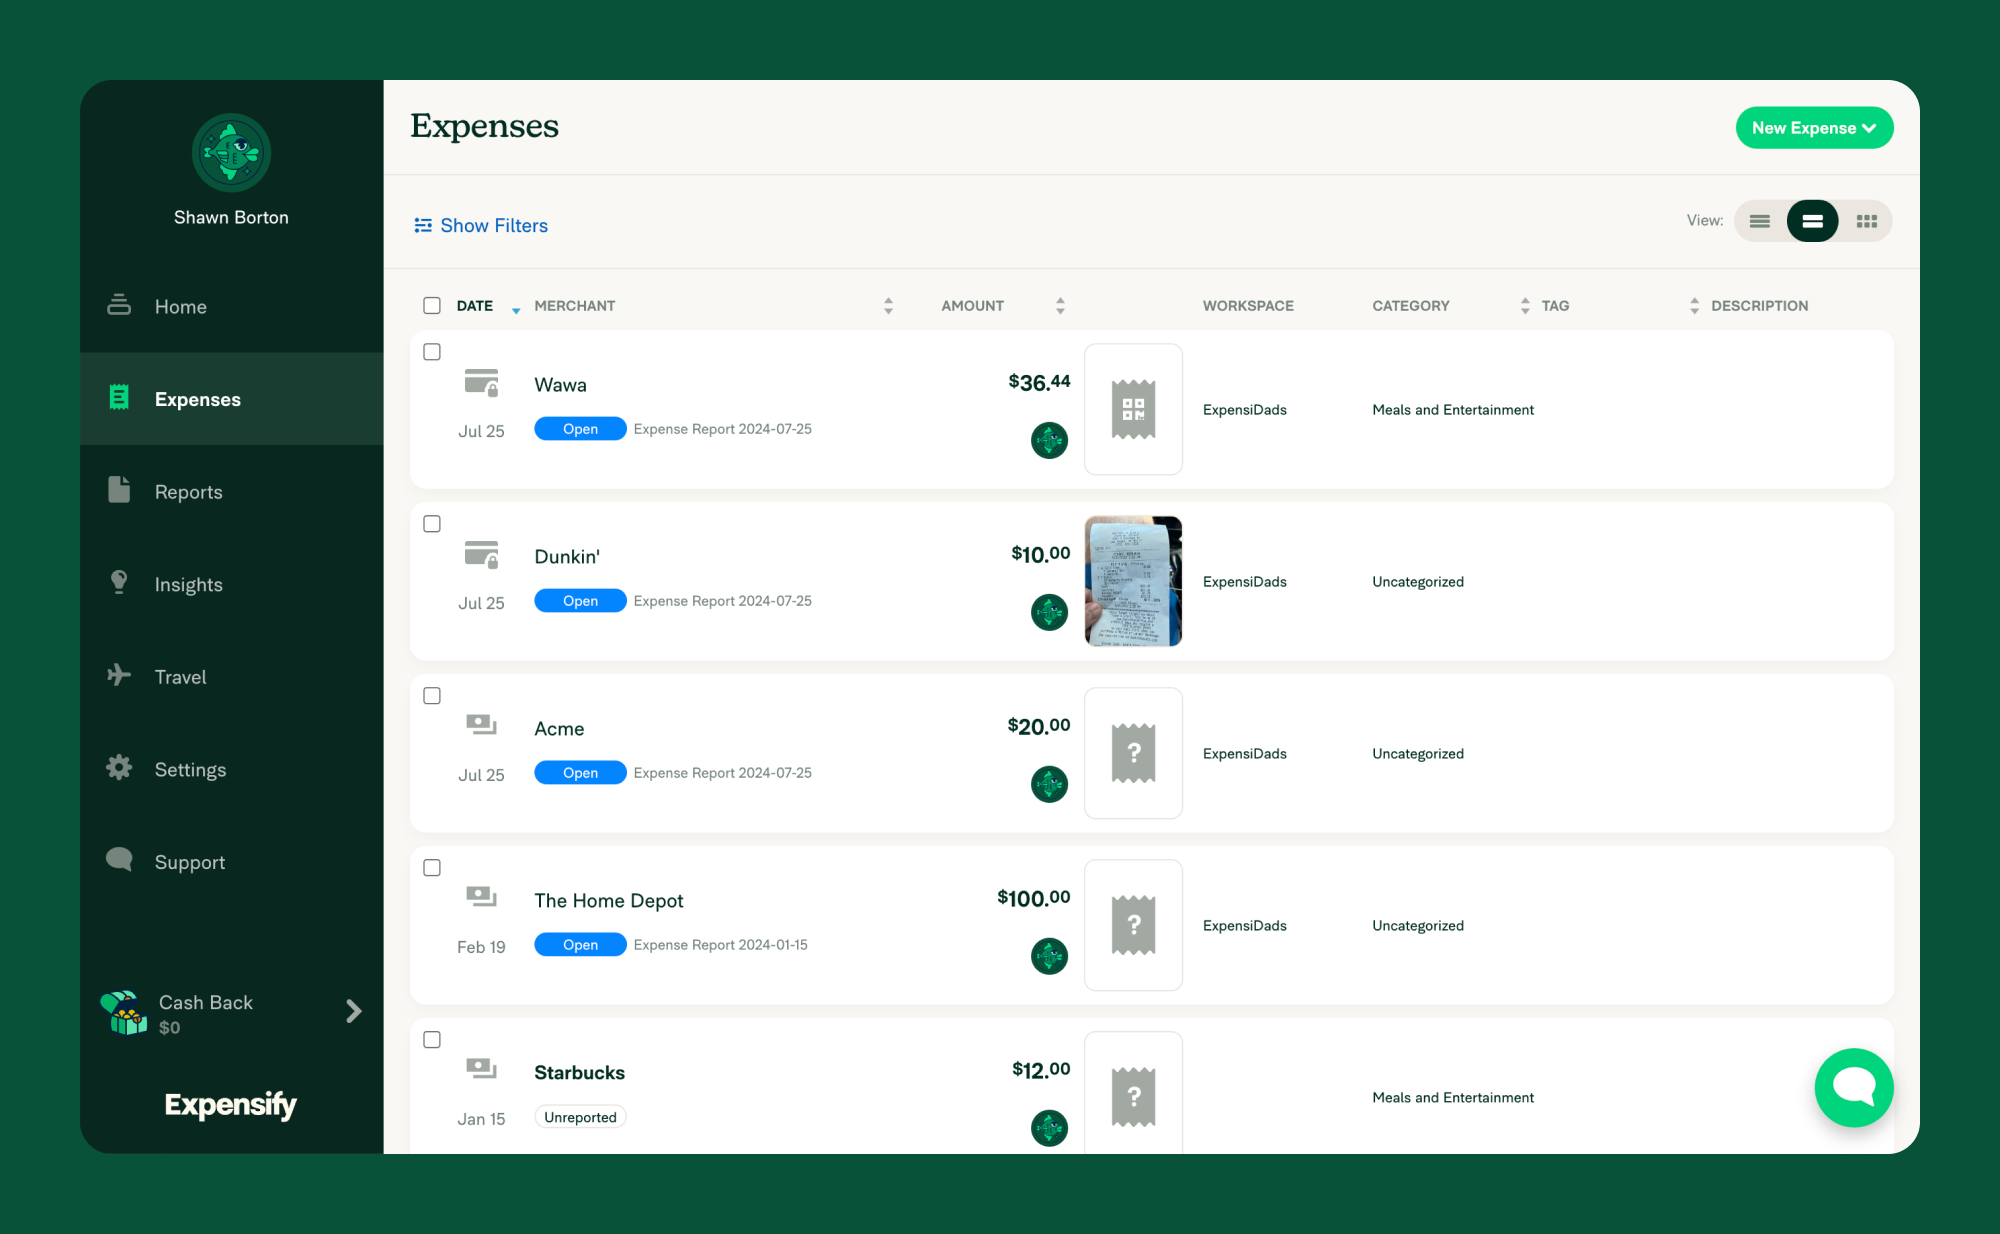
How to identify expense types
Each expense includes an icon that shows how it was created. This helps you understand what can and cannot be edited.
- 🏦 Cash icon: Manually added or SmartScanned
- 💳 Credit card icon: Imported from a personal card
- 📄 Spreadsheet icon: Imported via CSV
- 🔒 Locked credit card icon: Imported from a company card feed or company CSV
Company card expenses (🔒) have stricter editing rules. For example, the amount cannot be changed.
How to edit an expense
On Web:
- Click the Expenses tab.
- Click the expense to open it for editing.
- Click the field you want to change (e.g., category, description, attendees).
- Make the relevant changes and click Save.
On Mobile:
- Tap Expenses.
- Tap the expense you want to edit.
- Tap More Options.
- Update the relevant fields and tap Save.
How to resolve an expense violation
A violation is a flag applied to expenses that break Workspace rules, such as missing required Categories or Tags, or exceeding the allowed amount. Violations should be resolved before reports are submitted and can be approved.
Violations appear directly on the expense with an explanation.
To resolve a violation:
- Open the expense.
- Fix the required field (for example, add a Category or Tag).
If the violation cannot be corrected, you can add a Description explaining the exception.
Note: Expenses with violations can be submitted manually but cannot be submitted automatically. The violation remains visible for review.
How to split an expense
Splitting creates multiple expenses from one original charge. Each split keeps the same receipt image.
To split an expense:
On Web:
- Click the Expenses tab.
- Click the expense to open it for editing.
- Select Split Expense.
- Choose how to divide the expense.
- Click Save.
On Mobile:
- Tap Expenses.
- Select the expense you want to split.
- Tap More Options.
- Choose how to divide the expense.
- Tap Save.
Note: Splitting an expense cannot be undone.
How to merge expenses
You can merge two expenses into one when they represent the same purchase.
To merge two expenses:
On Web:
- Click the Expenses tab.
- Check the box next to the two expenses you want to merge.
- Click Merge.
- Choose which expense details to keep.
- Click Save.
Note: At least one expense must be manually created or SmartScanned - you cannot merge two card expenses together. Merging cannot be undone.
How to delete expenses
Only Unreported or Draft expenses can be deleted, and only the expense submitter can delete them.
To delete expenses:
On Web:
- Click the Expenses tab.
- Check the box next to the Unreported or Draft expenses you want to delete.
- Click the red Trash icon
On Mobile:
- Tap Expenses.
- Select the expense you want to delete. If you need to edit an expense on a submitted report, ask an approver or Workspace Admin to Unapprove the report.
- Tap Delete.
- Tap Delete again to confirm the deletion.
FAQ
What happens when an expense is split?
When an expense is split, each portion becomes its own expense, with the same receipt image duplicated to each. You can assign different categories, tags, or details to each one.
Can I add multiple receipts to a single expense?
No, it’s only possible to add one receipt per expense. However, you can add additional receipts or supporting documents as a Report Attachment. See Add Comments & Attachments to learn more.
Why can’t I edit my expense amount?
Company card expenses have a fixed amount based on imported transaction data and cannot be changed. Manually created or SmartScanned expenses can only be edited by the expense submitter, approvers and Workspace Admins when the report is in the Draft or Outstanding states.
Can I edit an expense after it has been approved?
No, approved expenses cannot be edited unless the report is Unapproved.
If you need to edit an expense on a submitted report, ask approver or Workspace Admin to Unapprove the report.
Can I undo a split expense?
No, it can’t be undone once an expense is split and saved. If you want to start over, delete the split expenses and re-upload the receipt.
Will each split have the same receipt image?
Yes. The same image will appear on all the split expenses for easy reference and audit compliance.
Can I apply different categories or tags to each split?
Absolutely! That’s one of the main benefits of splitting an expense — you can customize each part individually.