


Expense Rules
Expense rules in Expensify help automate the categorization, tagging, and reporting of expenses based on merchant names, reducing manual work. By setting up these rules at the account level, employees can streamline expense management and ensure consistency across reports.
Note: These are personal expense rules that apply only to your individual account.
Workspace Admins who need to enforce merchant-based coding across all workspace members can set up Workspace Merchant Rules, which apply to all expenses but can only be configured in New Expensify.
Create an Expense Rule
- Hover over Settings and click Account.
- Click Expense Rules.
- Click New Rule.
- In the Merchant Name Contains field, enter part of the merchant name that should trigger the rule.
- Note: If you enter only a period (
.), the rule applies to all expenses. Universal Rules take precedence over all other expense rules.
- Note: If you enter only a period (
- Select the rules to apply when a matching expense is detected:
- Merchant: Standardizes the merchant name (e.g., “Starbucks #238” → “Starbucks”).
- Category: Assigns a workspace category to the expense.
- Tag: Adds a tag (e.g., Department or Location).
- Description: Updates the description field of the expense.
- Reimbursability: Marks the expense as reimbursable or non-reimbursable.
- Billable: Flags the expense as billable.
- Add to a report named: Assigns the expense to a specific report. If Create report if necessary is selected, a new one is created if the report does not exist.
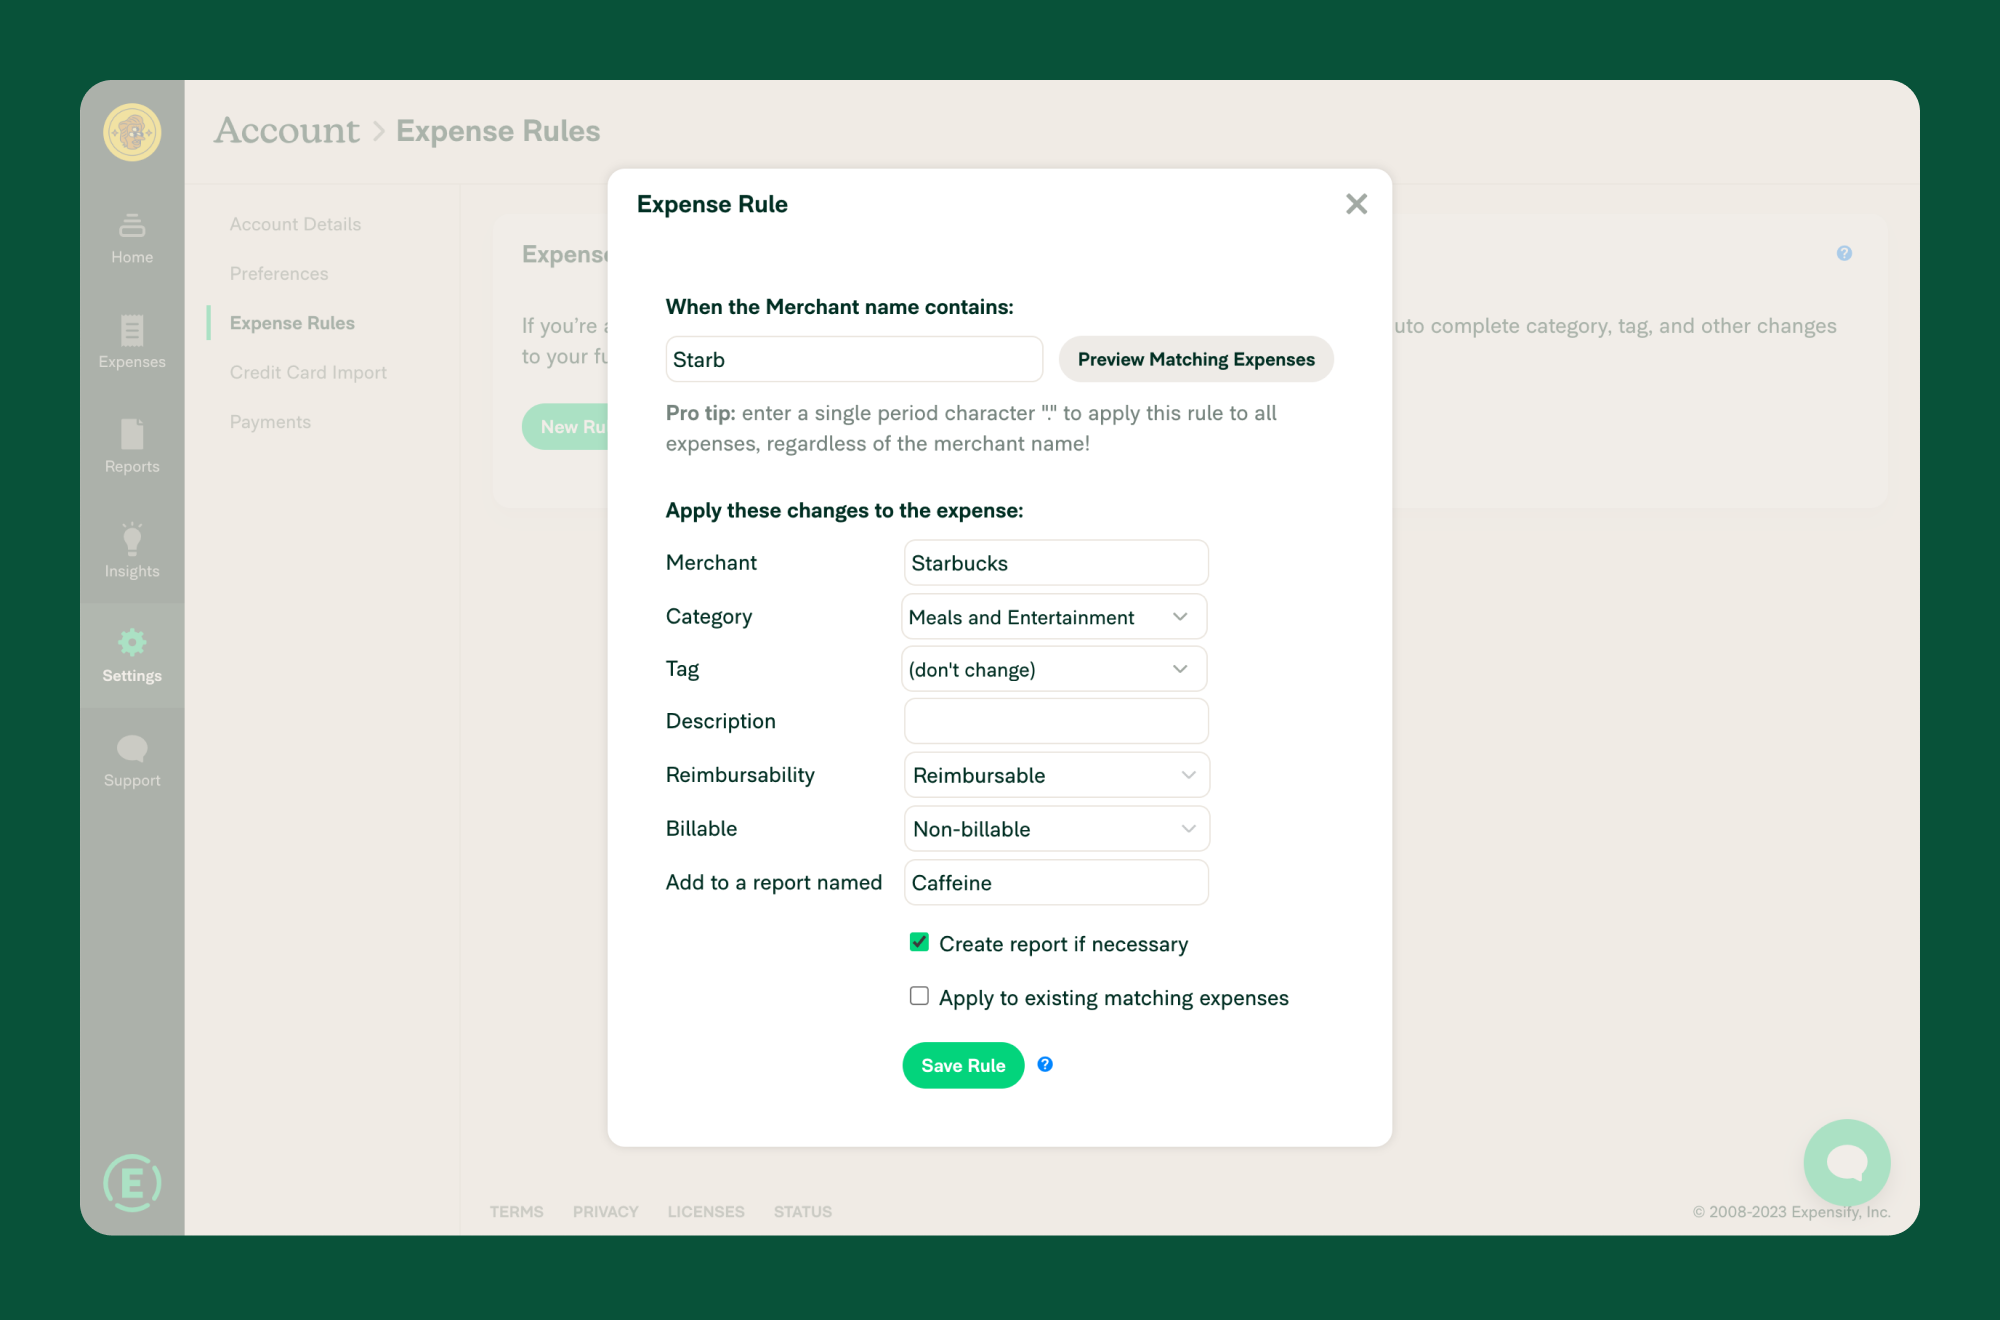
- (Optional) Select Apply to existing matching expenses to update past expenses.
- Click Preview Matching Expenses to check if the rule applies correctly.
How Rules Are Applied
Expense rules are processed from top to bottom in the list. However, other settings may override them. The rule hierarchy is:
- Universal Rules always override other expense category rules.
- Scheduled Submit with Enforce Default Report Title enabled takes precedence over expense rule-based report assignments.
- Company Card Rules for enforced workspaces take priority over individual expense rules.
- Accounting Integrations may override expense rule settings when expenses are exported.
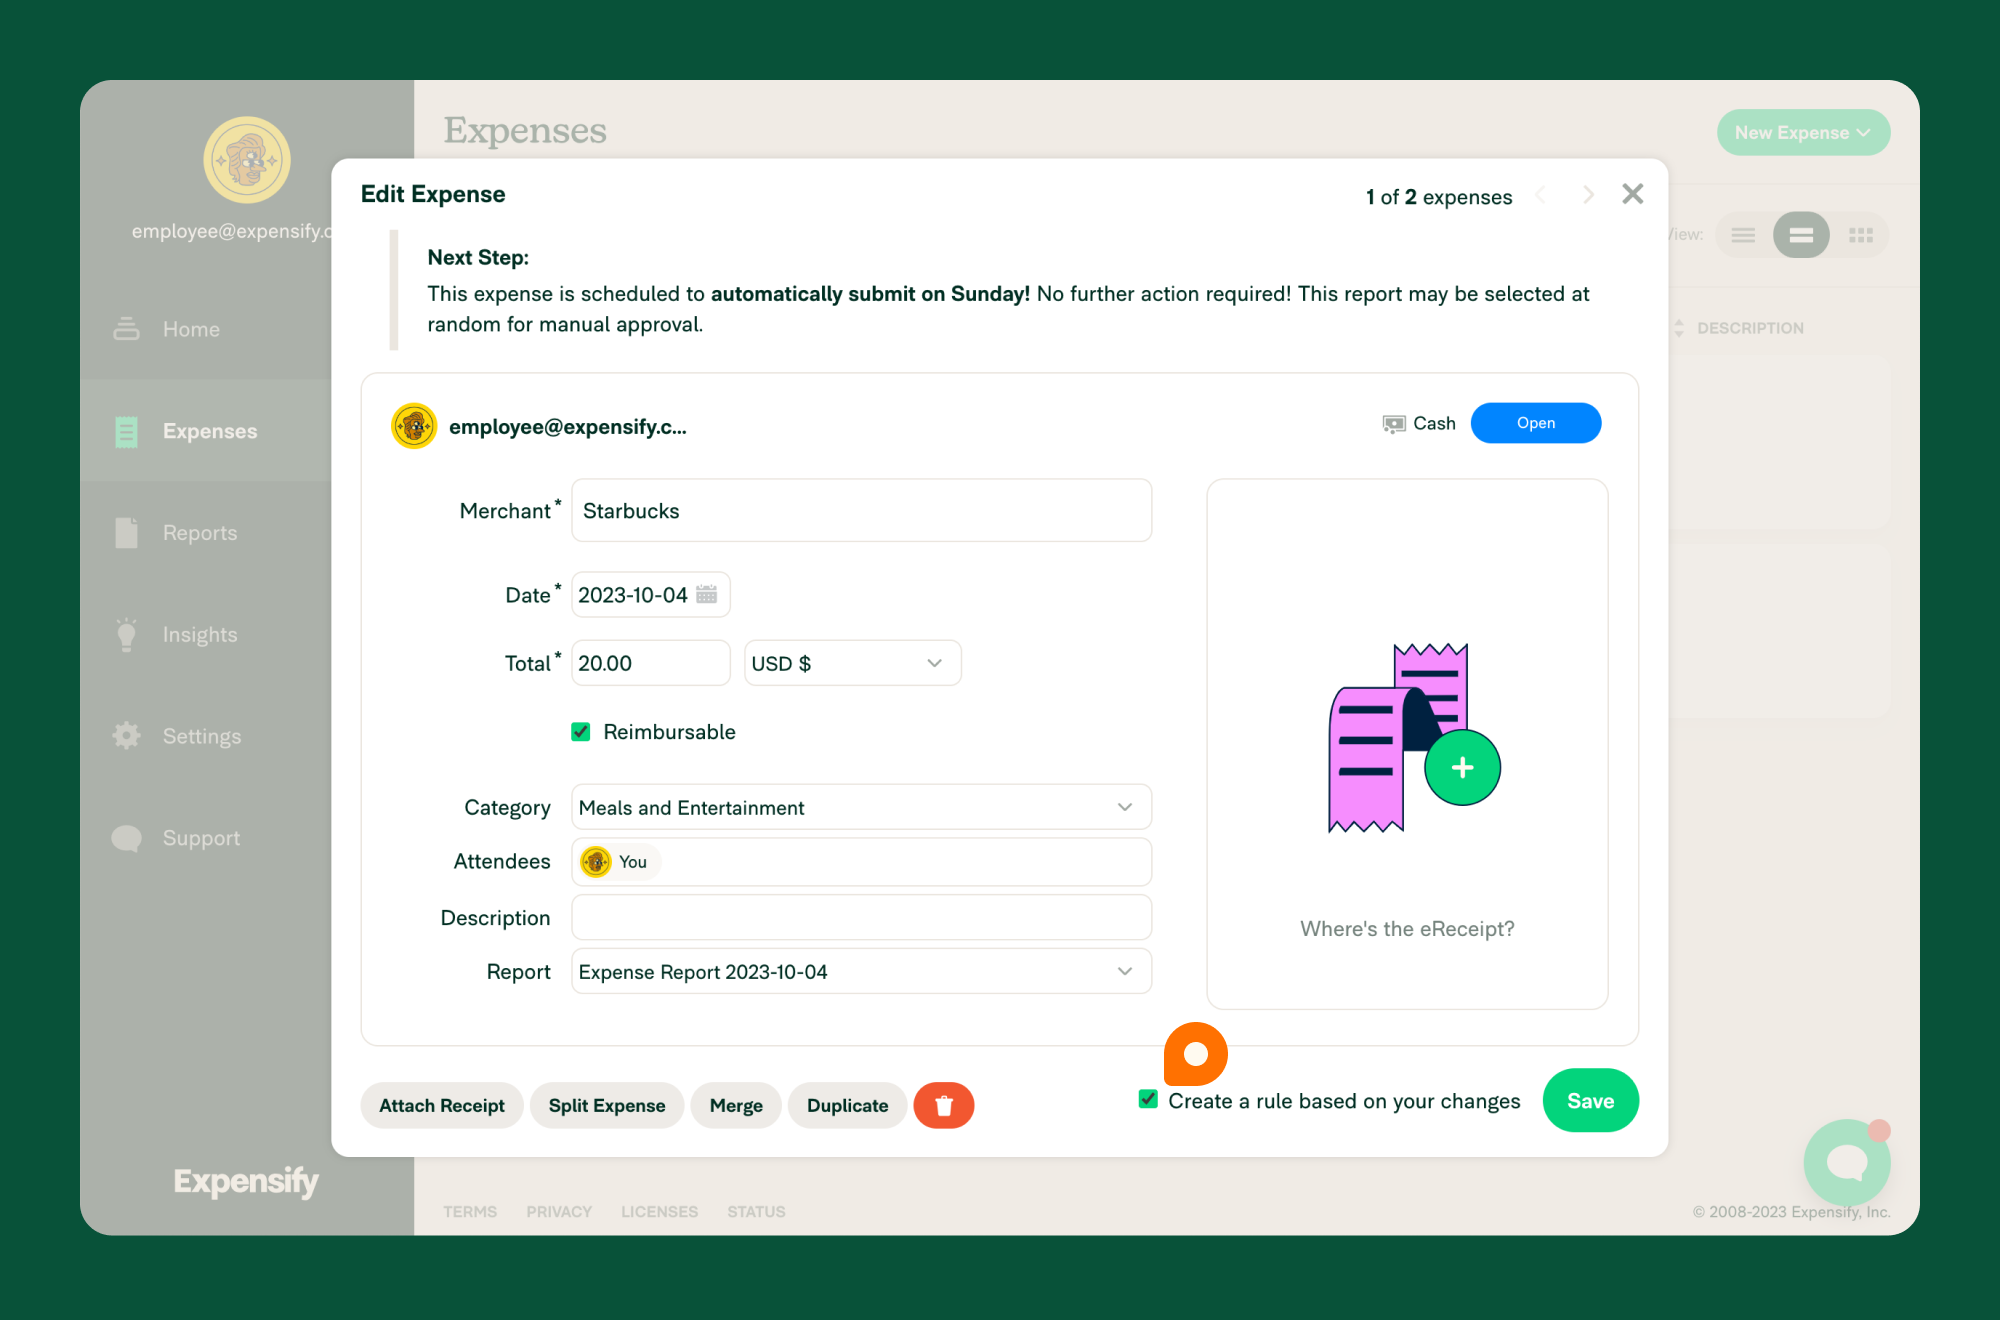
Create an Expense Rule from an Edited Expense
If you modify an expense manually, you can create a rule based on those changes:
- Open the expense.
- Make the necessary edits.
- Select Create a rule based on your changes before saving.
- Note: The option appears only after saving, reopening, and editing an expense.
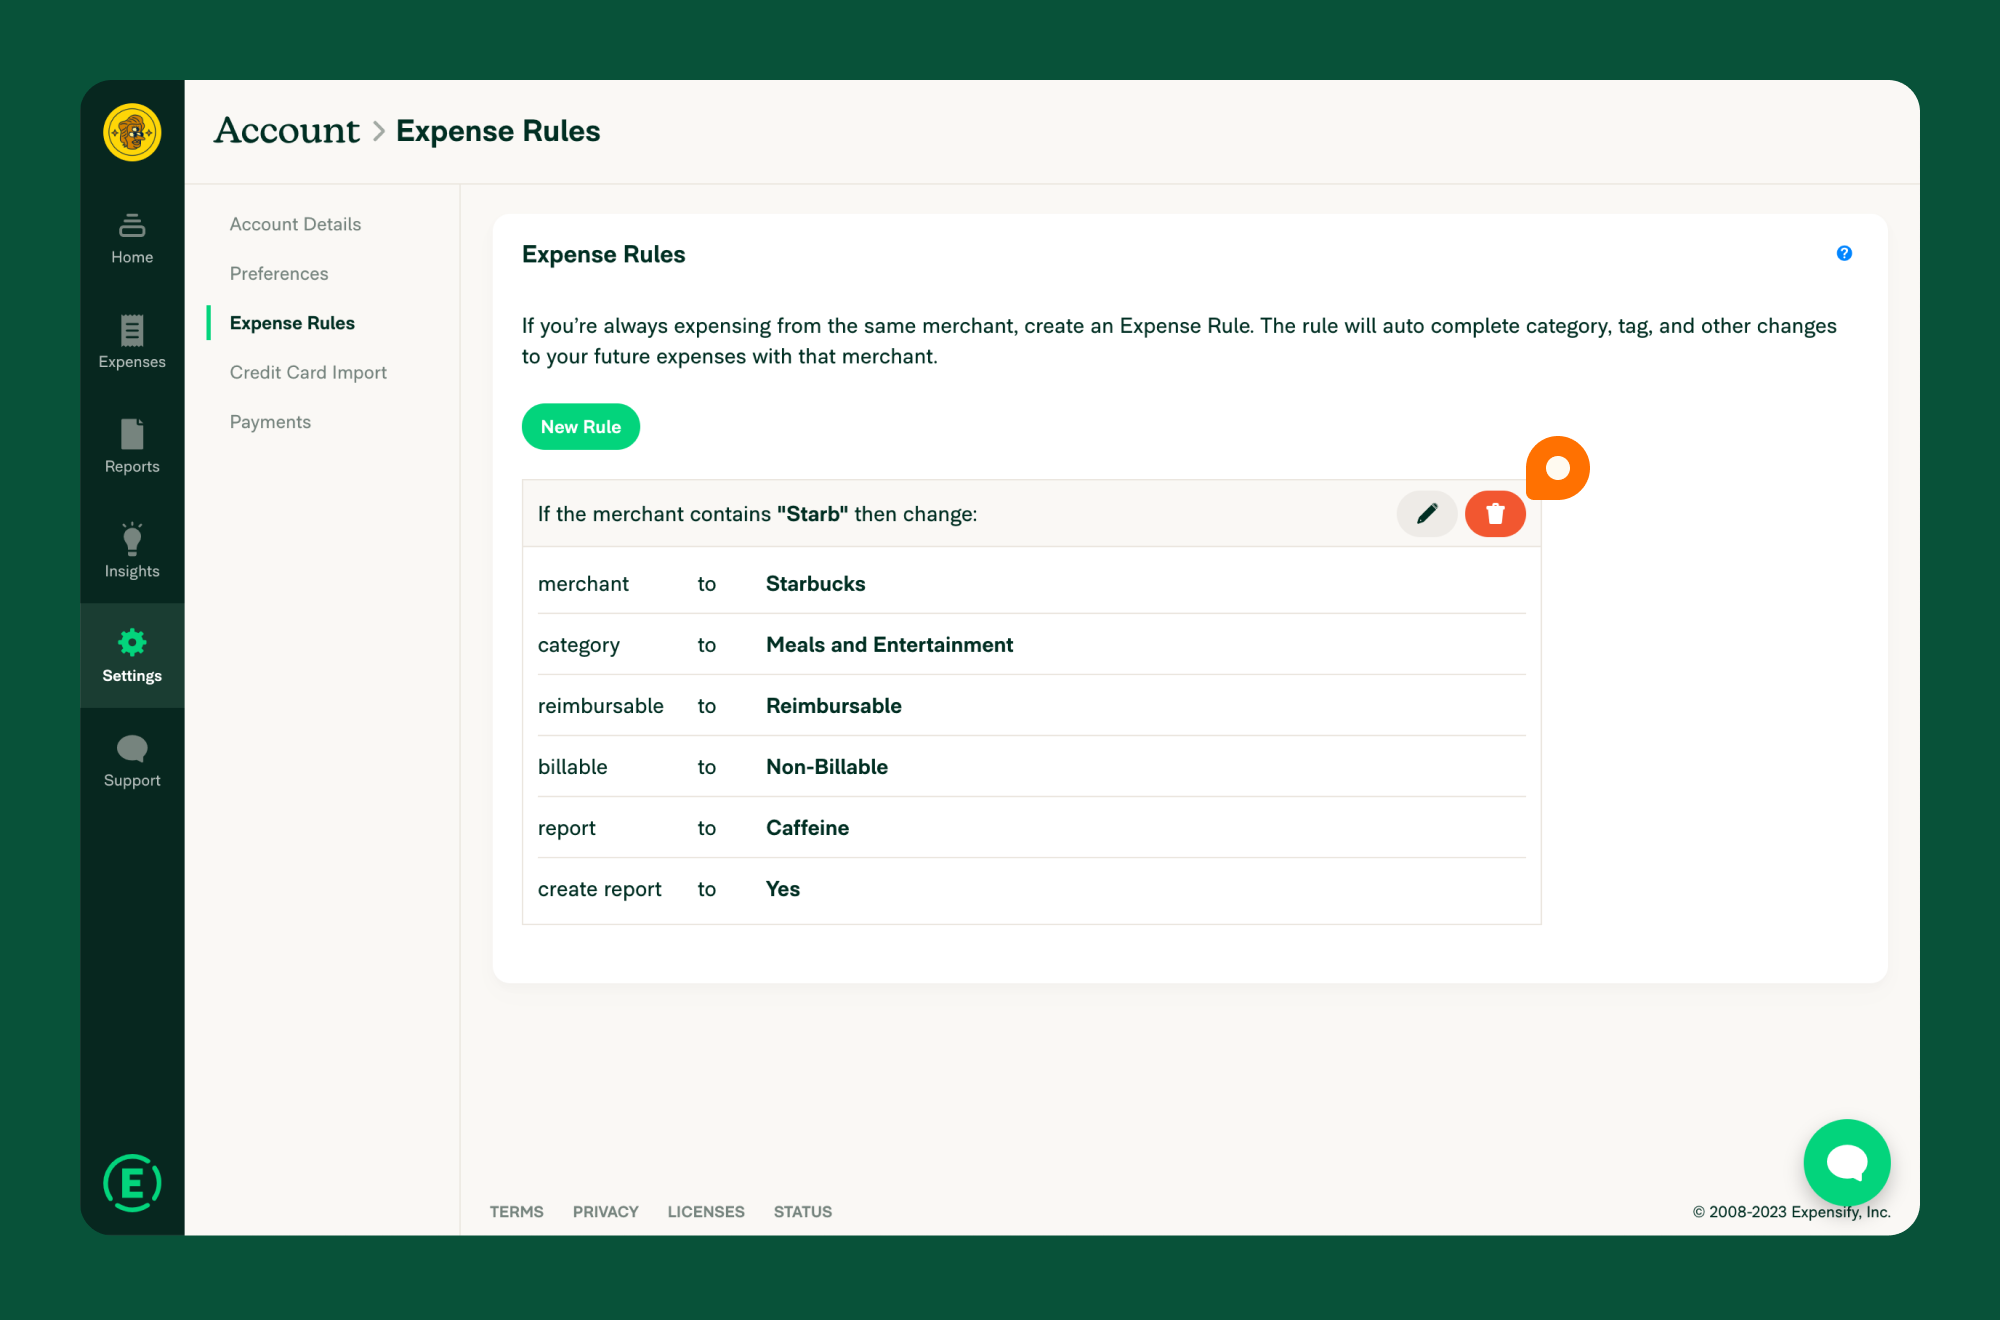
Delete an Expense Rule
- Hover over Settings and click Account.
- Click Expense Rules.
- Find the rule you want to remove and click the Trash icon.
FAQ
How can I use expense rules for vendor matching in an accounting integration?
When exporting non-reimbursable expenses, the Payee field in the accounting software will show “Credit Card Misc.” if there is no exact match for the merchant name. This prevents multiple variations of the same vendor (e.g., “Starbucks” vs. “Starbucks #1234”) from being created.
To avoid this, use Expense Rules to standardize vendor names before export.
- Supported integrations: QuickBooks Online, QuickBooks Desktop, Xero.
- Not supported for: NetSuite, Sage Intacct (due to API limitations).