


Configure Sage Intacct
By properly configuring your Sage Intacct settings in Expensify, you can automate many tasks, streamlining your expense management workflow.
Configure Export Settings
Expensify offers several options for exporting reports to Sage Intacct. Follow these steps to customize the export settings based on your business needs.
To access these settings:
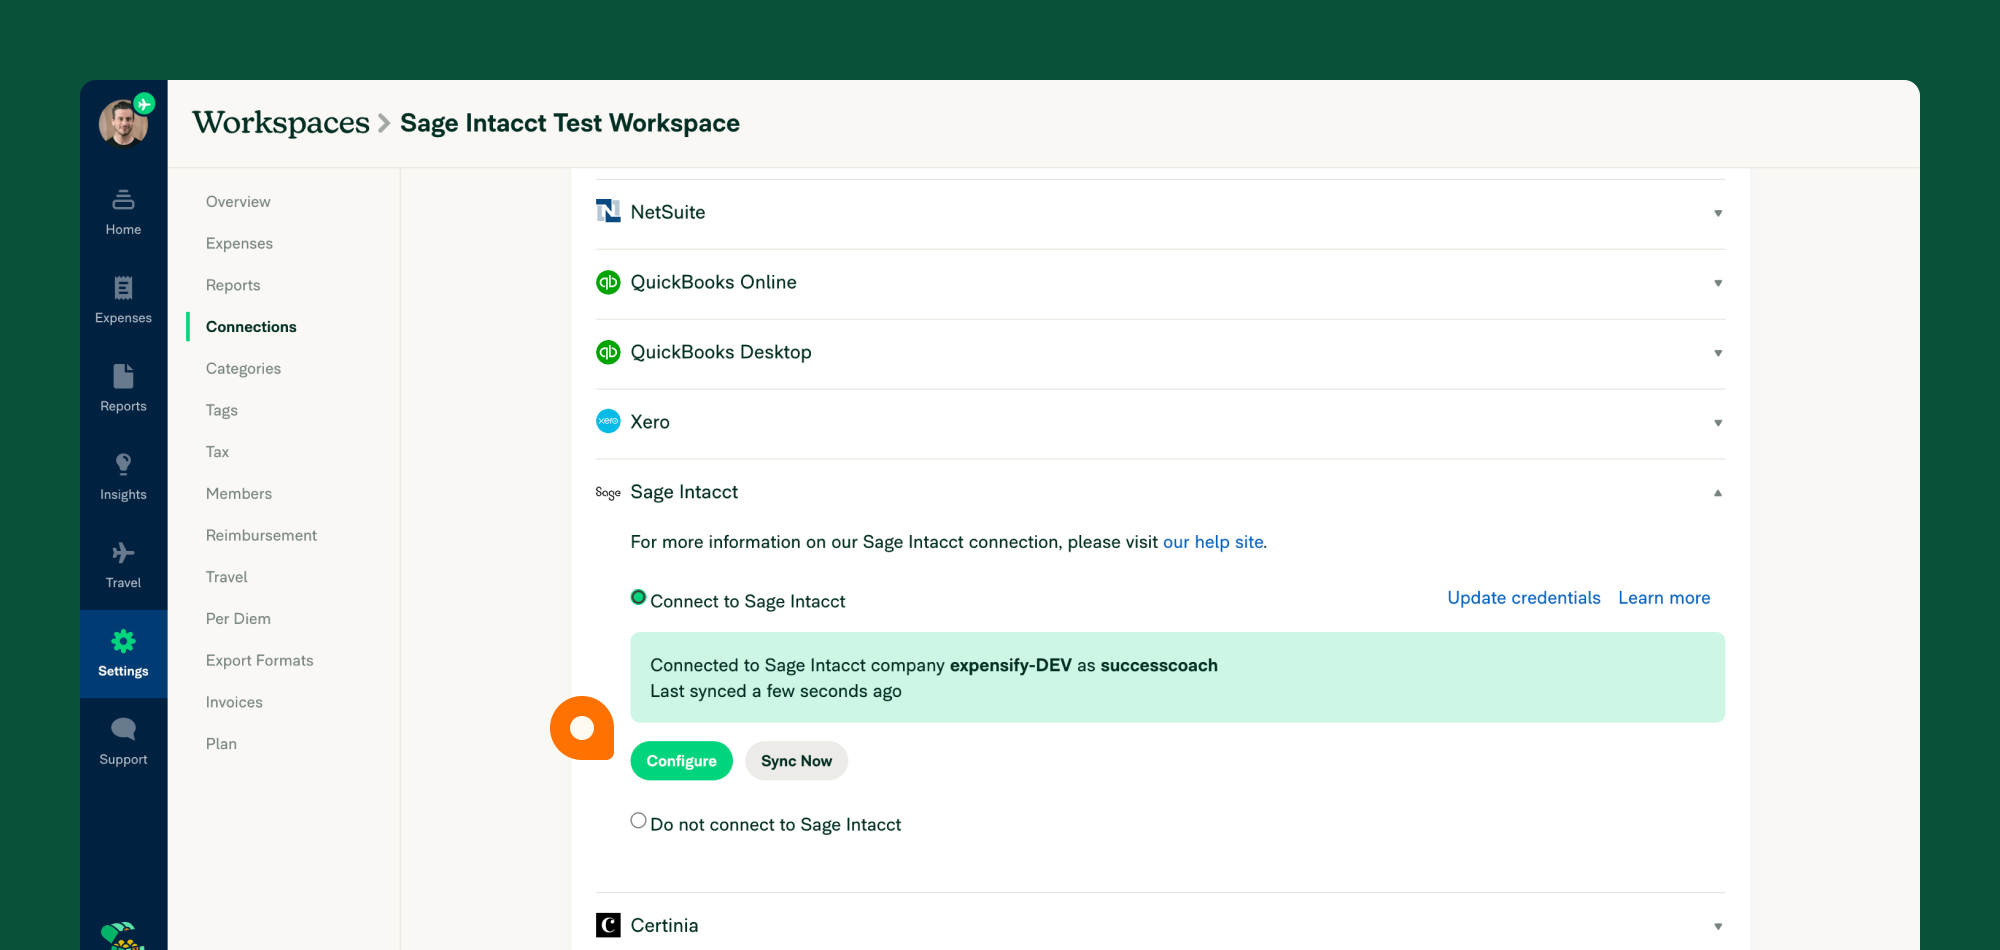
- Navigate to Settings > Workspaces > Group > Accounting.
- Select Configure under the Sage Intacct integration.
Export Options
Preferred Exporter
Any Workspace Admin can export reports to Sage Intacct, but only the Preferred Exporter will receive notifications regarding the export status.
Export Date Options
Choose from the following export date options:
- Date of last expense: Uses the date of the most recent expense in the report.
- Exported date: Uses the date when the report is exported to Sage Intacct.
- Submitted date: Uses the date when the report creator originally submitted the report.
Note: All export options (except for credit cards) use the selected date format. Credit card transactions always use the transaction date.
Reimbursable Expenses
Reimbursable expenses can be exported as either:
- Expense Reports, or
- Vendor Bills (depending on your initial setup).
Non-Reimbursable Expenses
Non-reimbursable expenses will be exported separately from reimbursable expenses and can be categorized as either:
- Vendor Bills, or
- Credit Card Charges (to a selected account).
Expensify does not support exporting non-reimbursable expenses as Journal Entries.
Configuring Company Card Export Settings
If your company centrally manages cards through Domain Settings, you can configure exports per cardholder:
- Go to Settings > Domains > [Domain Name] > Company Cards.
- Select the company card connection (if multiple exist).
- Locate the relevant cardholder.
- Click Edit Exports and assign the correct account for Sage Intacct exports.
Note: If you have Multi-Currency enabled, credit card transactions must be exported to a specific entity rather than the top level.
Exporting Negative Expenses
Negative expenses can be exported to Sage Intacct, but if using Expense Reports, the total report amount cannot be negative.
Configure Coding Settings
The way your expense data appears in Sage Intacct depends on your coding settings in Expensify.
Expense Types
Categories are the primary method for matching expenses to Sage Intacct accounts. The category type depends on your Reimbursable Export settings:
- Expense Reports → Categories are Expense Types.
- Vendor Bills → Categories are Chart of Accounts (GL Codes).
To manage categories:
- Go to Settings > Workspaces > Group > [Workspace Name] > Categories.
- Disable unnecessary categories as needed.
Note: Every expense must be assigned a category to export successfully.
Billable Expenses
Enable Billable Expenses to map expense types or accounts to Items in Sage Intacct. This requires:
- Read-only permissions for relevant Sage Intacct modules (e.g., Projects, Purchasing, Inventory Control, Order Entry).
- Mapping categories to items in Expensify.
If an expense is marked Billable, the correct category (item) must be selected to avoid export errors.
Dimensions: Departments, Classes, and Locations
Expensify supports three-dimensional settings:
- Employee Default – Applies when using Expense Reports.
- Tags – Enables selection at the report/expense level.
- Report Fields – Assigns at the report level (useful for varying locations per report).
If “Tags” appear instead of “Departments,” ensure:
- Projects are enabled in Tags settings.
- Dimensions are enabled in the Sage Intacct integration settings.
Customers and Projects
These settings are particularly relevant for billable expenses and can be assigned as Tags or Report Fields.
Tax Settings
Expensify supports native VAT and GST tax with Sage Intacct. To enable:
- Open Sage Intacct Configuration in Expensify.
- Navigate to the Coding tab and toggle on Tax.
- Resync the workspace to import tax rates from Sage Intacct.
Note: Default tax rates can be assigned per category.
User-Defined Dimensions (UDD)
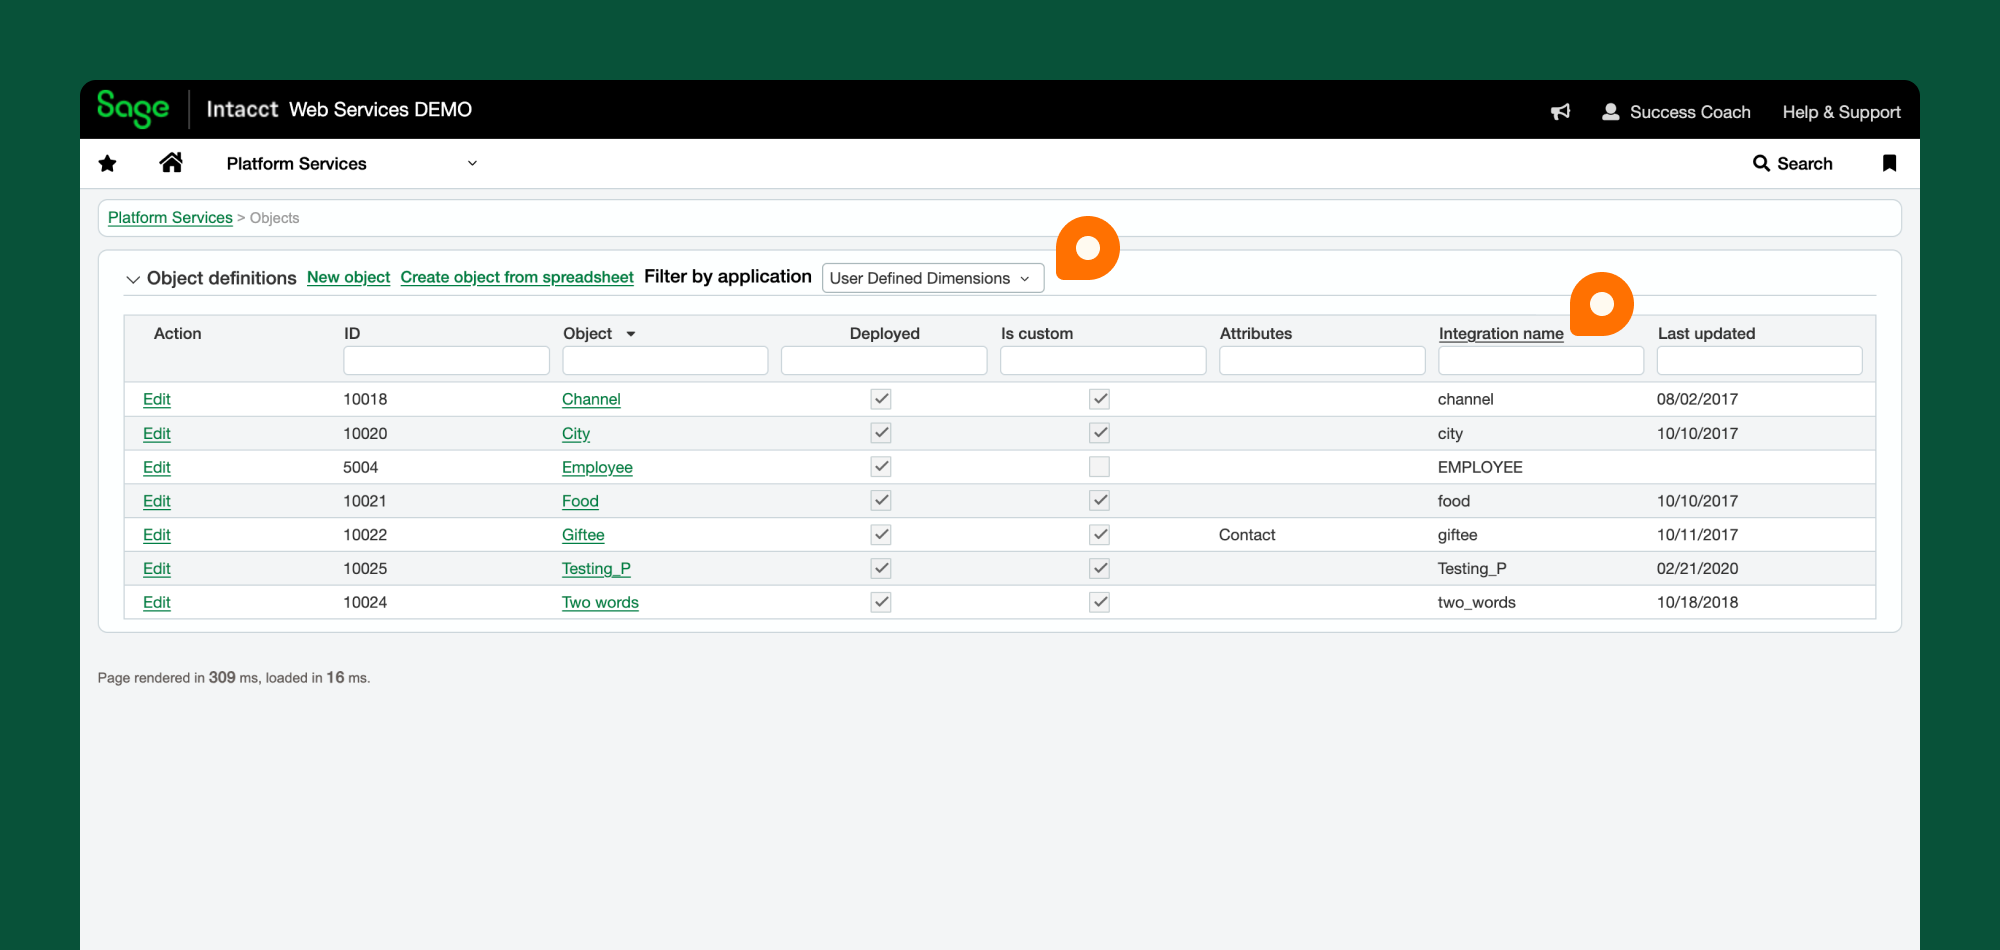
User-Defined Dimensions (UDD) can be added to your workspace by retrieving the Integration Name from Sage Intacct.
To find it in Sage Intacct:
- Go to Platform Services > Objects > List.
- Filter by User-Defined Dimensions.
To set this up:
- Go to Settings > Workspaces > Group > [Workspace Name] > Accounting.
- Click Configure under Sage Intacct.
- On the Coding tab, enable User Defined Dimensions.
- Enter the Integration Name and choose whether to import it as a Tag or Report Field.
- Click Save.
Configure Advanced Settings
Multi-Entity Sync
In multi-entity environments, select whether to sync at the top level or with a specific entity:
- Top-Level Sync: Imports employees and dimensions shared at the top level, exporting transactions accordingly.
- Entity-Level Sync: Syncs data with the selected entity.
Auto Sync
If enabled, non-reimbursable reports will be exported to Sage Intacct upon final approval.
For reimbursable expenses, reports are exported only after reimbursement (if using Expensify ACH).
Inviting Employees
Enabling Invite Employees will automatically:
- Add employees to your workspace.
- Create Expensify accounts for them (if they don’t have one).
If your domain is verified, the Expensify account linked to Sage Intacct must be a Domain Admin.
Importing Sage Intacct Approvals
When enabled, Expensify will set each employee’s Sage Intacct Manager as their first approver.
Approval options:
- Basic Approval: All users submit to one approver.
- Manager Approval: Employees submit to their Sage Intacct manager, who may forward to a final approver.
- Configure Manually: Employees are imported, but the approval workflow is set up manually.
Sync Reimbursed Reports
When using Expensify ACH, reimbursed reports will export as:
- Vendor Bills (to the default AP account in Sage Intacct).
- Expense Reports (to the Employee Liabilities account).
If Auto Sync is enabled, Bill Payments will be created upon reimbursement.
Note: Sage Intacct requires Bill Payments to be assigned to Cash and Cash Equivalents accounts.
FAQ
Why didn’t my report export automatically to Sage Intacct?
If your report didn’t export automatically, here are some possible reasons:
- The Preferred Exporter will receive an email and an Inbox task with details.
- The Report Comments section will also display error messages.
Check the Expensify Community for solutions or contact Concierge for assistance.
How can I ensure reports are final approved before export?
Make sure your approval workflow is correctly configured. If your domain is verified, enforce workspace workflows via: Settings > Domains > [Domain Name] > Groups.
What happens to existing reports if I enable Auto Sync?
- Reports not exported to Sage Intacct will remain unaffected.
- Reports already exported and reimbursed will be marked Paid in Sage Intacct on the next sync.
- Reports marked paid in Sage Intacct will be marked Reimbursed in Expensify.
- Reports not yet exported will not be automatically exported.