


Connect To QuickBooks Online
Expensify’s integration with QuickBooks Online allows you to import expense accounts, sync financial data, and export reports directly for streamlined reconciliation. This guide walks you through setting up the connection and ensuring a smooth integration.
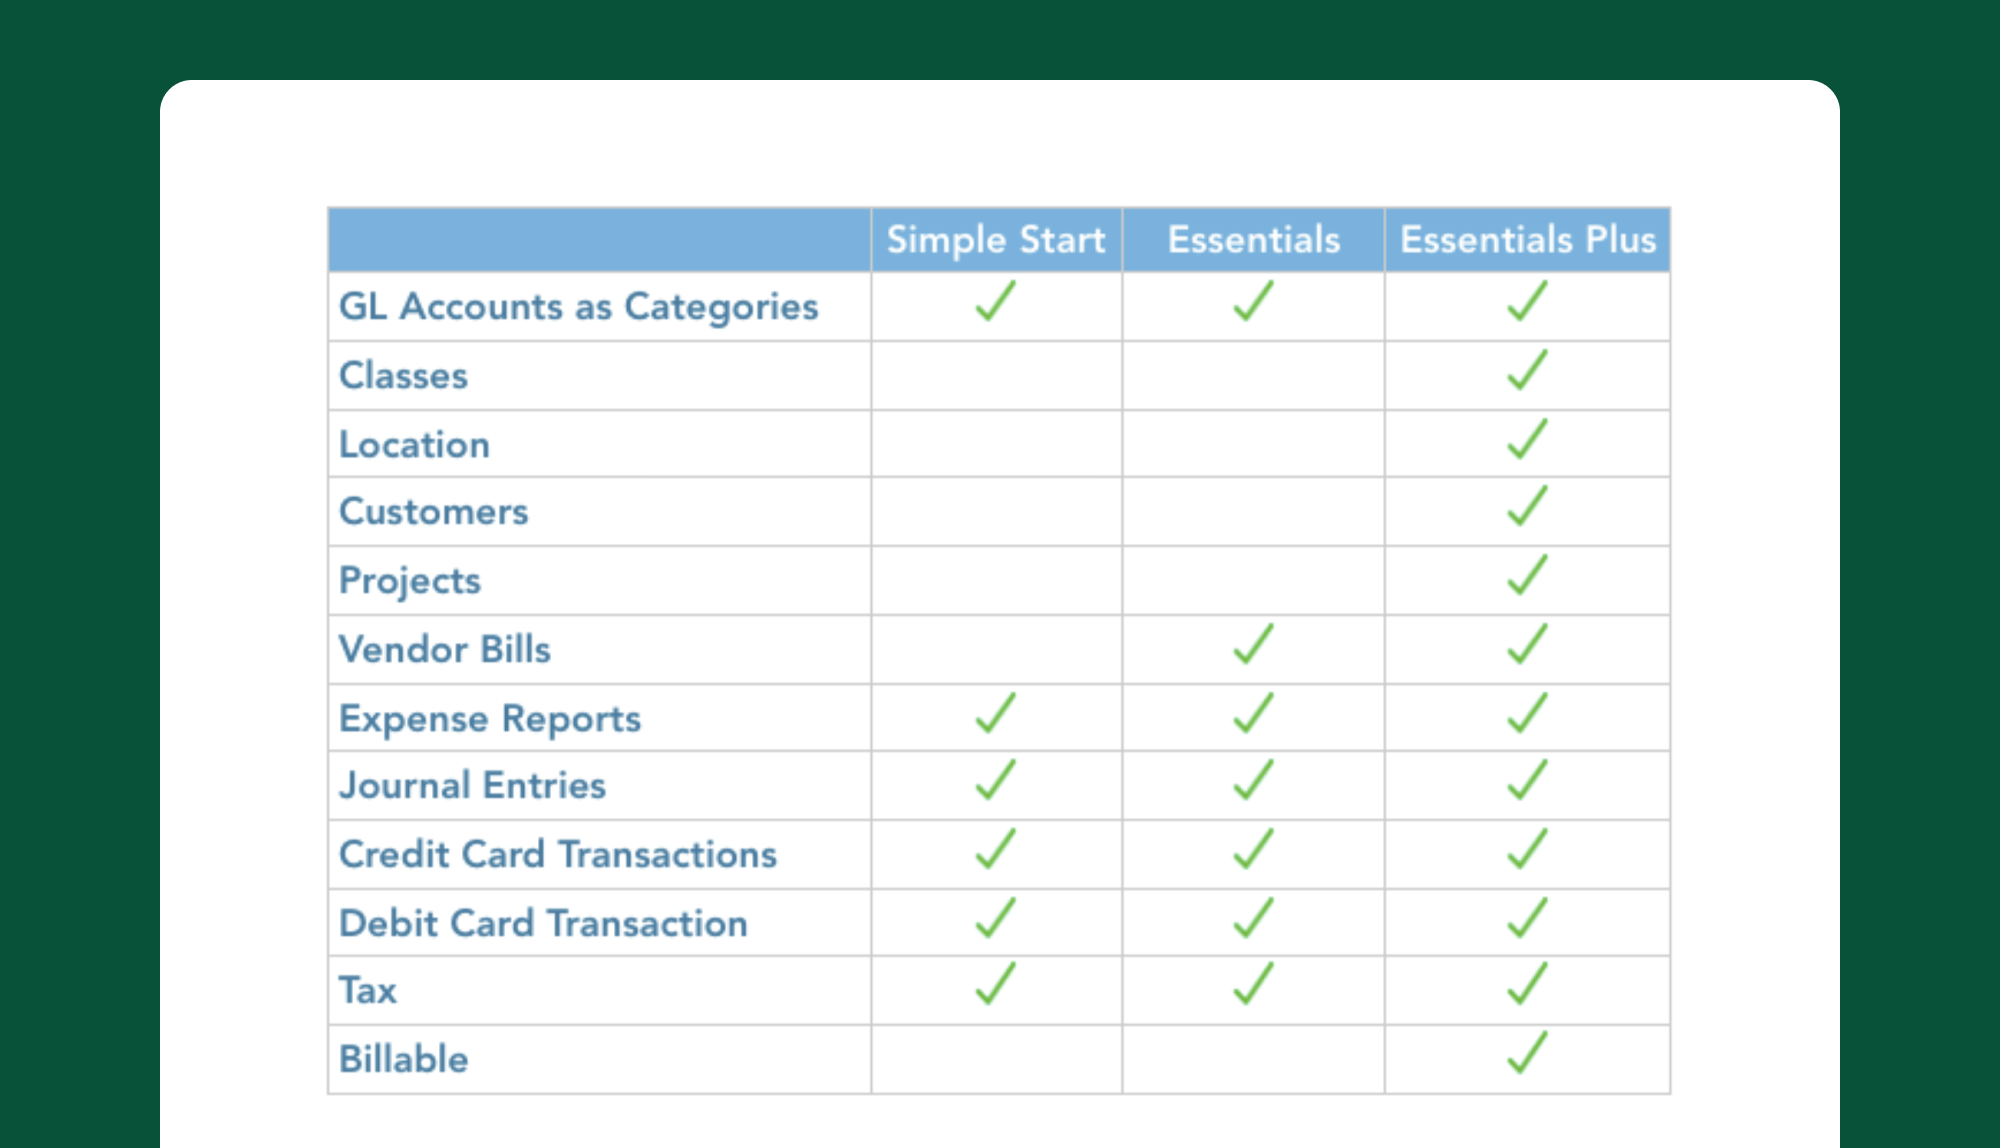
To avoid errors and ensure compatibility, consider the following:
- Certain features in Expensify may not be compatible with your QuickBooks Online setup.
- If a feature is enabled in Expensify but not supported by your QuickBooks Online plan, an export error will occur.
- Expensify does not support QuickBooks Online Self-Employed.
Note: Make sure your QuickBooks Online subscription supports the necessary features before proceeding.
Step 1: Set Up Employees in QuickBooks Online
Before connecting, ensure that employees are set up correctly in QuickBooks Online:
- Employees must be listed as Vendors or Employees within QuickBooks Online.
- Include each submitter’s email address in their record.
Export Options Based on Record Type:
- Vendor Records: Export as Vendor Bills, Checks, or Journal Entries.
- Employee Records: Export as Checks or Journal Entries (if using a liability account).
Step 2: Connect Expensify to QuickBooks Online
- Go to Settings in the left-hand menu.
- Navigate to Workspaces > Groups > [Workspace Name] > Accounting.
- Click Connect to QuickBooks Online.
- Select Create a New QuickBooks Online Connection.
- Enter your QuickBooks Online Administrator login credentials.
- Choose the QuickBooks Online Company File to connect (only one Company File per Workspace).
- Click Authorize.
- You’ll be redirected back to Expensify, and initial settings will sync from QuickBooks Online.
- Once the sync is complete, the QuickBooks Online configuration window will open automatically.
- Adjust export, import, and advanced settings as needed.
- Click Save to finalize the connection.
Step 3: Export Historical Reports to QuickBooks Online
After connecting, you can export past reports from Expensify to QuickBooks Online in bulk.
To export multiple reports:
- Open the Reports page in a web browser.
- Reset the filters, then adjust them to display the reports you want to export.
- Check the box next to each report.
- Click Export To, then select QuickBooks Online.
- If you do not want to export specific reports, select Mark as Manually Entered instead.