


Connect To QuickBooks Desktop
QuickBooks Desktop is an accounting software developed by Intuit, designed to support small and medium-sized businesses in managing financial and accounting tasks. Integrating Expensify with QuickBooks Desktop streamlines expense management for your organization.
Connect QuickBooks Desktop to Expensify
Important: To successfully connect, you must be logged into QuickBooks Desktop as an Admin, and the desired company file must be the only open file.
Step 1: Set Up the Connection in Expensify
- Log into Expensify and go to Settings > Workspaces.
- Select the workspace you want to integrate with QuickBooks Desktop.
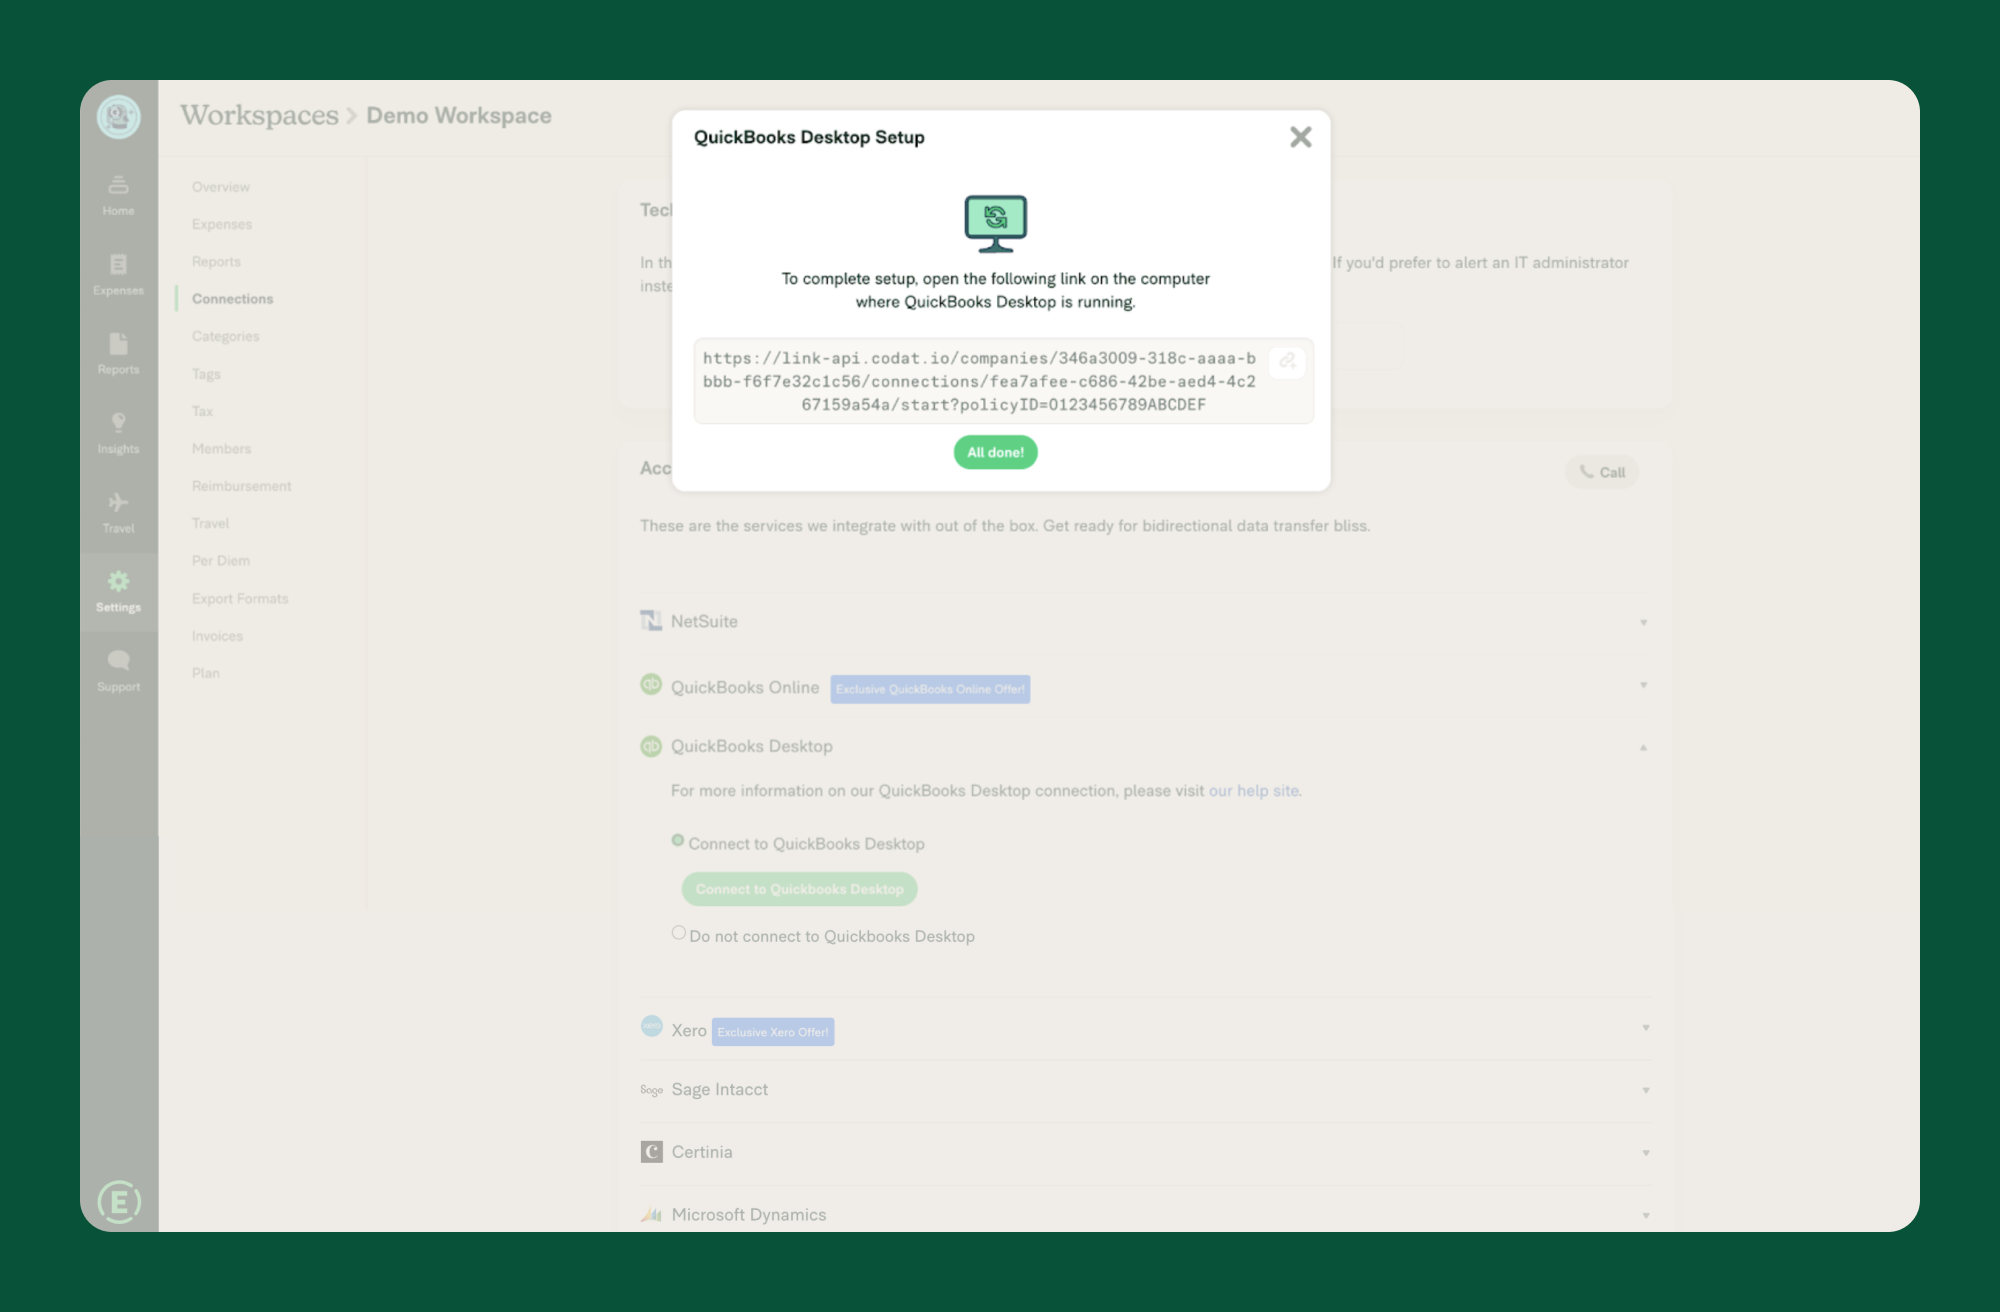
- Navigate to the Accounting tab and click Connect to QuickBooks Desktop.
-
Copy the provided link and paste it into the computer where QuickBooks Desktop is installed.
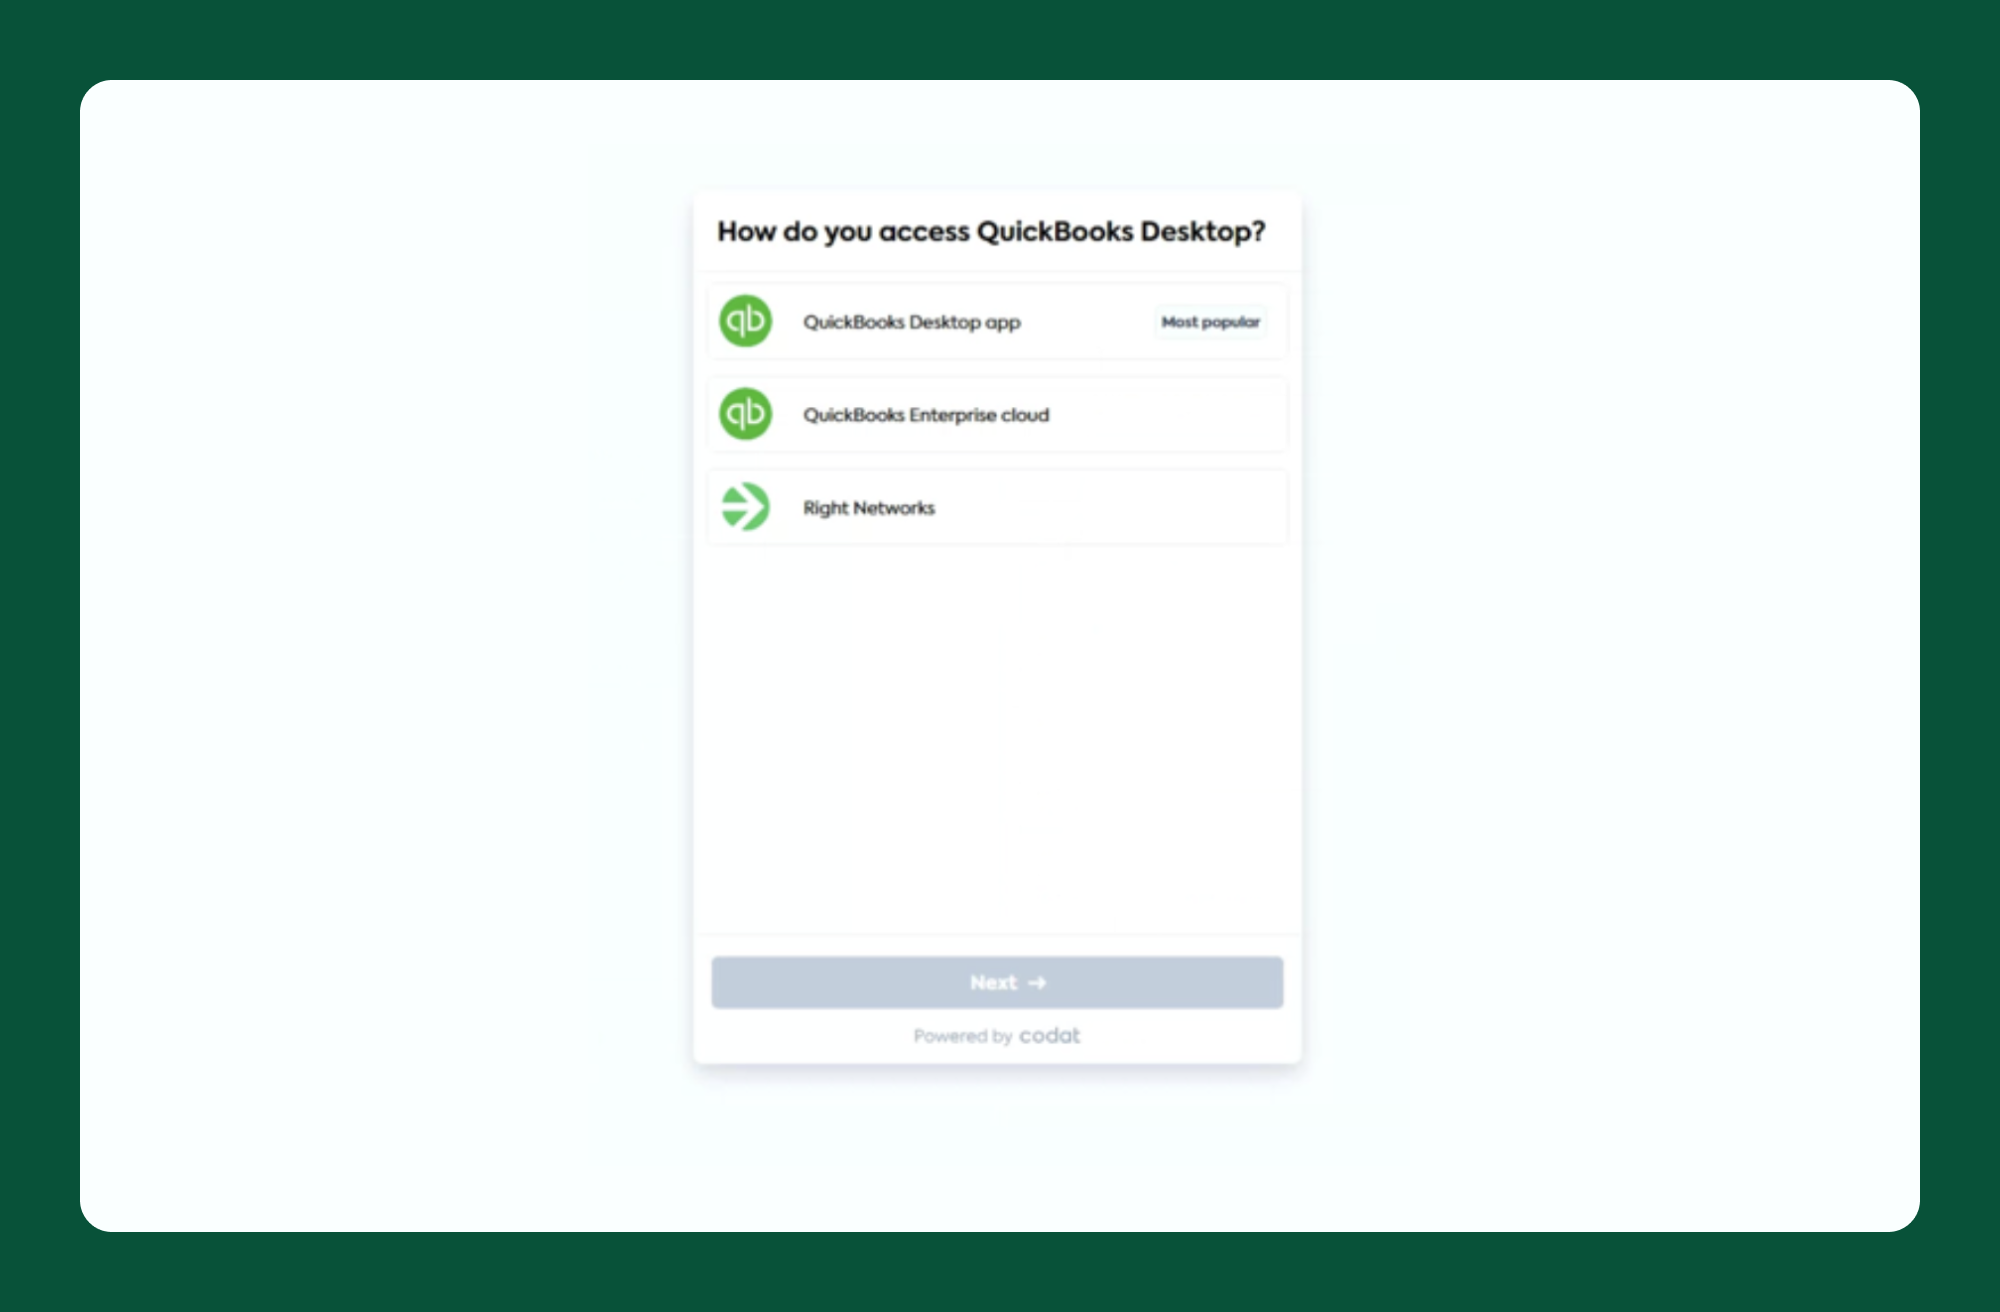
- Choose your version of QuickBooks Desktop when prompted.
Step 2: Install and Configure the Web Connector
- Download and install the QuickBooks Web Connector following the on-screen instructions.
- Open the Web Connector after installation.
- Download the configuration file when prompted and open it in File Explorer. This will load the integration into the Web Connector automatically.
Tip: Ensure the correct company file is open in QuickBooks Desktop and the only open file during setup.
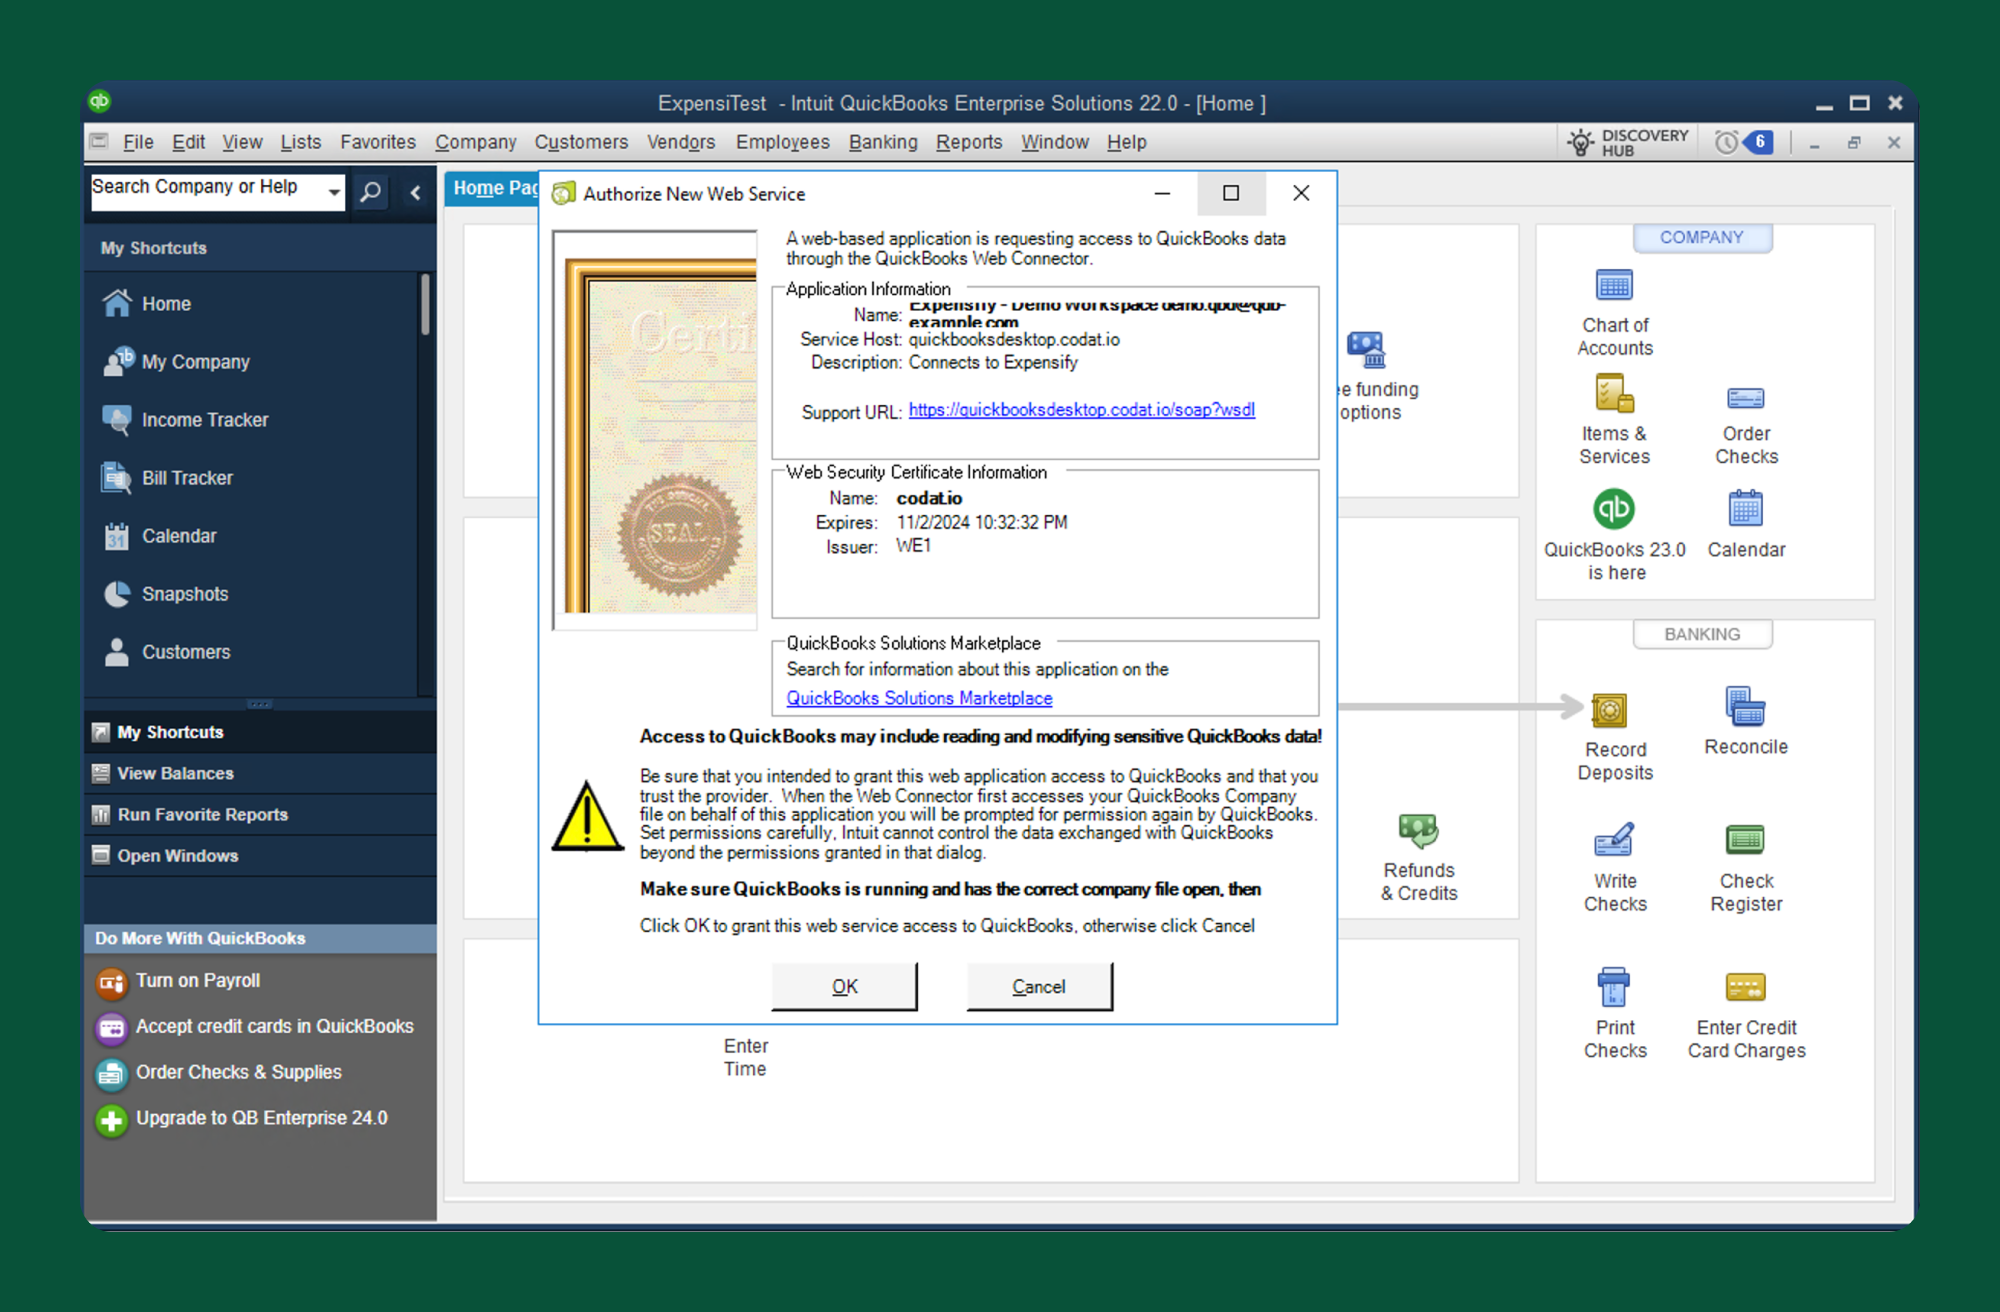
Step 3: Authorize Access and Finalize Setup
-
In QuickBooks Desktop, select Yes, always allow access, even when QuickBooks is not running, and click Continue.
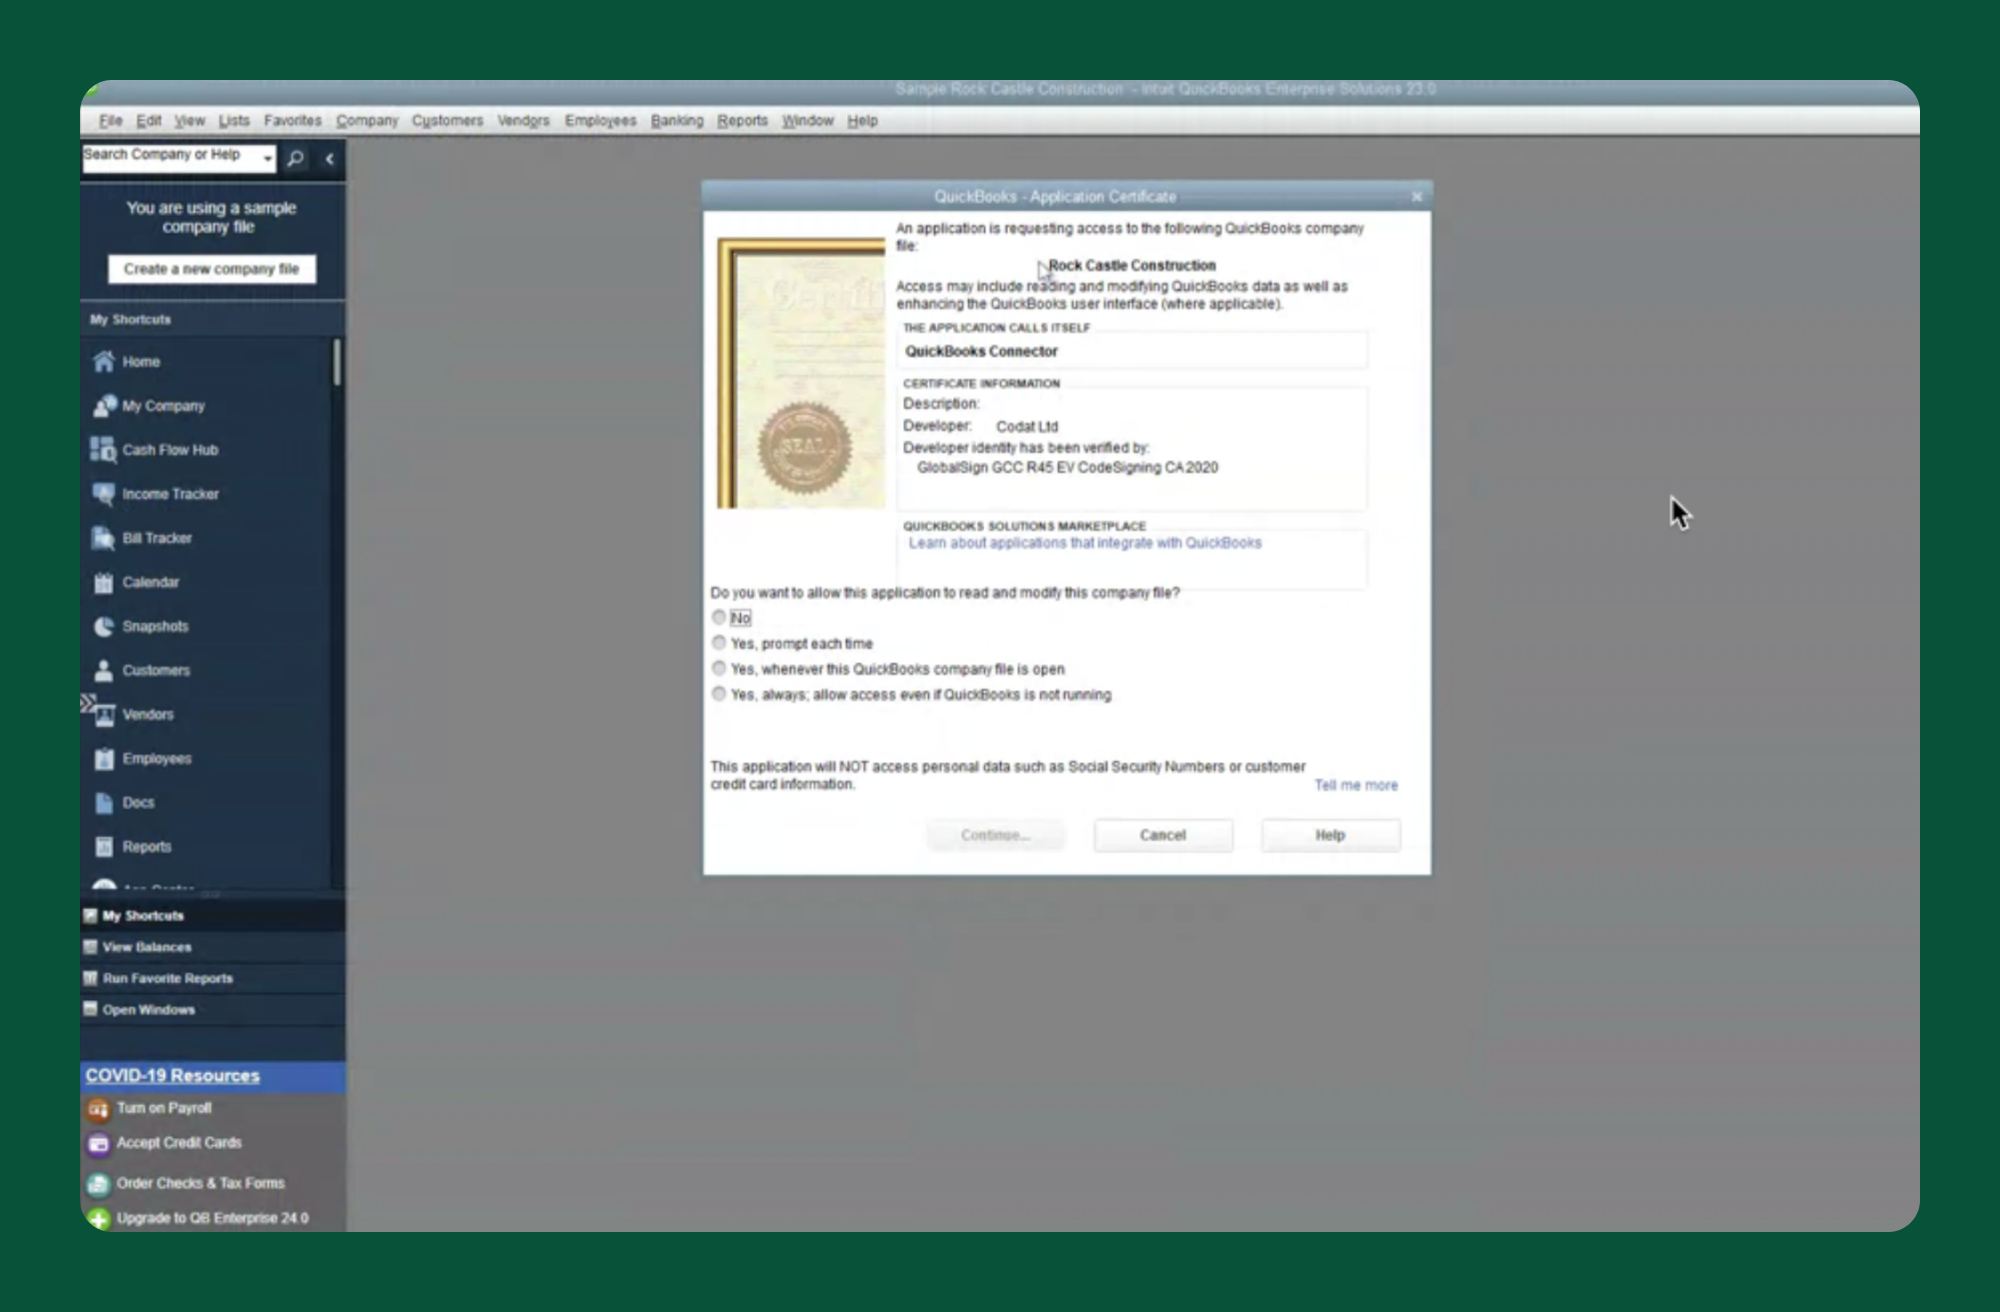
-
Click OK, then select Yes to confirm.
-
In the Web Connector, click Copy to copy the password.
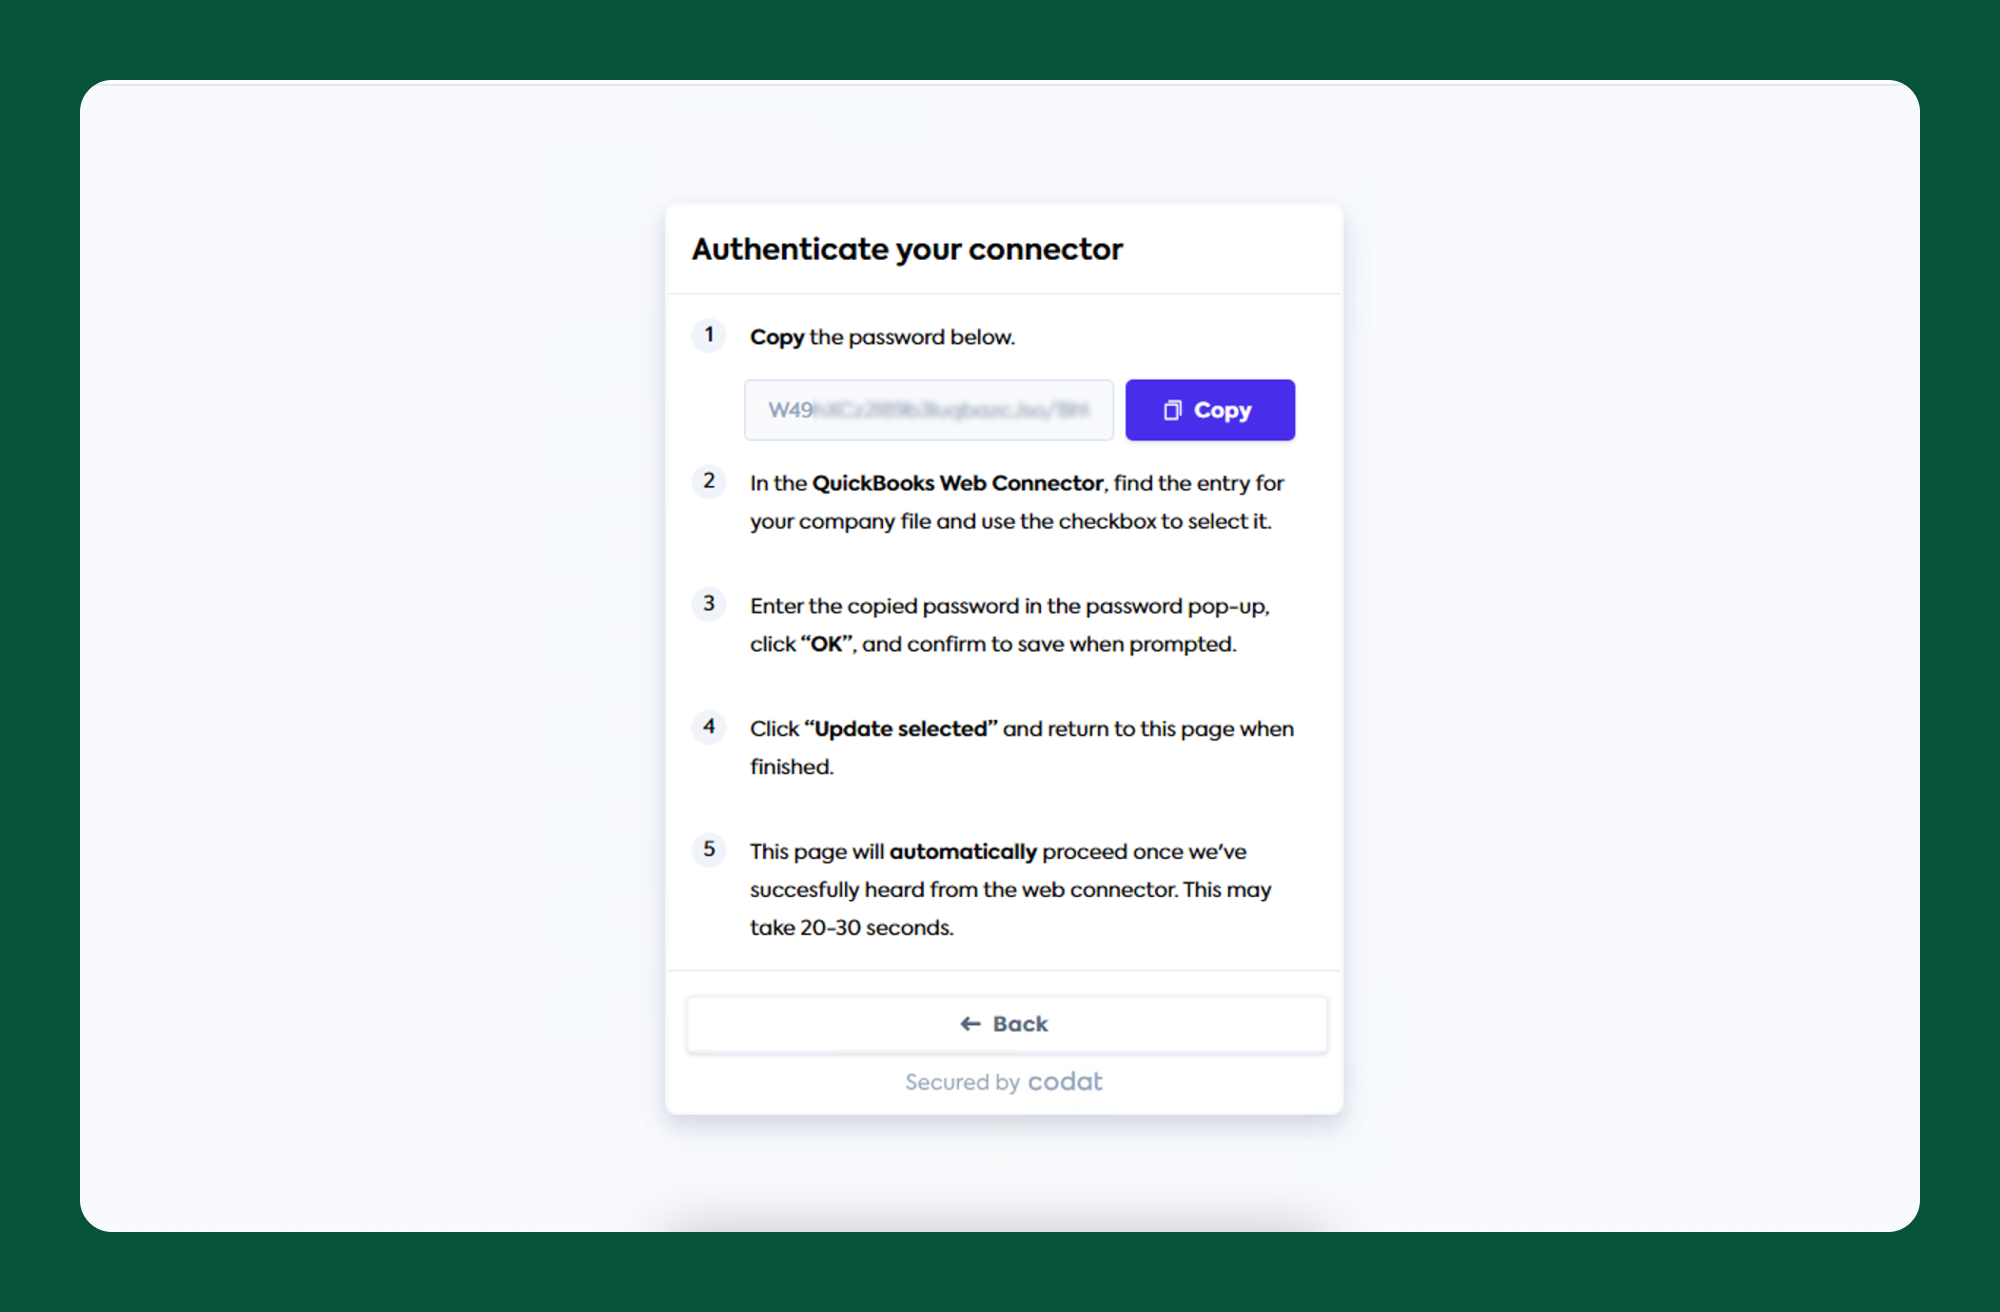
-
Paste the password into the Web Connector’s Password field and press Enter.
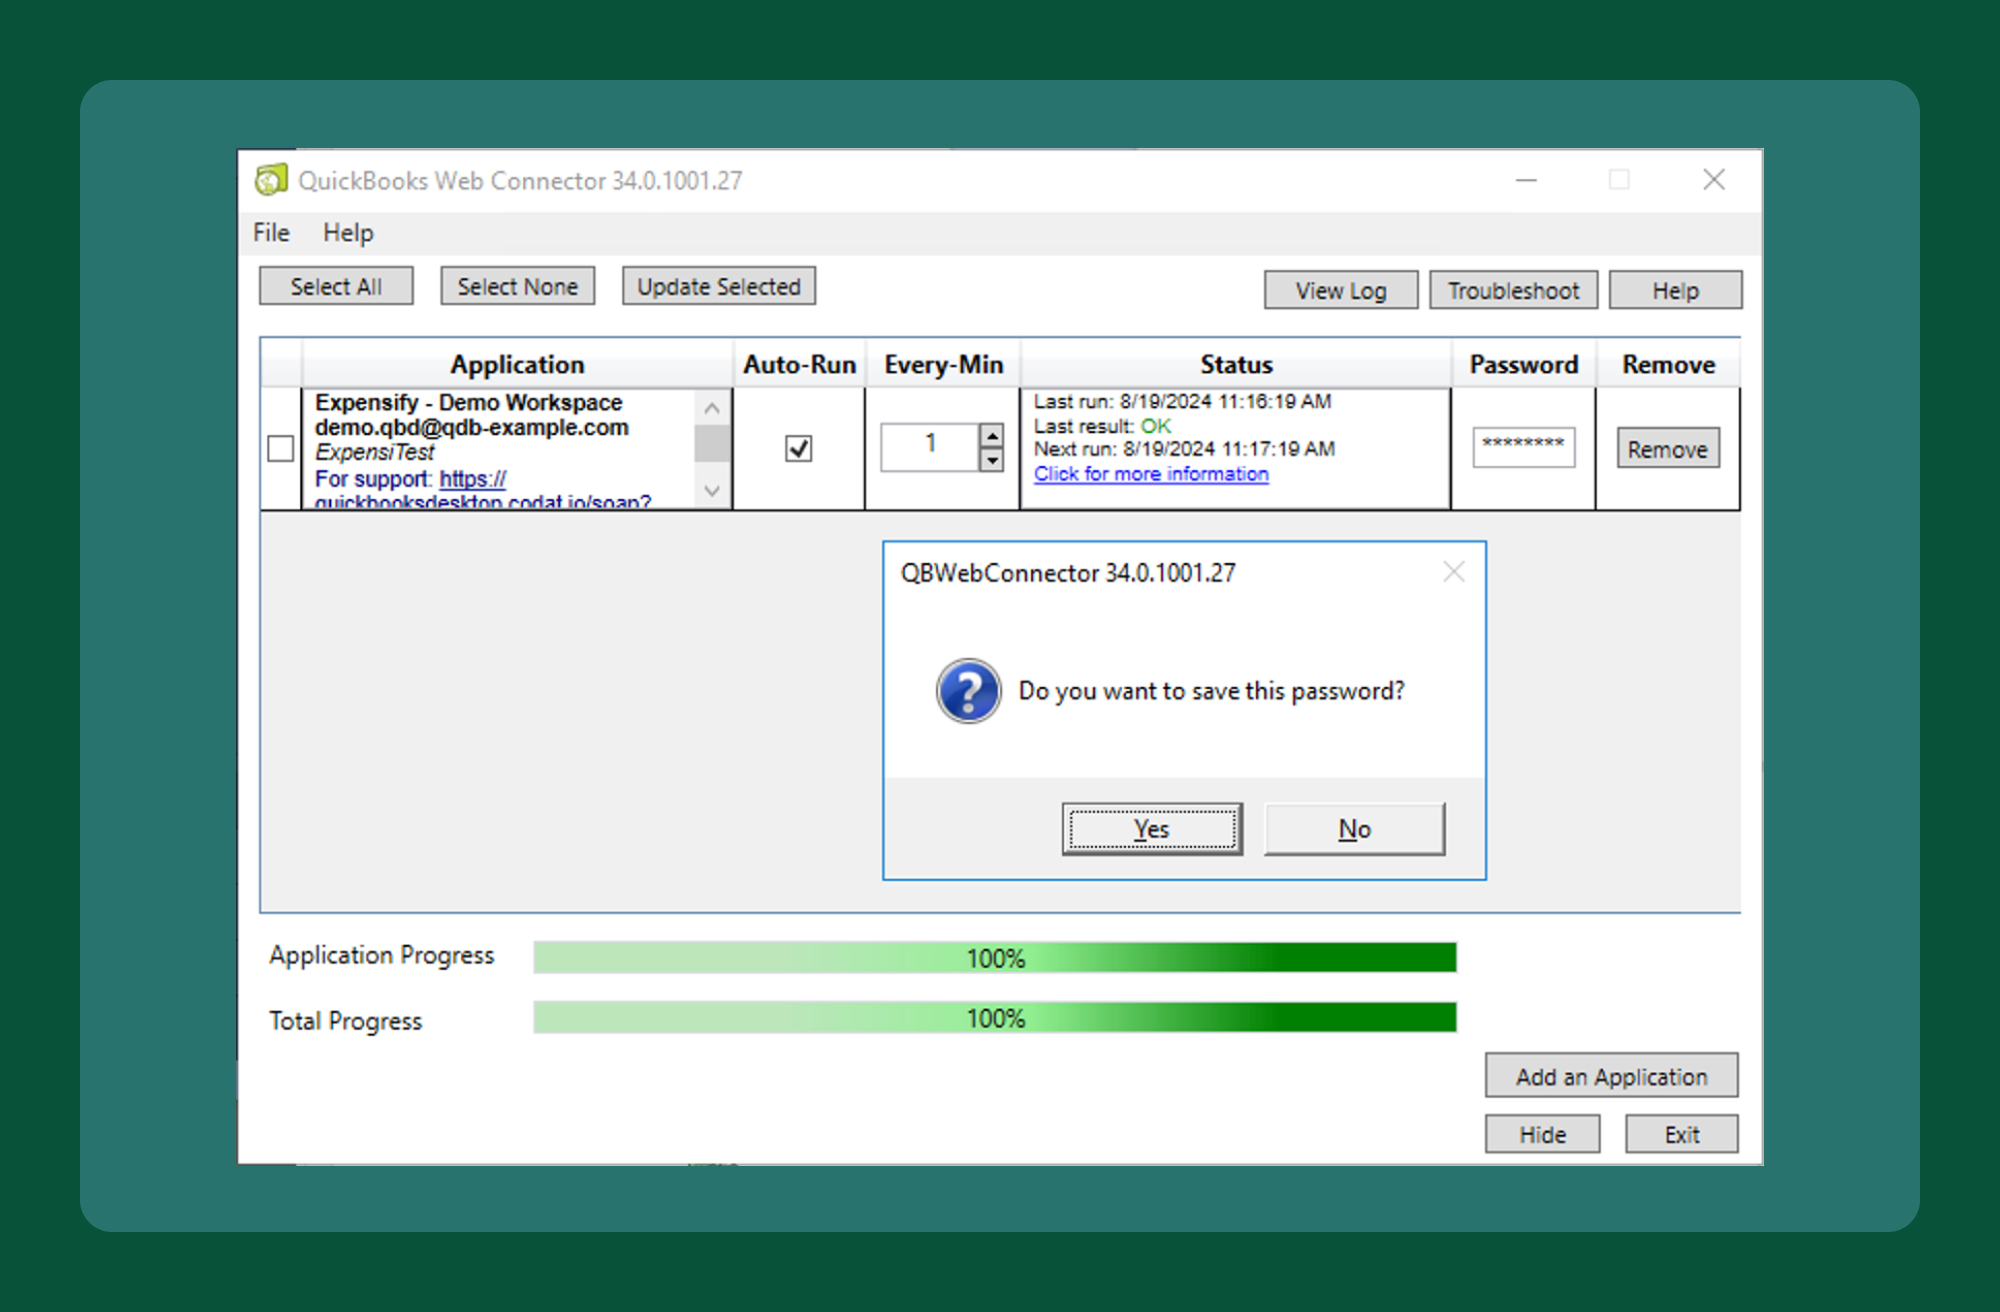
-
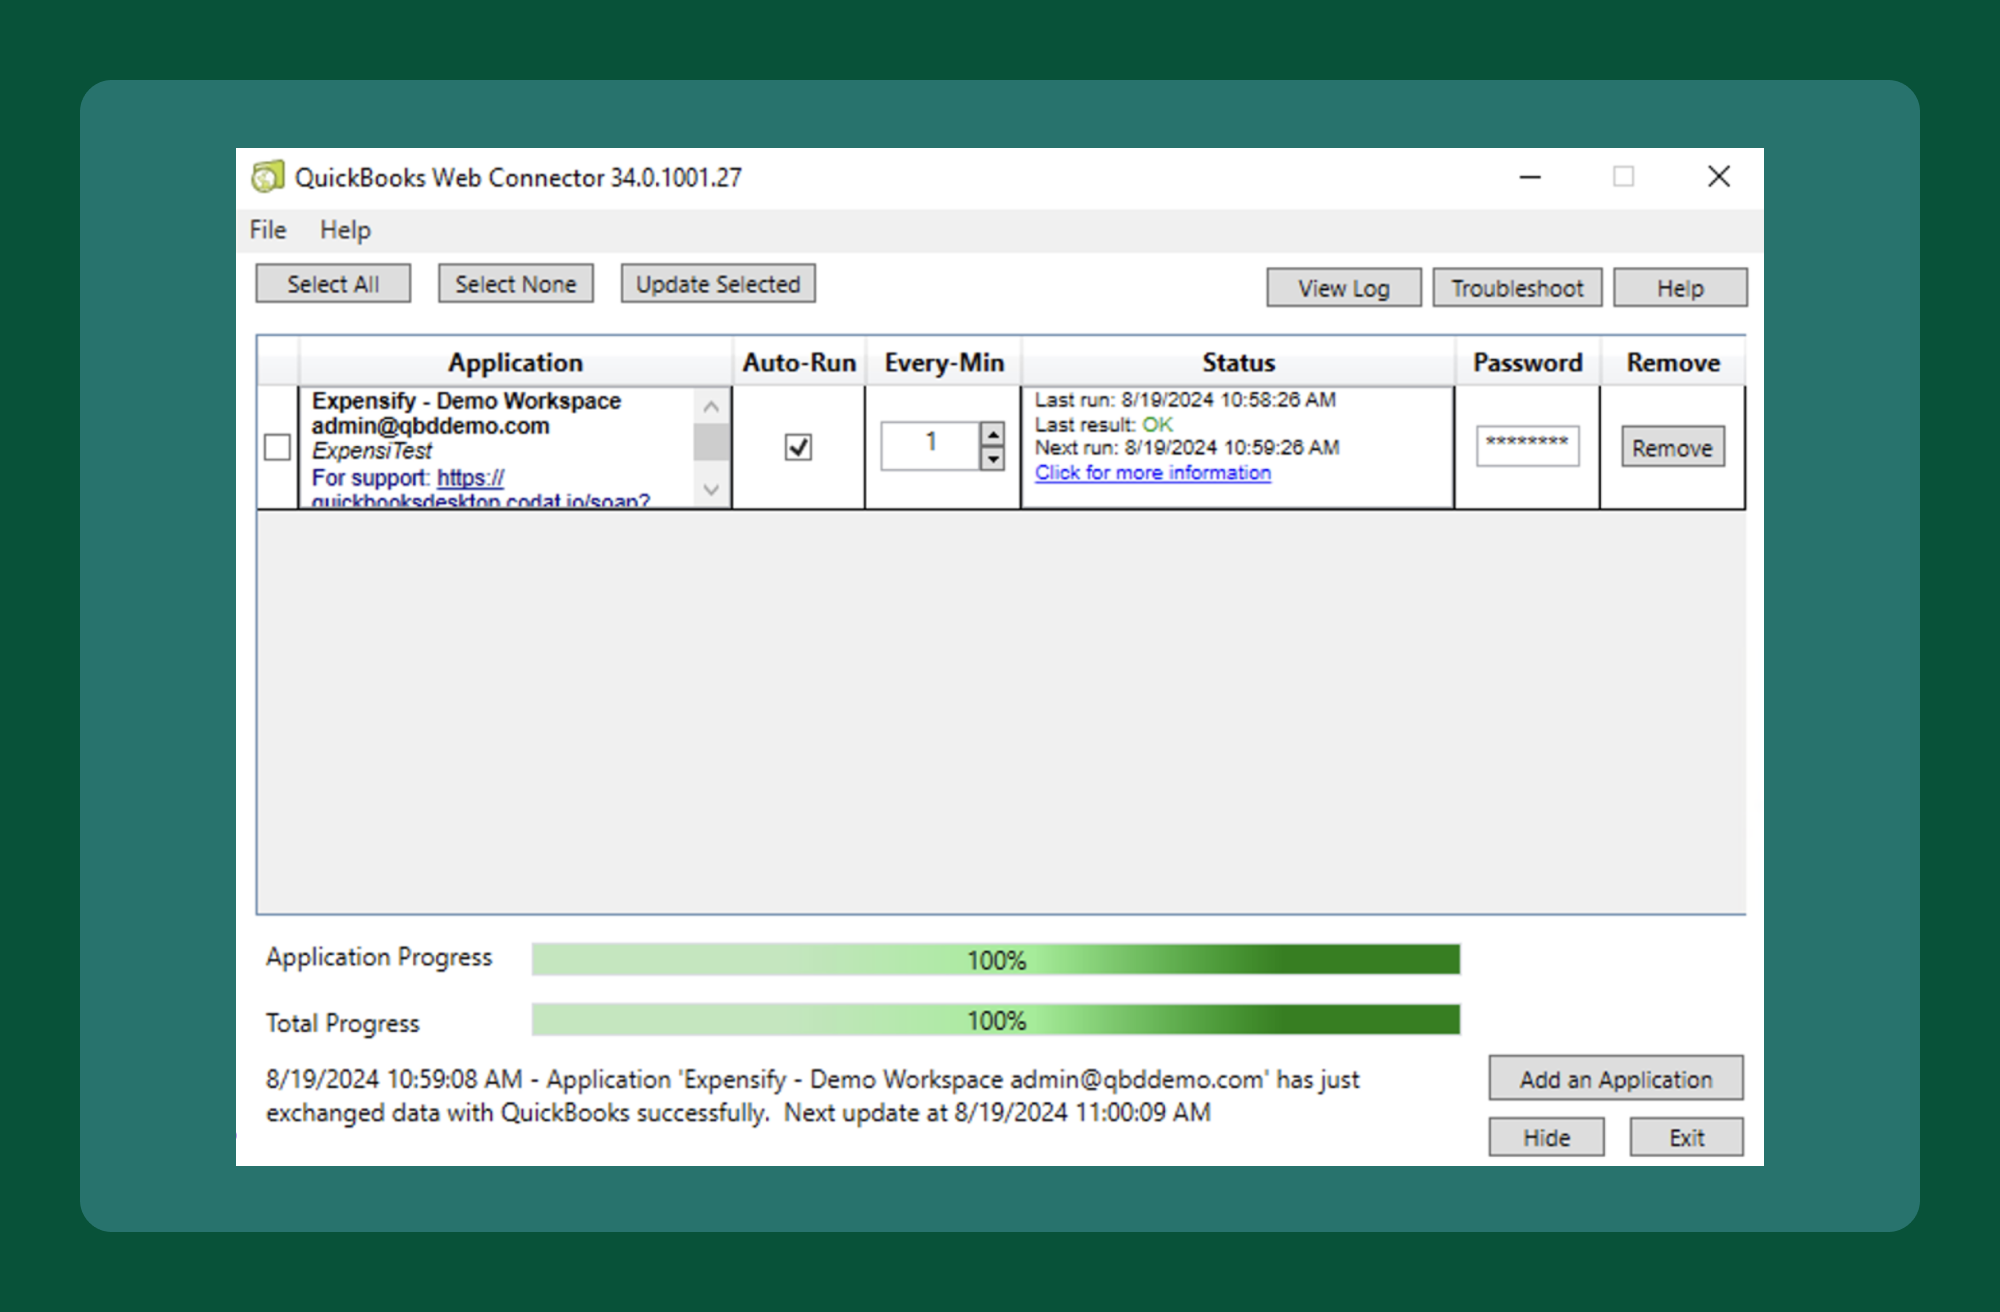
Click Yes to save the password. Your new connection will appear in the Web Connector.
Pro Tip: Store the password securely in a trusted password manager for easy access during troubleshooting or updates.
FAQ
What are the requirements for using QuickBooks Desktop with Expensify?
- Hardware: Refer to Intuit’s recommended specifications.
- Software: Windows 10 or 11 (latest service pack). Older versions of Windows may work, but are unsupported. Mac OS is not supported.
Which versions of QuickBooks Desktop are supported?
Expensify supports the latest three versions of QuickBooks Desktop (US and Canada), adhering to Intuit’s discontinuation policy. Supported versions include:
- Accountant, Pro, Pro Plus, Premier, Premier Plus, and Enterprise.
- Special editions, such as:
- Contractor
- Manufacturing & Wholesale
- Accountant
- Professional Services
- Nonprofit
Where should QuickBooks Desktop and the Web Connector be installed with a Terminal Server?
If you’re using QuickBooks Desktop in a file server and client setup, it’s important to install both QuickBooks Desktop and the QuickBooks Web Connector on the same computer where QuickBooks Desktop is actively being used.
The Web Connector only works when it’s running alongside QuickBooks Desktop, and the company file is open. The company files can be stored in a different location, but note that network speed may affect performance.
Typical Setup
- Server: Stores the QuickBooks company file
- Client (or Remote Desktop): Runs QuickBooks Desktop - This is also where you need to install and run the Web Connector
Note: You will need to run the install files as an admin for the initial install and setup.
Can I install multiple QuickBooks Desktop connectors on one machine?
Yes. Each connector corresponds to one company file, but multiple connectors can sync multiple company files from the same computer. Ensure you are logged into the correct company file during syncing.
Can negative expenses be exported?
- Yes, unless:
- The export type is Check, as the report’s total must be positive.
- Non-reimbursable expenses are exported as debit card transactions (QuickBooks exports them as non-reimbursable checks, which cannot have negative amounts).