


Configure Quickbooks Desktop
Our QuickBooks Desktop integration automates the import and export process between Expensify and QuickBooks Desktop.
Step 1: Configure Export Settings
The following steps determine how data is exported from Expensify to QuickBooks Desktop.
- In Expensify, hover over Settings and click Workspaces.
- Select the Workspace you want to connect to QuickBooks Desktop.
- Click the Accounting tab.
- Click Export under the QuickBooks Desktop connection.
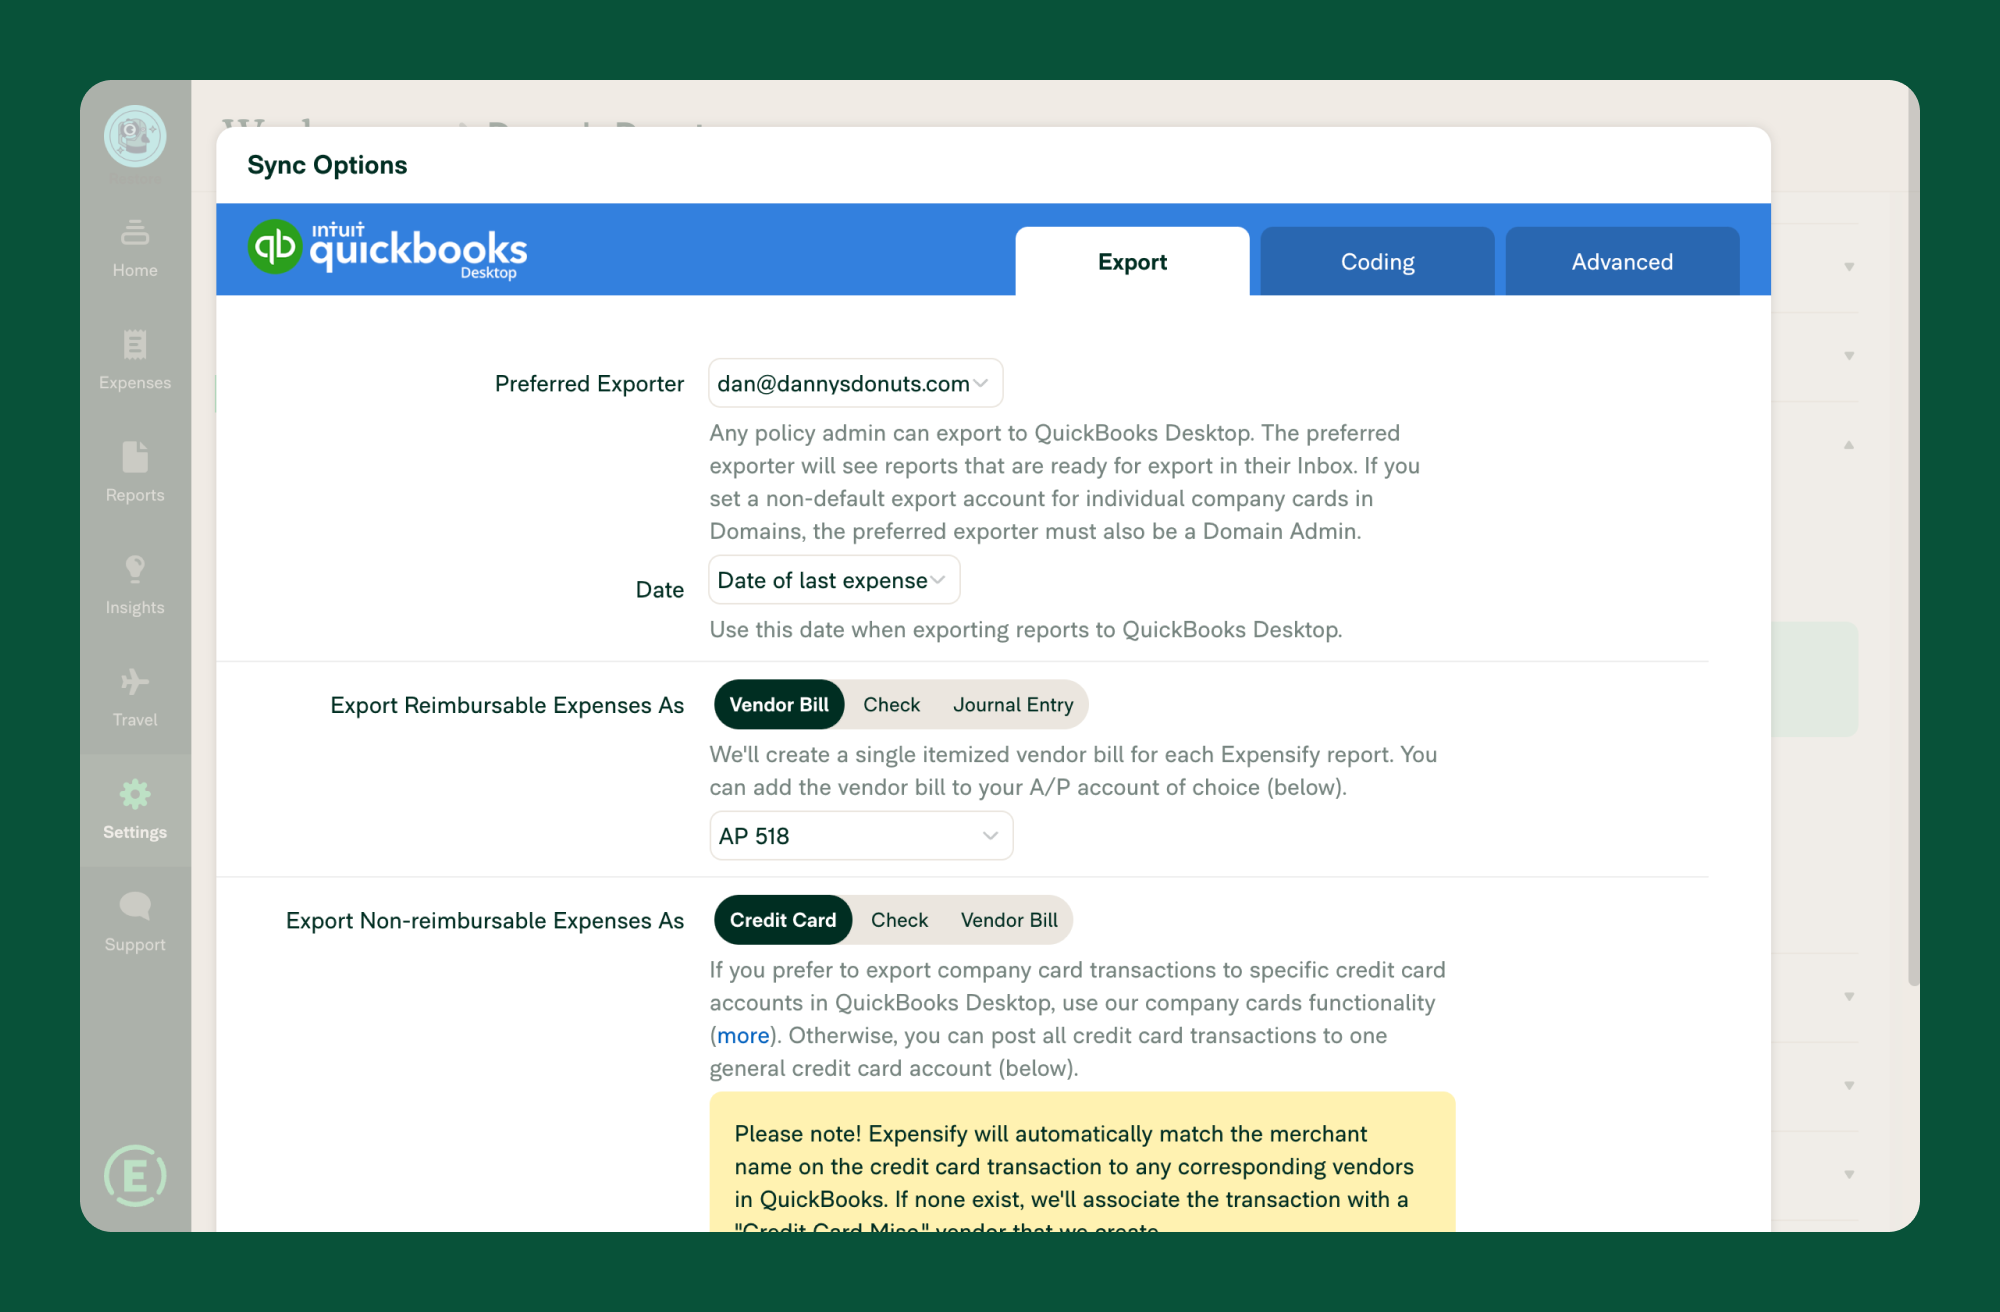
- Review the following export settings:
- Preferred Exporter: The designated user in QuickBooks Desktop who receives error notifications and export prompts.
- Date: Choose whether to use the report’s submitted date, exported date, or last expense date.
- Unique Reference Numbers: Enable the generation of a unique reference number for each transaction.
- Reimbursable Expenses:
- Vendor Bill (recommended): Creates a single itemized vendor bill per Expensify report.
- Check: Creates a single itemized check per Expensify report.
- Journal Entry: Creates a single itemized journal entry per Expensify report.
- Non-Reimbursable Expenses:
- Credit Card: Each expense appears as a separate transaction with a matching post date. Ensure the merchant exists in QuickBooks for accurate payee mapping.
- Check: Creates an itemized check for each report.
- Vendor Bill: Creates a vendor bill associated with the report submitter.
Step 2: Configure Coding/Import Settings
These settings determine how data is imported from QuickBooks Desktop into Expensify.
- Click Import under the QuickBooks Desktop connection.
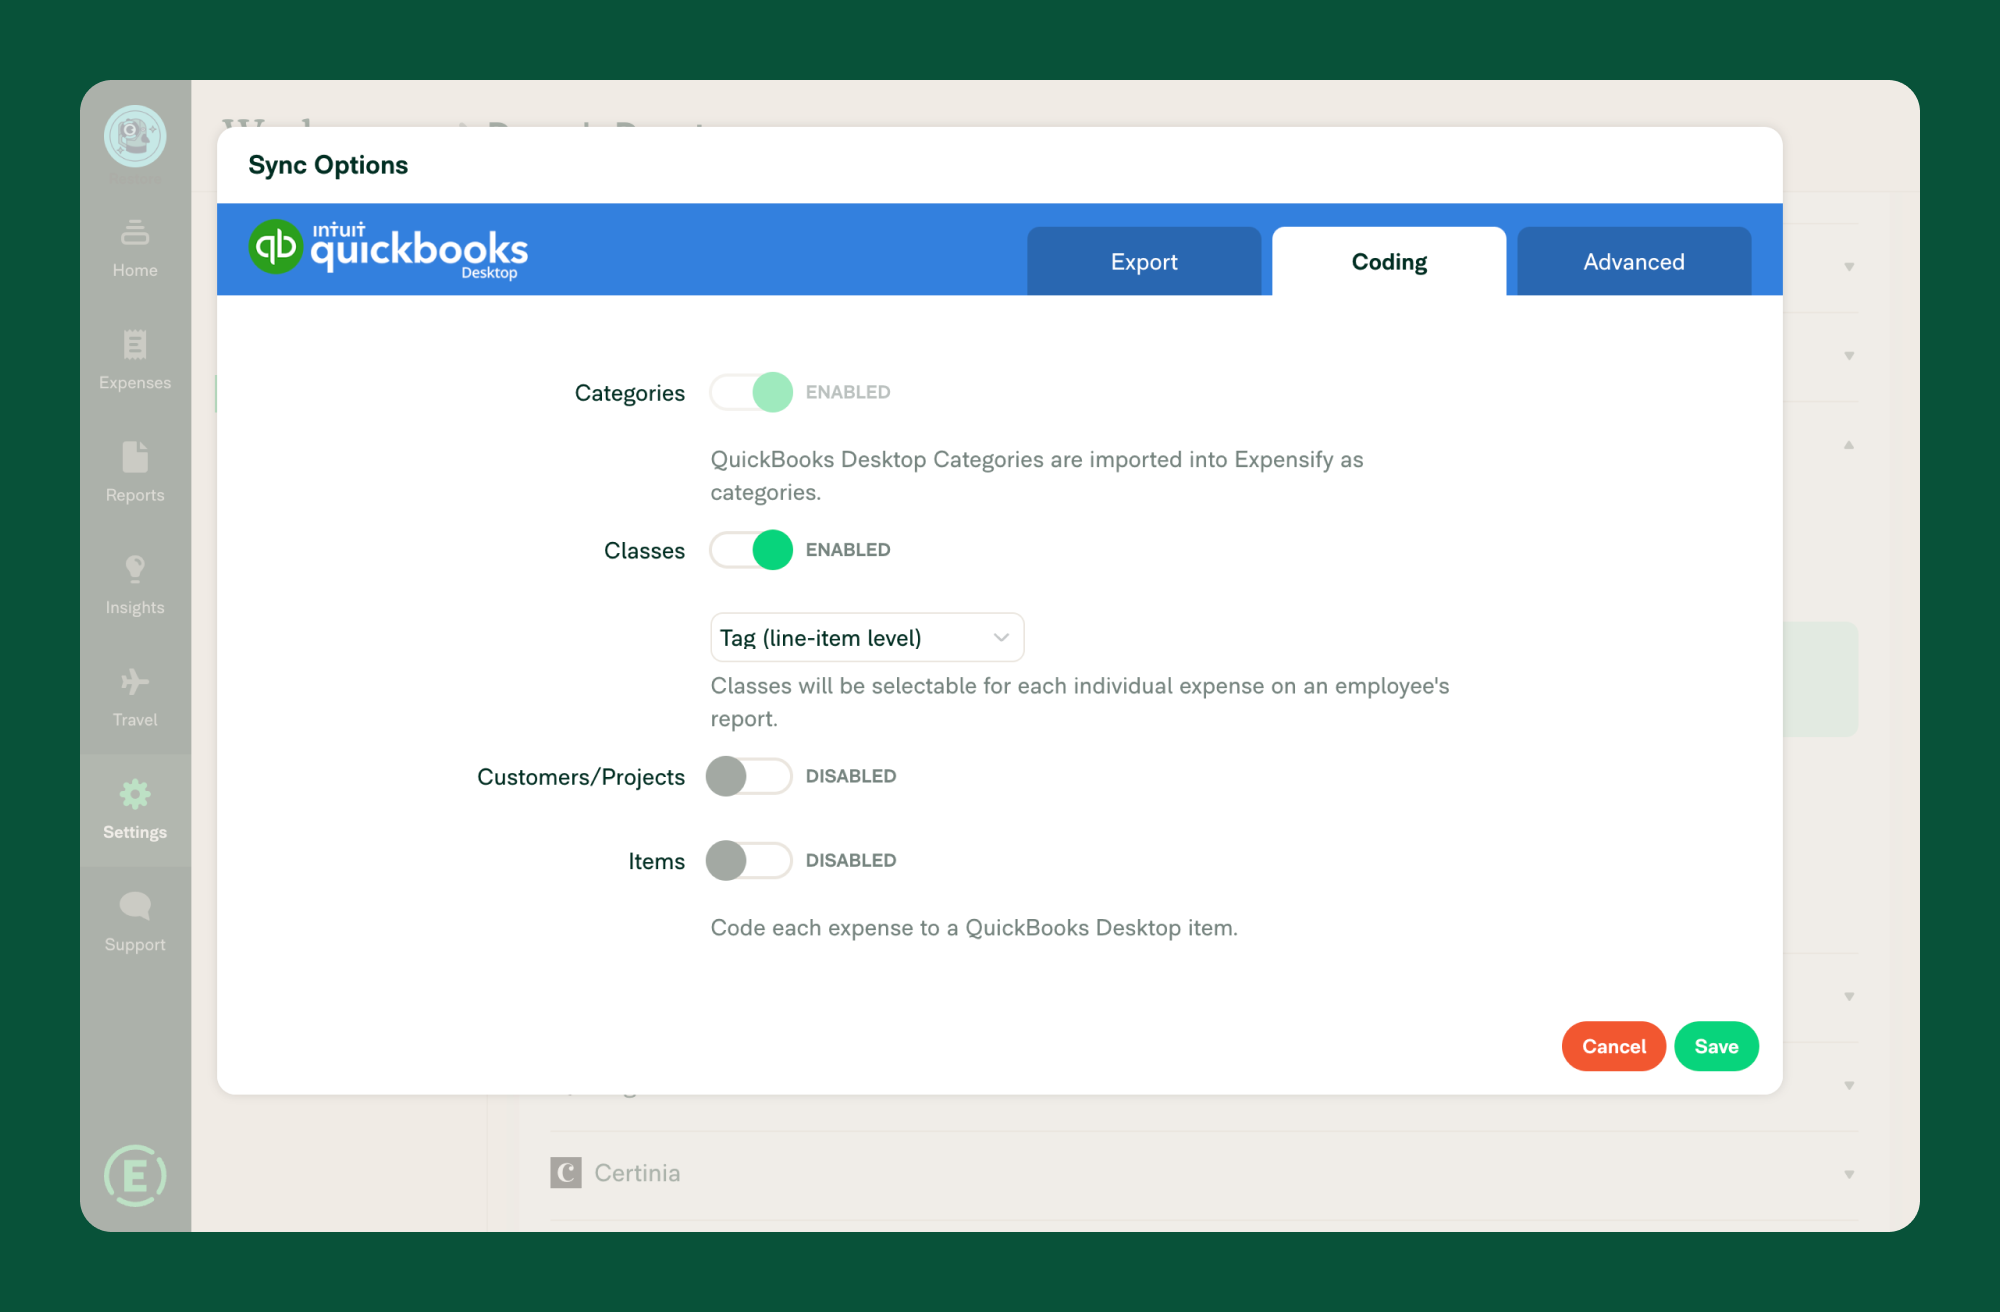
- Review the following import settings:
- Chart of Accounts: Automatically imported as categories.
- Classes: Optional import as tags for expense coding.
- Customers/Projects: Optional import as tags for expense coding.
- Locations: Optional import as tags for expense coding.
Step 3: Configure Advanced Settings
These settings help manage auto-sync and employee invitation preferences.
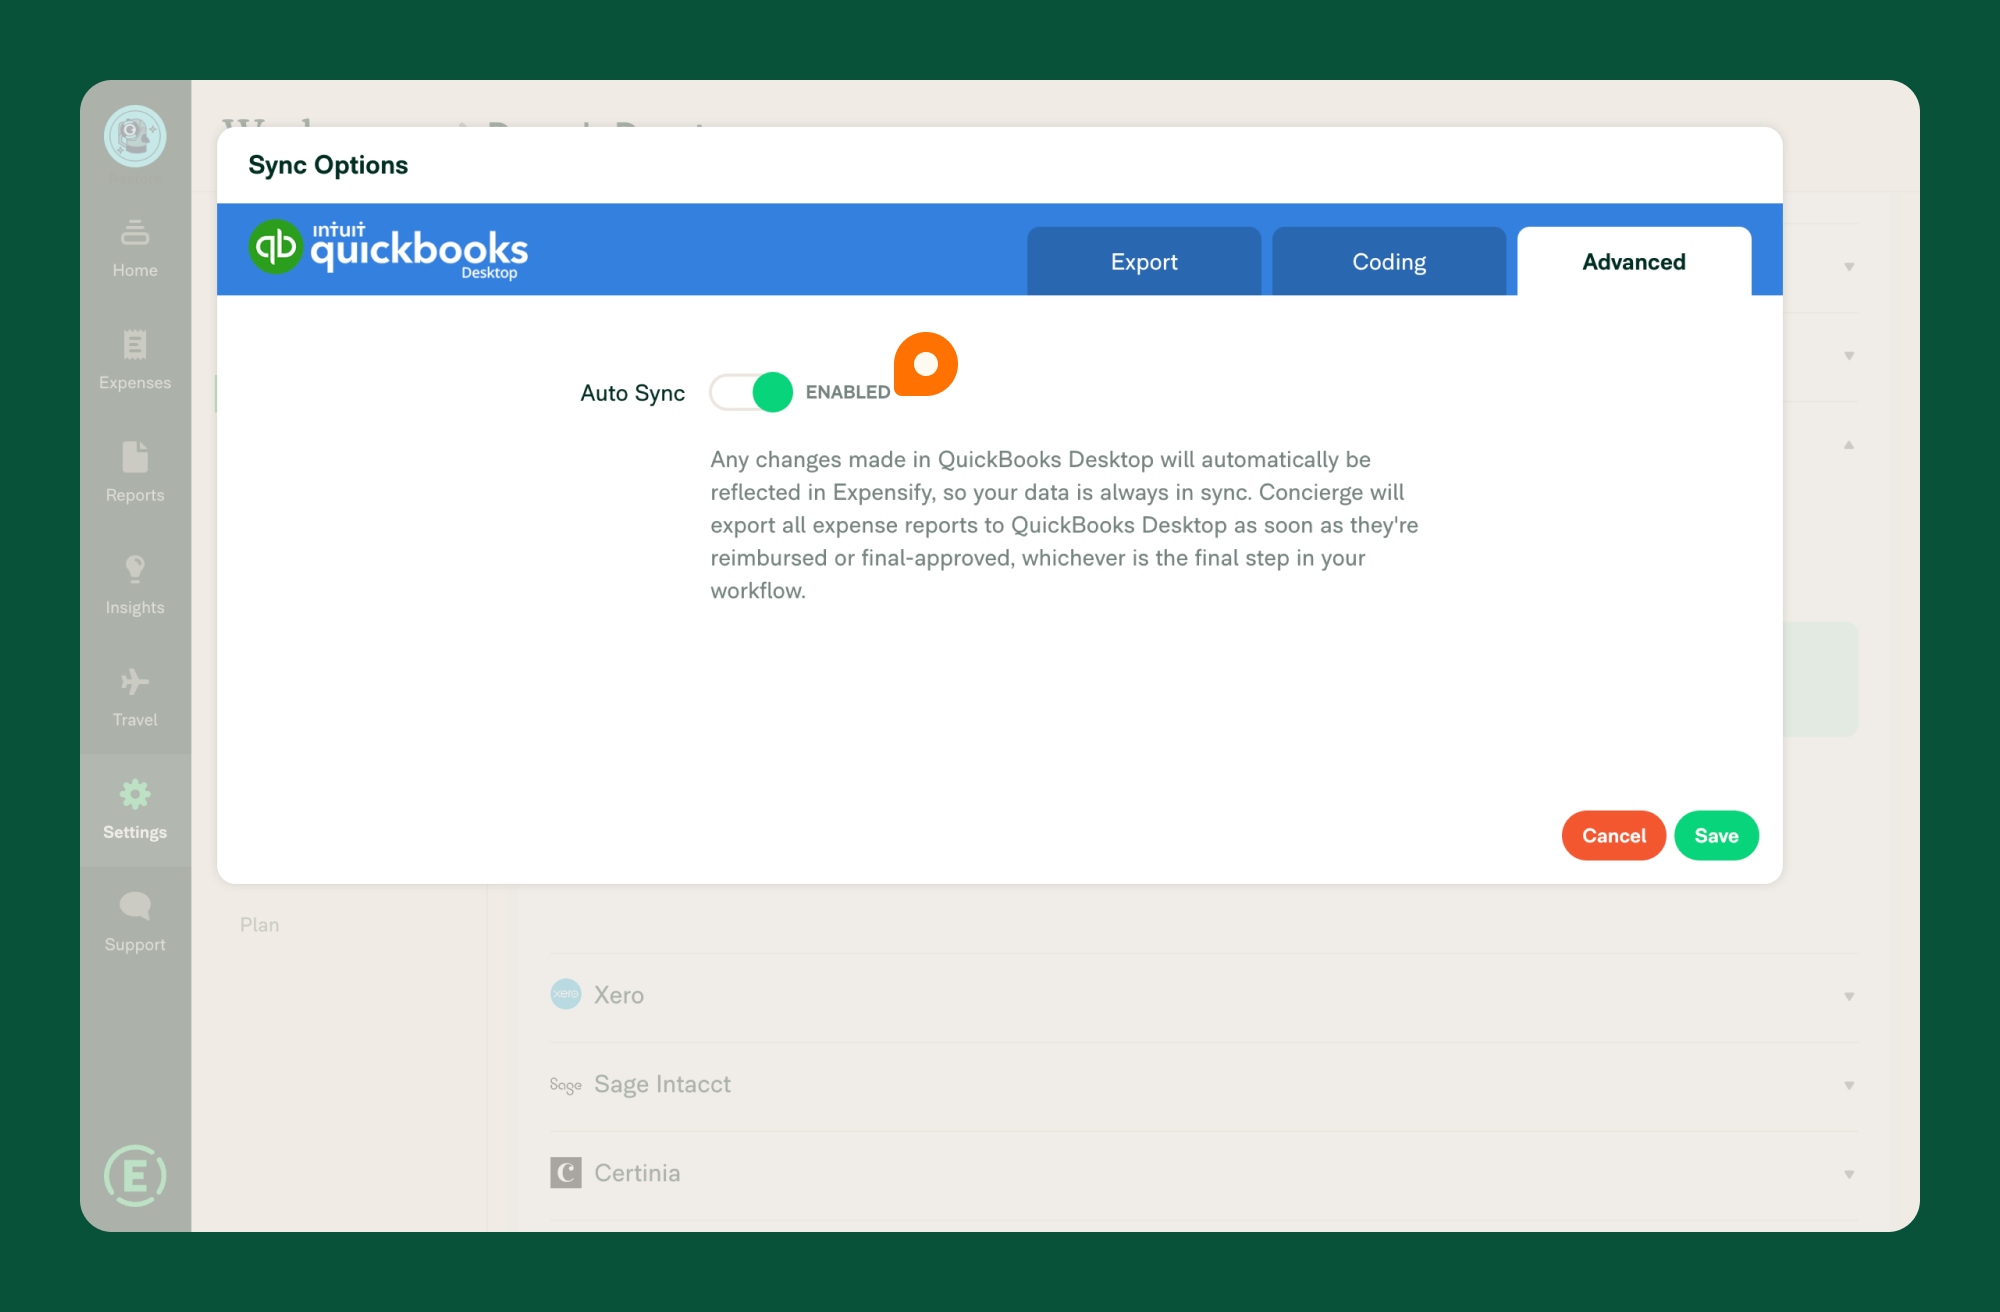
- Click Advanced under the QuickBooks Desktop connection.
- Enable or Disable Auto-Sync: When enabled, changes are automatically synced between Expensify and QuickBooks Desktop.
Note: Auto-Sync queues updates to be added to your QuickBooks Company File the next time both QuickBooks Desktop and QuickBooks Web Connector are open.
FAQ
How do I manually sync QuickBooks Desktop if Auto-Sync is disabled?
- In Expensify, go to Settings > Workspaces.
- Click the Workspace connected to QuickBooks Desktop.
- Click the Accounting tab.
- Click Sync Now under QuickBooks Desktop.
Note: We recommend manually syncing at least once a week or after making changes in QuickBooks Desktop that impact report exports.
Can I use Expensify and QuickBooks Desktop at the same time while syncing?
We recommend waiting for the sync to complete before using either platform, as performance may be affected.
What types of accounts can be imported from QuickBooks Desktop?
| QuickBooks Desktop Account Type | How it Imports to Expensify |
|---|---|
| Accounts Payable | Vendor bill or journal entry |
| Accounts Receivable | Not imported |
| Bank | Debit card or check |
| Credit Card | Credit card export options |
| Fixed Assets | Categories |
| Other Current Assets | Categories or journal entry |
| Other Current Liabilities | Journal entry (if report creator is an Employee) |
| Other Expense | All detail types import except Exchange Gain/Loss |
Why are exports showing as “Credit Card Misc.”?
Expensify checks for an exact vendor match when exporting credit or debit card expenses. If no match is found, expenses are mapped to a “Credit Card Misc.” vendor.
To export expenses to a specific QuickBooks account:
- In Expensify, go to Settings > Domains.
- Select the desired domain.
- Click the Company Cards tab.
- Click Export.
How does multi-currency work with QuickBooks Desktop?
- Vendor Bills and Checks: The vendor and account currencies must match, but do not need to be in the home currency.
- Credit Card: If a matching vendor is not found, the expense exports to the “Credit Card Misc.” vendor. Foreign currency transactions are converted 1:1.
- Journal Entries: Multi-currency exports fail unless the account, vendor, and home currency match.