


Expensify API
Expensify’s API helps connect your account to third-party tools like NetSuite, Xero, and even internal systems like Workday. This guide includes tips, usage examples, and common troubleshooting questions.
Getting Started
To start using the API, review our full Integration Server Manual.
Note: The API is a self-serve tool. Your internal team will need to manage setup and maintenance. If you have an Account Manager, please reach out to them directly for assistance with setting up Expensify’s API.
FAQ
Should I give Concierge my API credentials?
No. Never share your partnerUserSecret. If you already have, rotate your credentials immediately here.
What is the API rate limit?
To keep things running smoothly:
- Max 5 requests every 10 seconds
- Max 20 requests every 60 seconds
Going over this will return a 429 error.
What is a Policy ID?
Your Policy ID is also called your Workspace ID.
To find it:
- Go to
Settings > Workspaces - Click the Workspace name
- Copy the ID from the browser URL. It will look like this:
https://www.expensify.com/policy?param={"policyID":"0810E551A5F2A9C2"}Your Workspace ID is
0810E551A5F2A9C2.
Can I use the parent type file to export workspace/policy data?
No. The parent type file can only be used to export expense and report data — not policy information. To export policy data (e.g., categories, tags), you must use the get type with inputSettings.type set to policy.
Can I use the API to create Domain Groups?
No, you cannot create domain groups. You can only assign users to them.
I’m exporting expense IDs ${expense.transactionID} but when I open my CSV in Excel, it’s changing all the IDs and making them look the same. How can I prevent this?
Try prepending a non-numeric character like a quote to force Excel to interpret the value as a string and not a number (i.e., '${expense.transactionID}).
How can we export the person who will approve a report while the reports are still processing?
Use the field ${report.managerEmail}.
Why won’t my boolean field return any data?
Boolean fields won’t output values without a string. For example, instead of using ${expense.billable}, use ${expense.billable?string("Yes", "No")}. This will display “Yes” if the expense is billable and “No” if it is not.
Can I export the reports for just one user?
Not in a quick, convenient way, as you would need to include the user in your template. The simplest approach is to export data for all users and then apply a filter in your preferred spreadsheet program.
Can I create expenses on behalf of users?
Yes. However, to access the Expense Creator API on behalf of employees, Expensify needs to verify the following setup:
Ensure you are properly configured (e.g., Domain Control, Domain Admin, Policy Admin). Verify you have internal authorization to add data to other accounts within your domain.
If you need this access, contact concierge@expensify.com and reference this help page.
Using Postman
Many customers use Postman to help them build out their APIs. Below are some guides contributed by our customers. Please note, in all cases, you will need to first generate your authentication credentials, the steps for which can be found here and have them ready:
Download expenses from a report as a CSV file
Step 1: Get the ID of a report you want to export in Expensify
Find the ID by opening the expense report and clicking Details at the top right corner of the page. At the top of the menu, the ID is provided as the “Long ID.”
Step 2: Export (generate) a “Report” as a CSV file
For this you’ll use the Documentation under Report Exporter.
In Postman, set the following:
- HTTP Action: POST
- URL: https://integrations.expensify.com/Integration-Server/ExpensifyIntegrations
- Your only Parameters (“Params”) will be “requestJobDescription”, described below
- Body: “x-www-form-encoded”, with a key “template”, described below
The requestJobDescription key will have a value like below:
{
    "type": "file",
    "credentials": {
        "partnerUserID": "my_user_id",
        "partnerUserSecret": "my_user_secret"
    },
    "onReceive": {
        "immediateResponse": [
            "returnRandomFileName"
        ]
    },
    "inputSettings": {
        "type": "combinedReportData",
        "filters": {
            "reportIDList": "50352738"
        }
    },
    "outputSettings": {
        "fileExtension": "csv"
    }
}
Take the above and replace it with your own partnerUserID, partnerUserSecret, and reportIDList. To download multiple reports, you can use a comma-separated list as the reportIDList, such as “12345,45678,11111”.
The template key will have the value like below:
<#if addHeader>
 Merchant,Amount,Transaction Date<#lt>
</#if>
<#list reports as report>
 <#list report.transactionList as expense>
 <#if expense.modifiedMerchant?has_content>
 <#assign merchant = expense.modifiedMerchant>
 <#else>
 <#assign merchant = expense.merchant>
 </#if>
 <#if expense.convertedAmount?has_content>
 <#assign amount = expense.convertedAmount/100>
 <#elseif expense.modifiedAmount?has_content>
 <#assign amount = expense.modifiedAmount/100>
 <#else>
 <#assign amount = expense.amount/100>
 </#if>
 <#if expense.modifiedCreated?has_content>
 <#assign created = expense.modifiedCreated>
 <#else>
 <#assign created = expense.created>
 </#if>
 ${merchant},<#t>
 ${amount},<#t>
 ${created}<#lt>
 </#list>
</#list>
The template variable determines what information is saved in your CSV file. If you want more columns than merchant, amount, and transaction date, follow the syntax as defined in the export template format documentation.
Step 3: Save your generated file name
Expensify currently supports only the “onReceive”:{“immediateResponse”:[“returnRandomFileName”]} option in step 2, so you should receive a random filename back from the API like “export111111d-a1a1-a1a1-a1a1-d1111111f.csv”. You will need to document this filename if you plan on running the download command after this one.
Step 4: Download your exported report
Set up another API call in almost the same way you did before. You don’t need the template key in the Body anymore, so delete that and set the Body type to “none”. Then modify your requestJobDescription to read like below, but with your own credentials and file name:
{
    "type": "download",
    "credentials": {
        "partnerUserID": "my_user_id",
        "partnerUserSecret": "my_user_secret"
    },
    "fileName": "export111111d-a1a1-a1a1-a1a1-d1111111f.csv",
    "fileSystem": "integrationServer"
}
Click Go and you should see the CSV in the response body.
Thank you to our customer Frederico Pettinella who originally wrote and shared this guide.
Use Advanced Employee Updater API with Postman
- Create a new request.
- Select POST as the method.
- Copy-paste this to the URL section: https://integrations.expensify.com/Integration-Server/ExpensifyIntegrations
- Do not add anything to “Params”, “Authorization”, or “Header”. Go straight to “Body”.
- Select “x-www-form-urlencoded” and add 2 keys “requestJobDescription” and “data”.
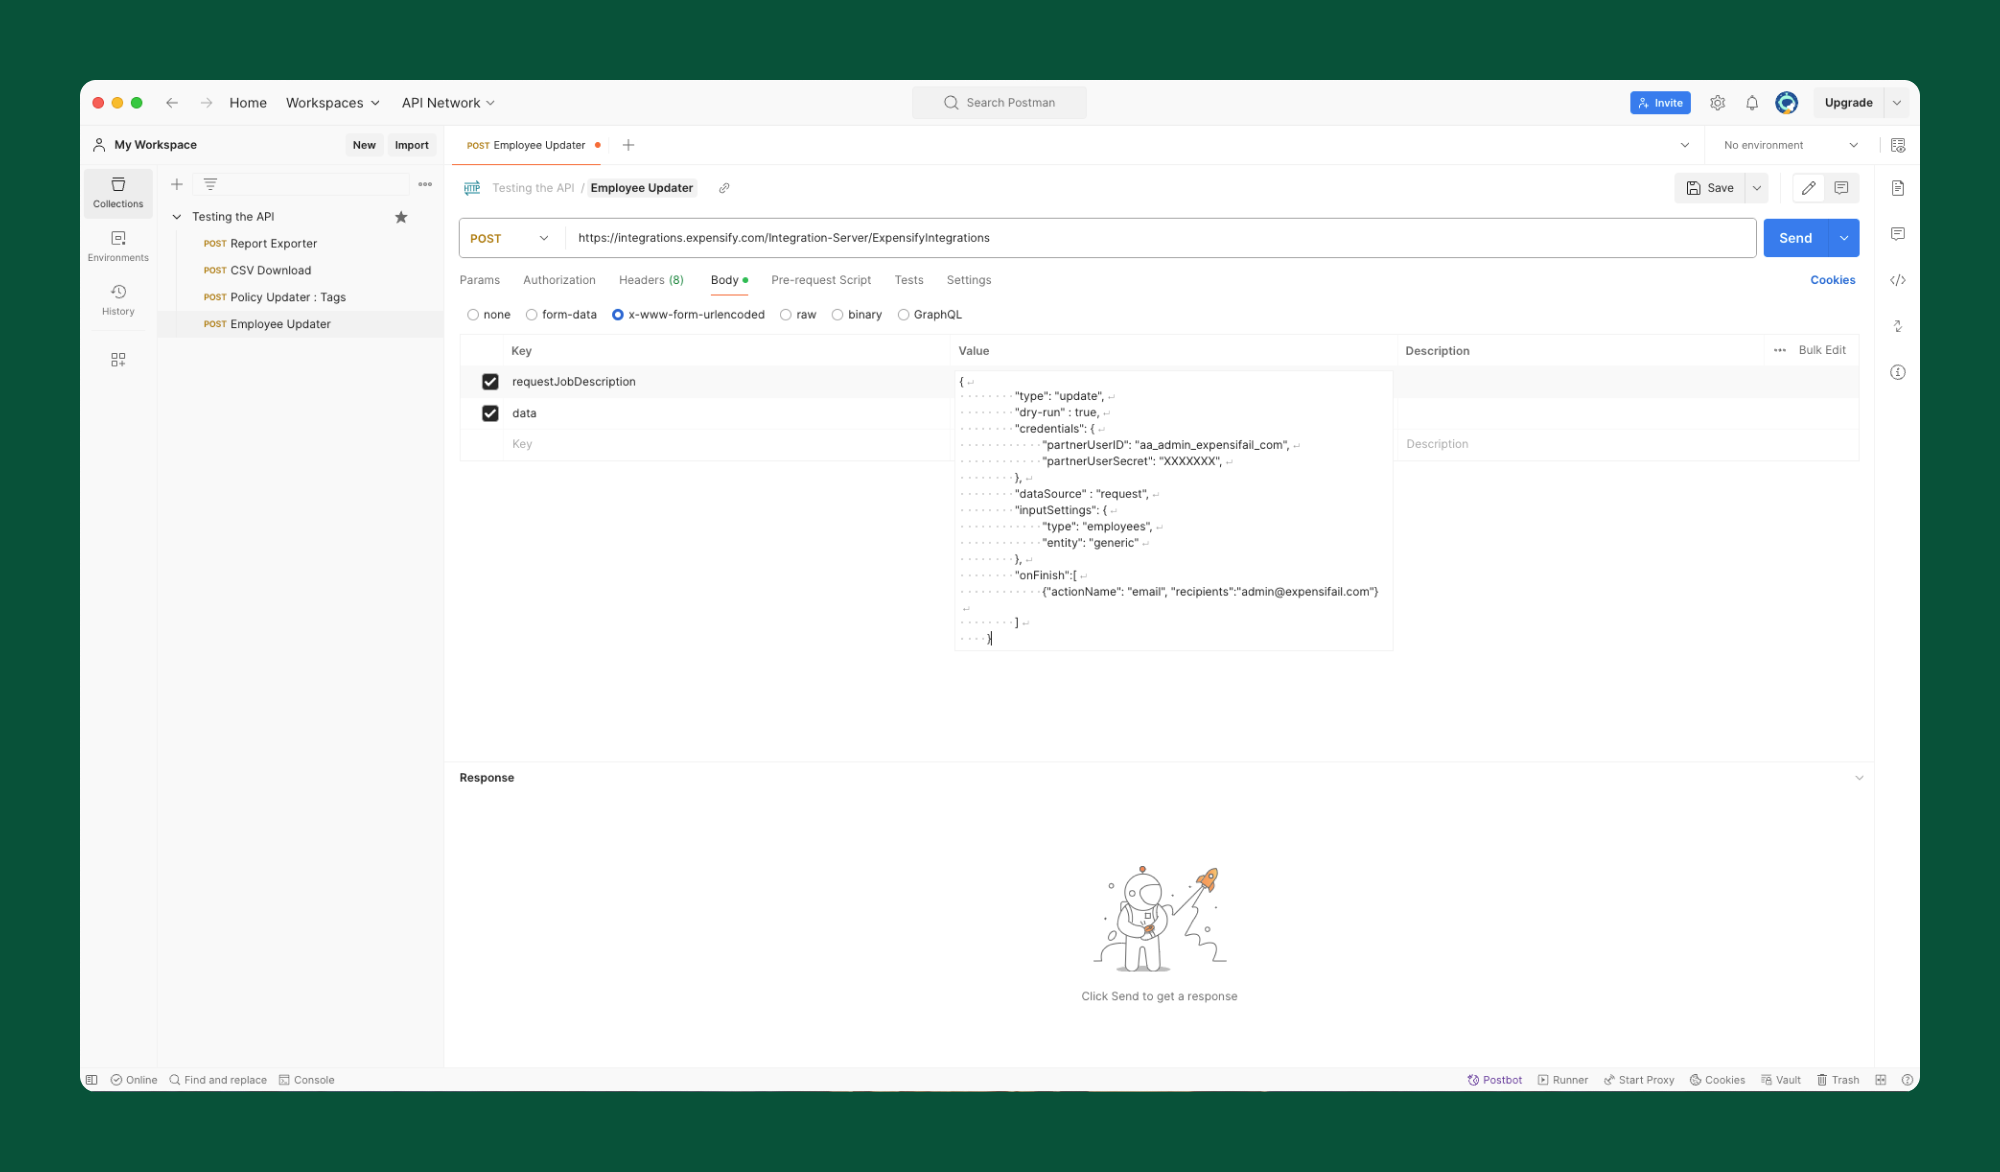
- For “requestJobDescription” copy and paste the following text, and replace the values for “partnerUserID”, “partner_UserSecret”, and “recipients”. Remember that “dry-run”=true means that it’s just for testing. Set it to false whenever you are ready to modify that in production.
{
    "type": "update",
    "dry-run" : true,
    "credentials": {
      "partnerUserID": "aa_api_domain_com",
      "partnerUserSecret": "xxx"
    },
    "dataSource" : "request",
   "inputSettings": {
      "type": "employees",
       "entity": "generic"
    },
    "onFinish":[
      {"actionName": "email", "recipients":"admin1@domain.com"}
    ]
  }'
For "data" copy-paste the following text and replace values as needed
{
    "Employees":[
      {
        "employeeEmail": "user@domain.com",
        "managerEmail": "usermanager@domain.com",
        "policyID": "1D1BC525C4892584",
"isTerminated": "false",
     }
]}
- Click SEND.
This is how it should look on Postman:
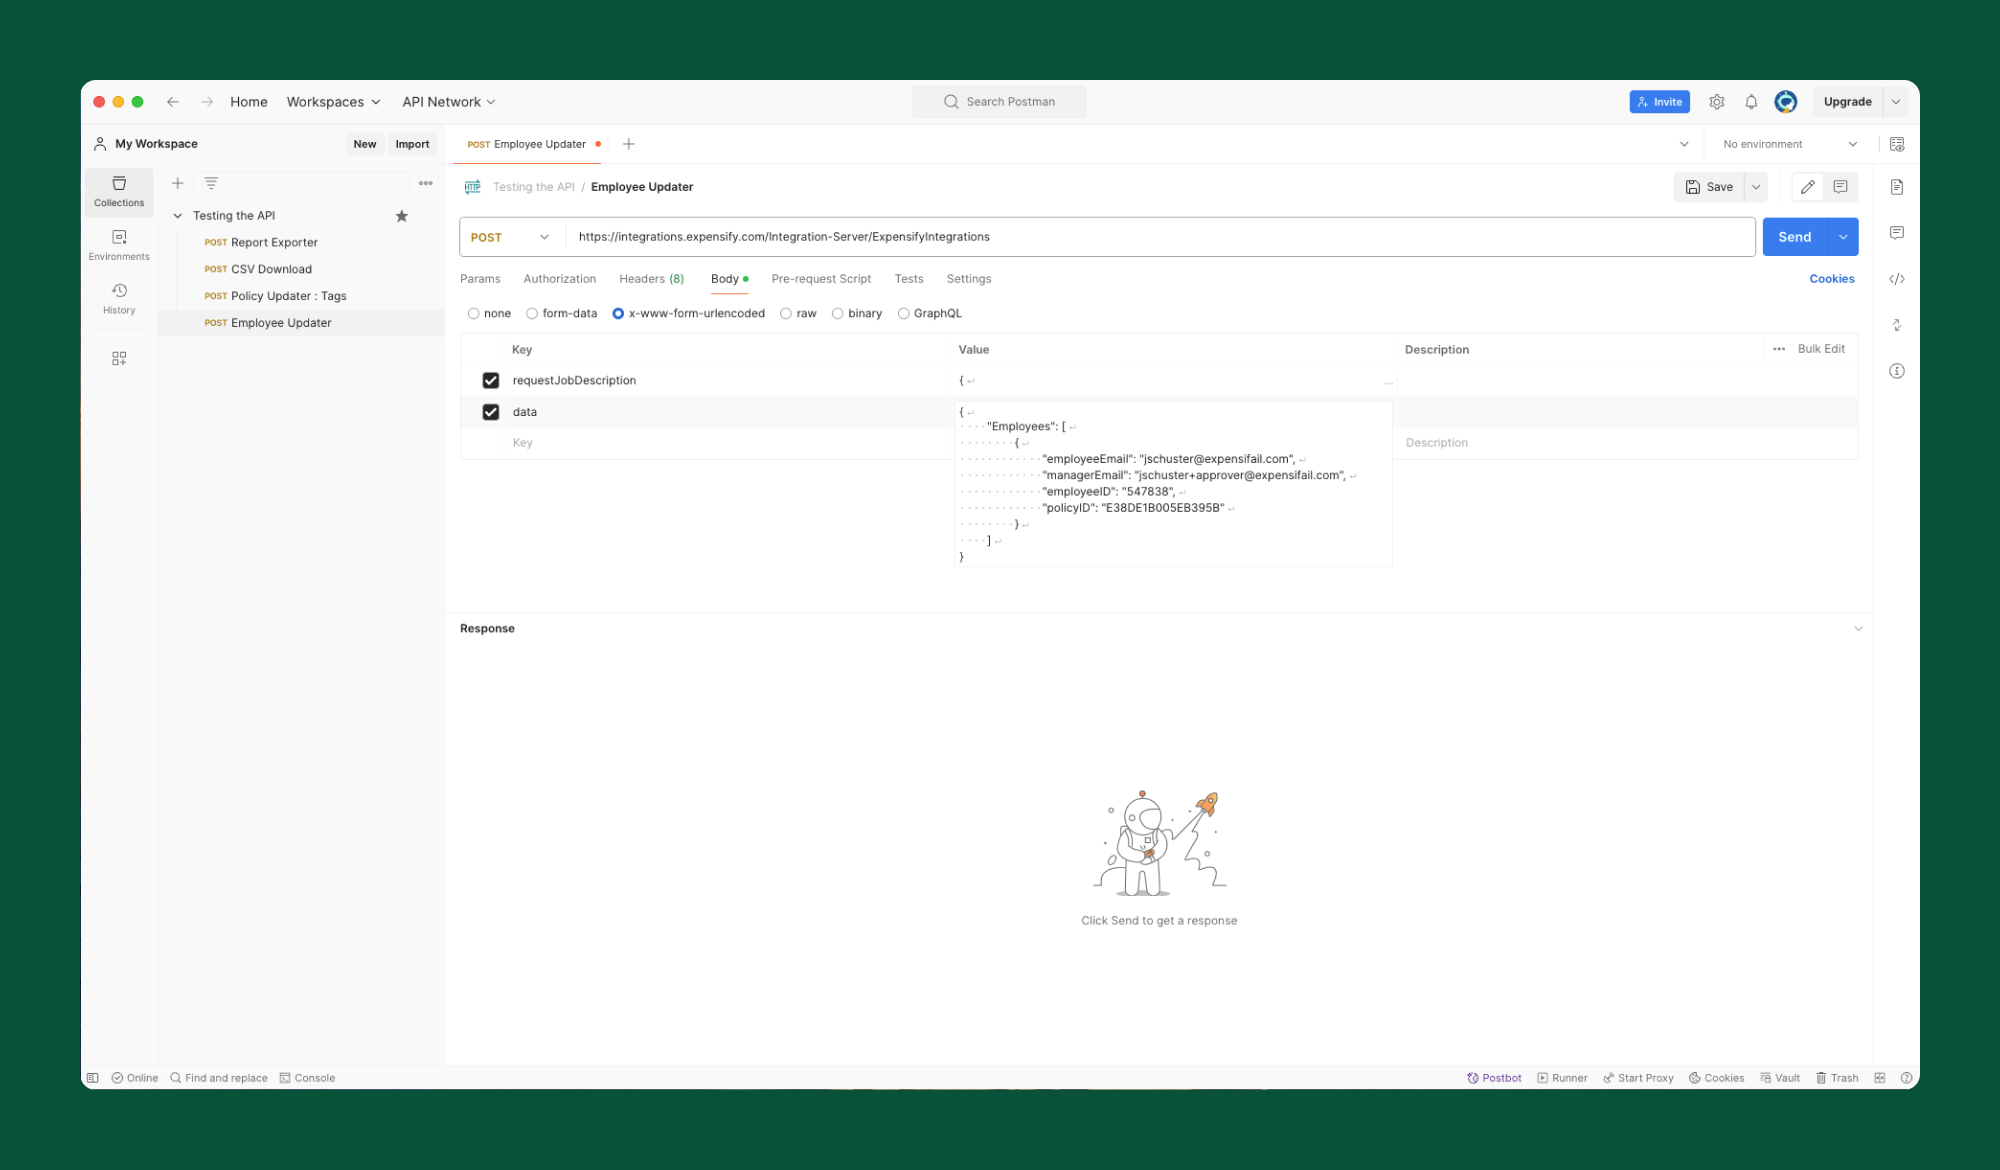
This is how the value looks inside those keys:
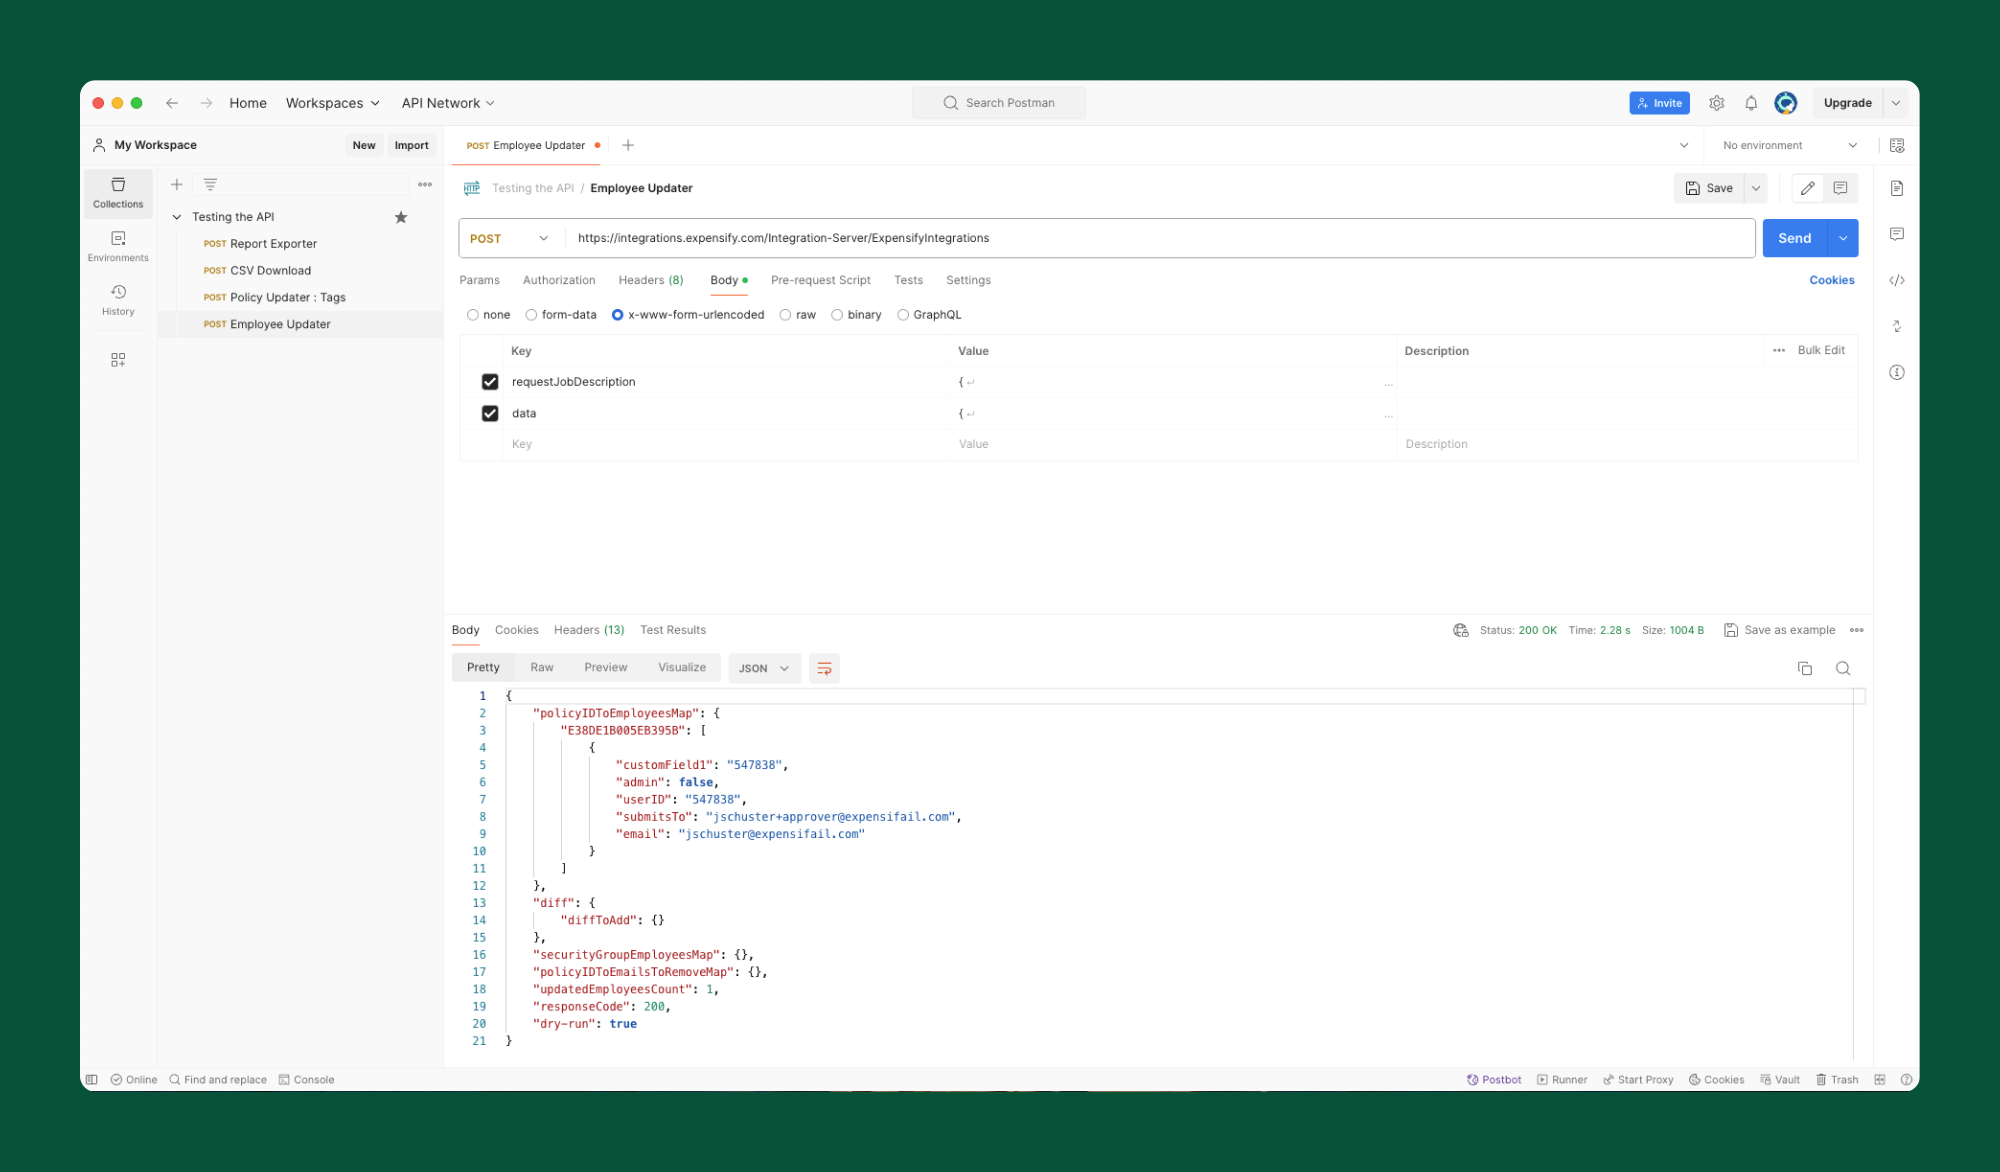
Remember that there are 4 required fields needed to make this API call to work:
- employeeEmail
- managerEmail
- employeeID
- policyID