


Automate User Provisioning in Expensify with Okta Workflows
Automate User Provisioning in Expensify with Okta Workflows
Set up Okta Workflows with Expensify’s Advanced Employee Updater API to automate user provisioning, updates, and deprovisioning — no manual entry required.
Who can use the Advanced Employee Updater API with Okta Workflows
- Domain Admins in Expensify
- Okta Admins with Workflow Builder access
Where to find your Expensify API credentials
Web
- While logged into your Expensify account, visit the Integrations Center.
- Click Generate API credentials.
- Copy your partnerUserID and partnerUserSecret.
- Store these securely — these credentials will be used in your Okta workflow.
What the Okta Workflows integration with Expensify does
Expensify’s native Okta integration handles authentication and SSO, but does not provision or update users. Use Okta Workflows with the Advanced Employee Updater API for user provisioning and updates.
With this setup, you can:
- Provision users into specific Workspaces (formerly policies)
- Assign domain groups and managers
- Deprovision terminated employees
- Update names, email addresses, and more
How to configure Okta Workflows with Expensify
1. Build the trigger
In Okta Workflows, create a new flow:
- Trigger: User Created or User Assigned to Application
2. Retrieve workspace policy IDs from Expensify
Use this API request to retrieve a list of policy IDs tied to your domain:
{
  "type": "get",
  "credentials": {
    "partnerUserID": "your_partnerUserID",
    "partnerUserSecret": "your_partnerUserSecret"
  },
  "inputSettings": {
    "type": "policyList"
  }
}
We recommend using Postman or Insomnia to run this API request once, then store the results in an Assign card.
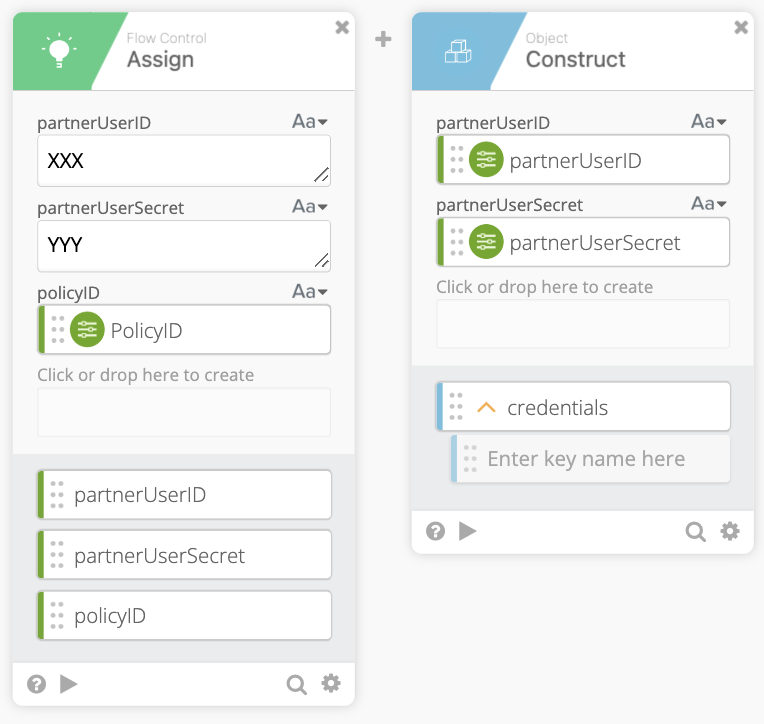
Use an Assign card to store your Expensify credentials and policy IDs once for reuse throughout the workflow.
How to create a user in Expensify using Okta Workflows API
To create or update a user, your API request must follow Expensify’s required structure. Here’s what your API request payload should include in the requestJobDescription parameter:
{
"type": "update",
"credentials": {
"partnerUserID": "your_partnerUserID",
"partnerUserSecret": "your_partnerUserSecret"
},
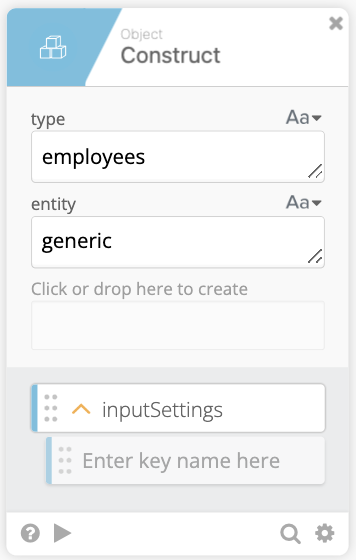
"inputSettings": {
"type": "employees",
"entity": "generic",
"data": [
{
"employeeEmail": "user@example.com",
"managerEmail": "manager@example.com",
"policyID": "your_policy_id",
"employeeID": "unique_employee_id",
"firstName": "First",
"lastName": "Last",
"isTerminated": false
}
]
},
"onFinish": {
"immediateResponse": true
}
}
End-to-end workflow example
Here’s how the Okta Workflows cards work together to create users in Expensify:
-
Trigger
Use User Created or User Assigned to App. -
Retrieve user profile
Use a Read User or Get Profile card to fetch the employee’s details. -
Lookup policy
(Optional) If your company uses multiple Workspaces, use a Lookup card to determine the correctpolicyID.
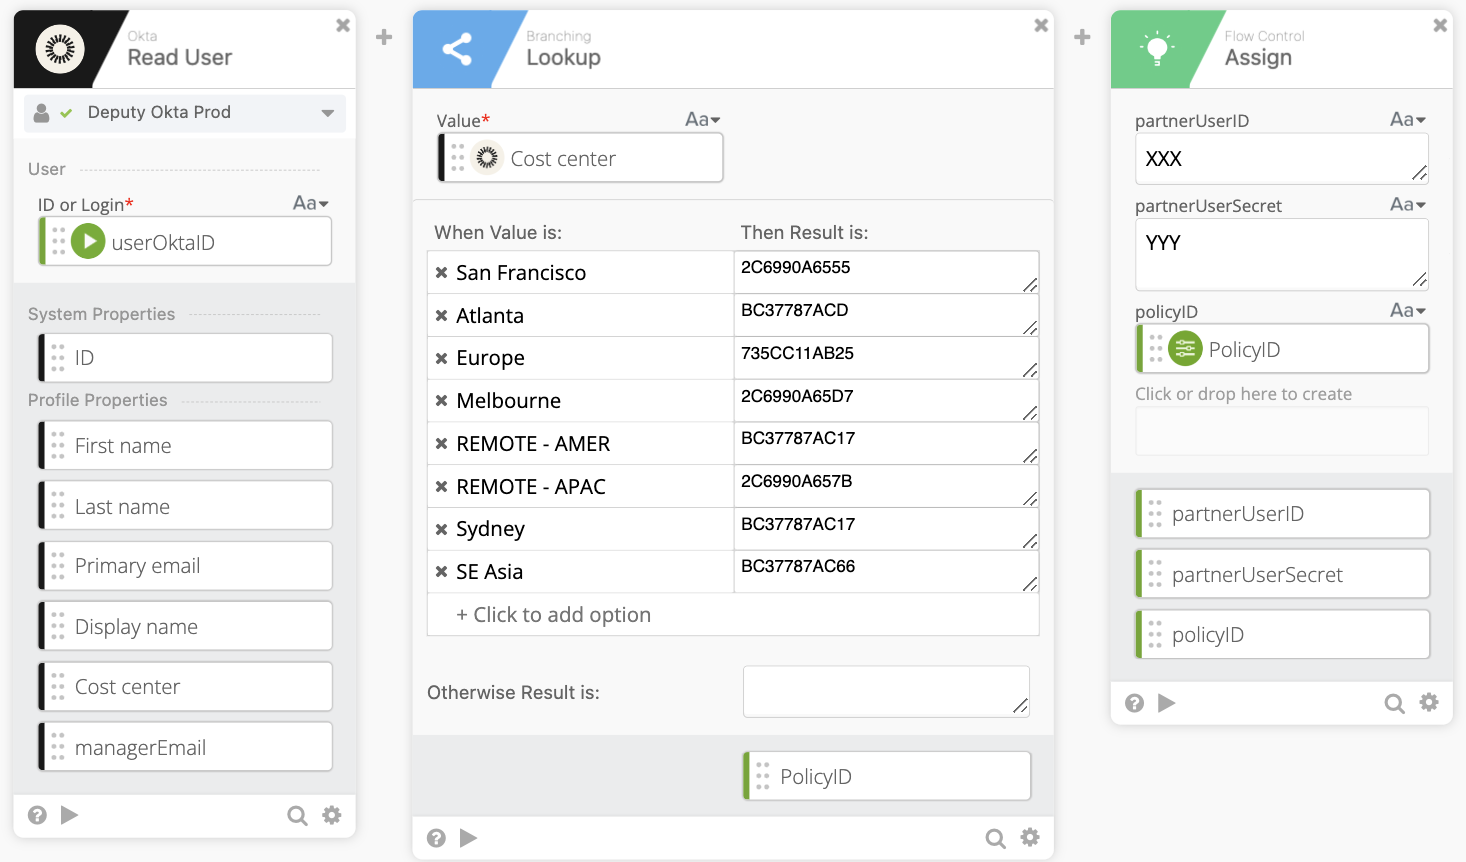
Use Lookup logic to assign employees to the correct Workspace based on their cost center.
- Build credentials and payload
Use Assign, Construct, or Object cards to:- Store your API credentials
- Format
inputSettings
Create a reusable inputSettings object for all your user-related API calls.
- Construct the
dataarray with employee fields
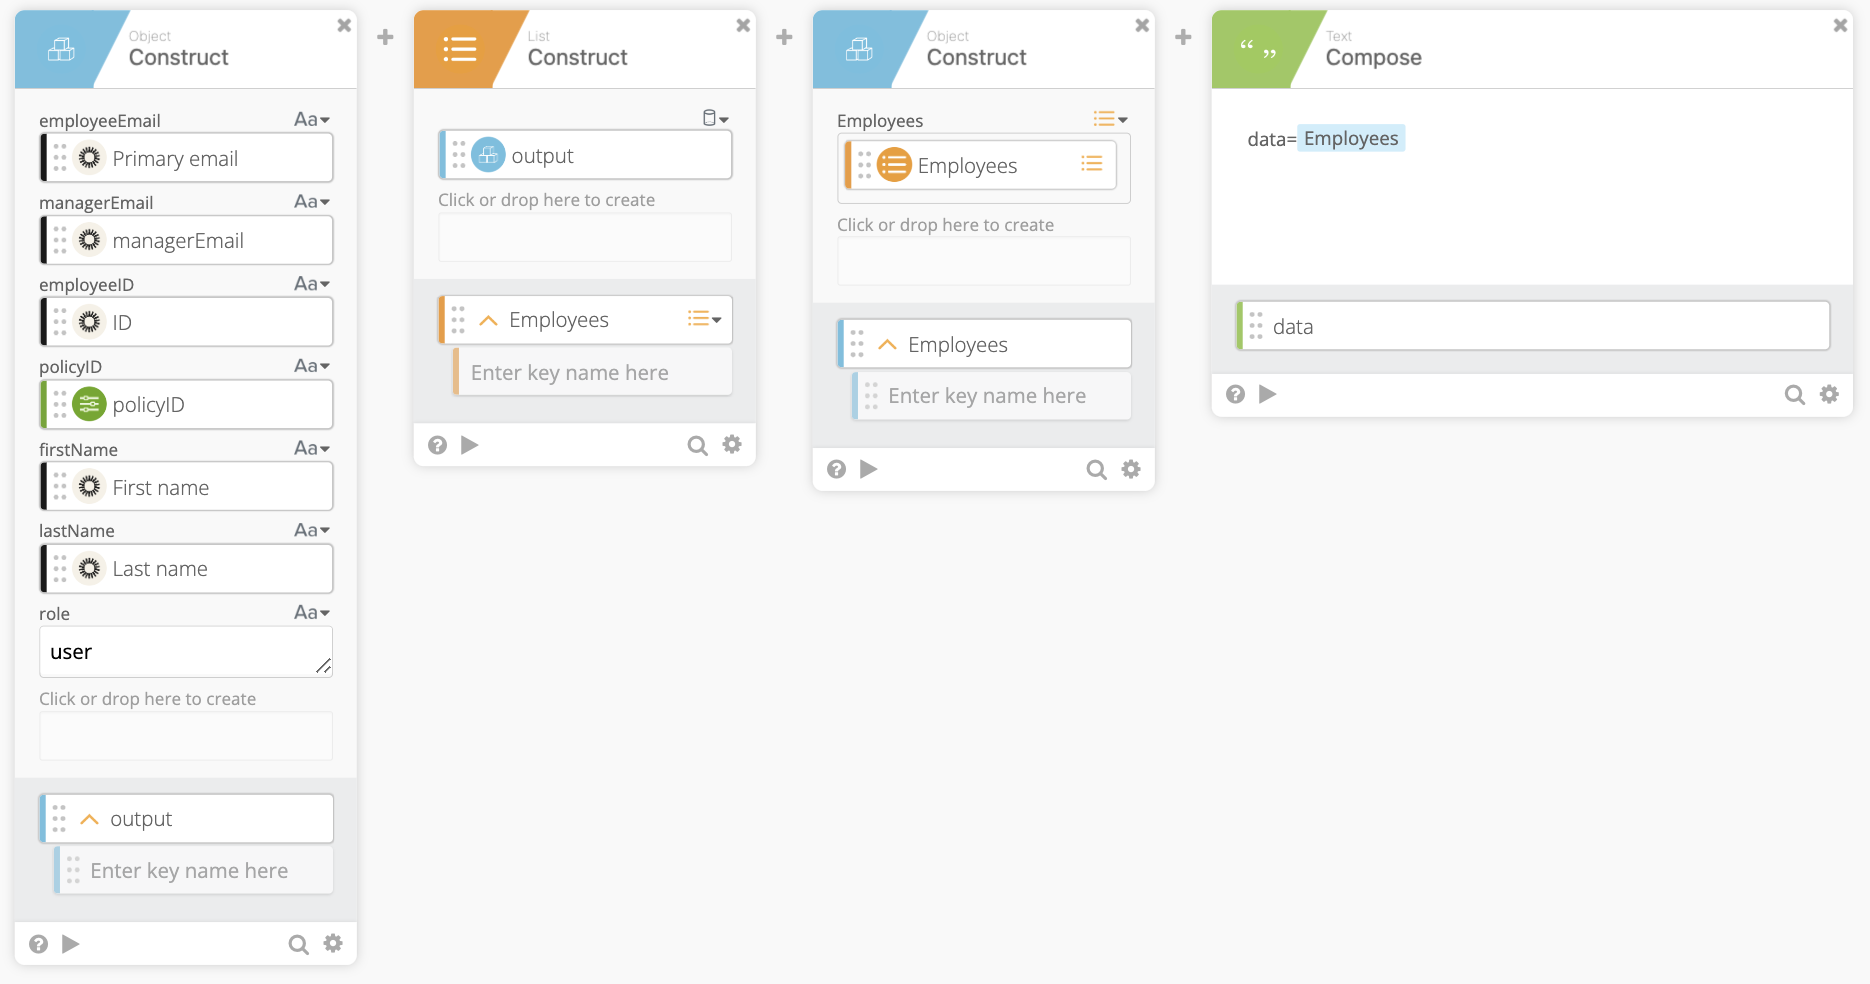
Use Construct and Compose cards to format the employee data into the required API structure.
- Add an onFinish email notification (optional)
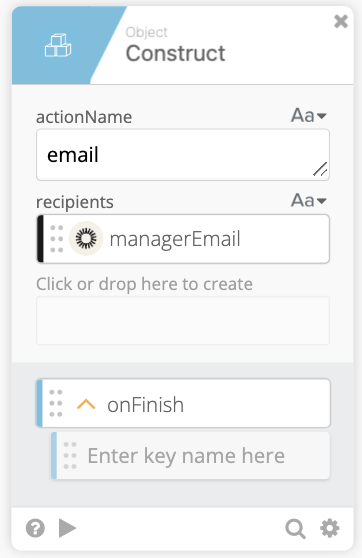
Use onFinish to trigger a follow-up action like notifying a manager after provisioning completes.
- Create the full request
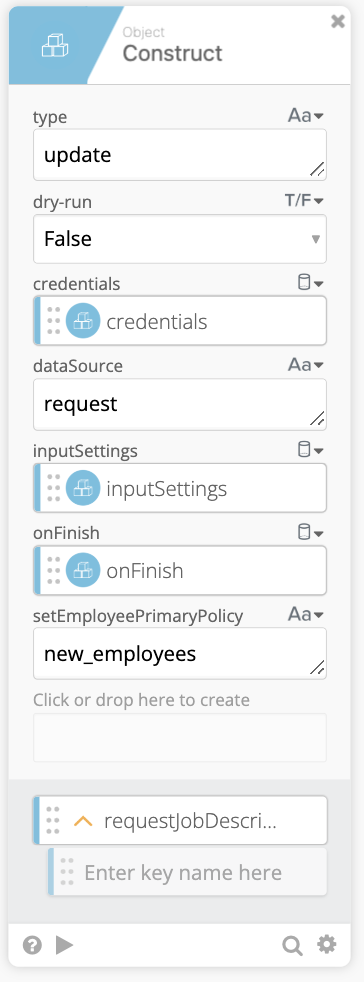
Build your requestJobDescription object to define the API call details.
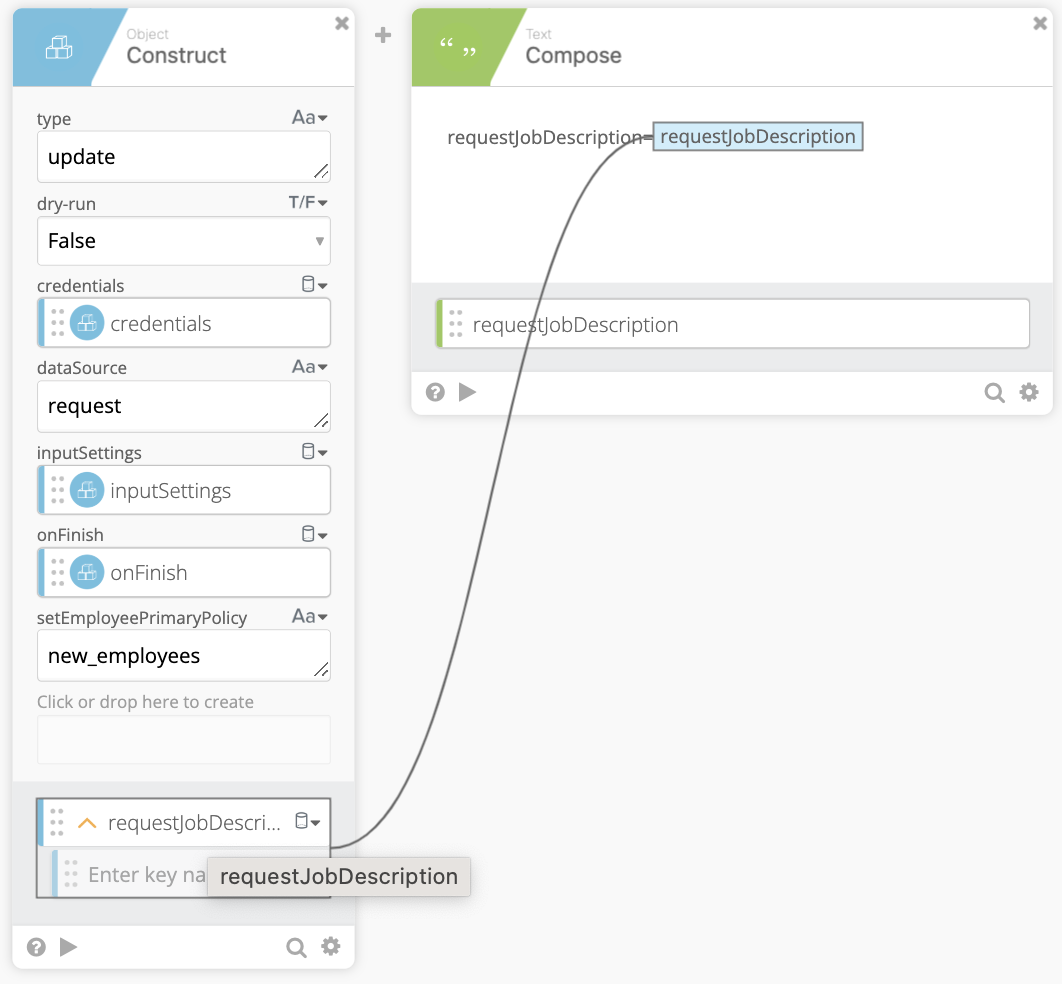
Connect your Constructed request to the Compose card to pass into the API request.
- Set headers
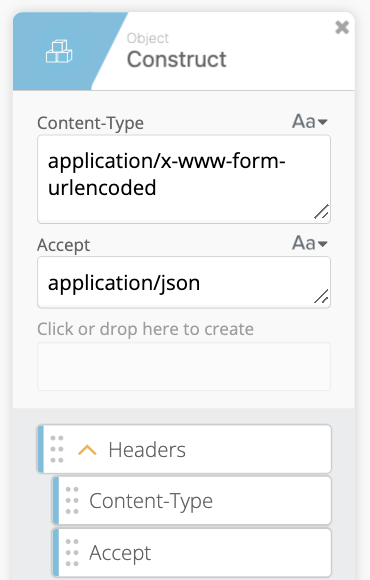
Set headers for your API call, including content type and accepted format.
- Send the API request
Use Raw Request to send thePOSTto:https://integrations.expensify.com/Integration-Server/ExpensifyIntegrations
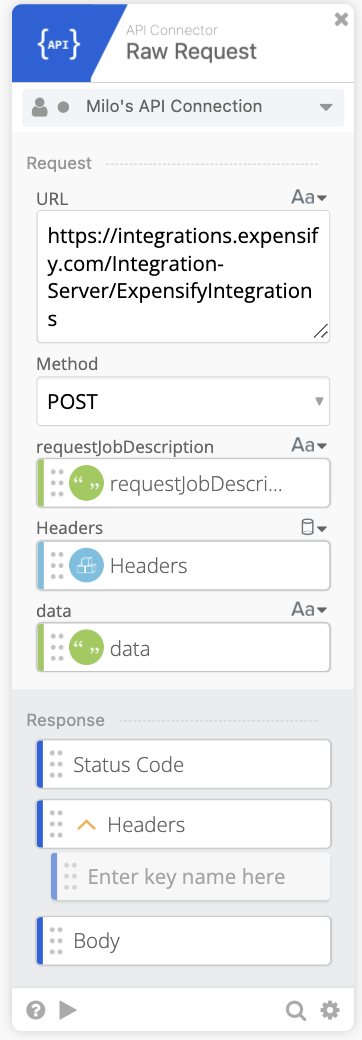
Use the Raw Request card to POST the formatted data to Expensify’s API.
- Handle the response
Use Parse JSON to extract theresponseCode, and use Return Error If to catch failures.

Use Parse and Return Error If cards to handle failures returned by Expensify’s API.
Common use cases for Okta Workflows with Expensify user provisioning
This Okta Workflows integration guide reflects common customer workflows, such as:
- Auto-provisioning employees into Workspaces at onboarding
- Assigning managers and domain groups based on profile fields
- Deprovisioning users when removed from an Okta group
- Updating names and emails during employment changes
If your setup differs or you’ve found another way to use this integration, we’d love to hear from you. Reach out to Concierge with feedback or recommend a change to this article to help expand the use cases we cover.
FAQ
Can I use this to update existing users?
Yes. Set "type": "update" — the API will either update or create the user depending on whether they already exist.
Can I test the flow without creating users?
Yes. Set "dry-run": true in the request payload to simulate the call without applying changes.
What happens if the API request contains invalid data?
The API response will include a responseCode and responseMessage. Handle this using error-checking logic in your flow.
How often can I run this flow?
Expensify enforces API rate limits. Avoid sending excessive requests in a short period. Batching users can help reduce the load.
Does Expensify support SCIM-based provisioning?
No. Expensify does not support SCIM-based user provisioning. However, we do support SCIM-based deprovisioning for customers using Okta. To learn more, see Okta SCIM API for User Deactivation.